Creating Figures with Moorhen
Introduction
This tutorial will explain how to make high-quality figures of molecular models, maps, and analysis/validation markup with Moorhen. Load tutorial data 1 into Moorhen by:
Clicking on the Moorhen burger icon and then clicking on the “File” button and selecting “Load tutorial data” and then selecting tutorial 1 and clicking “OK”. You should see something like this:
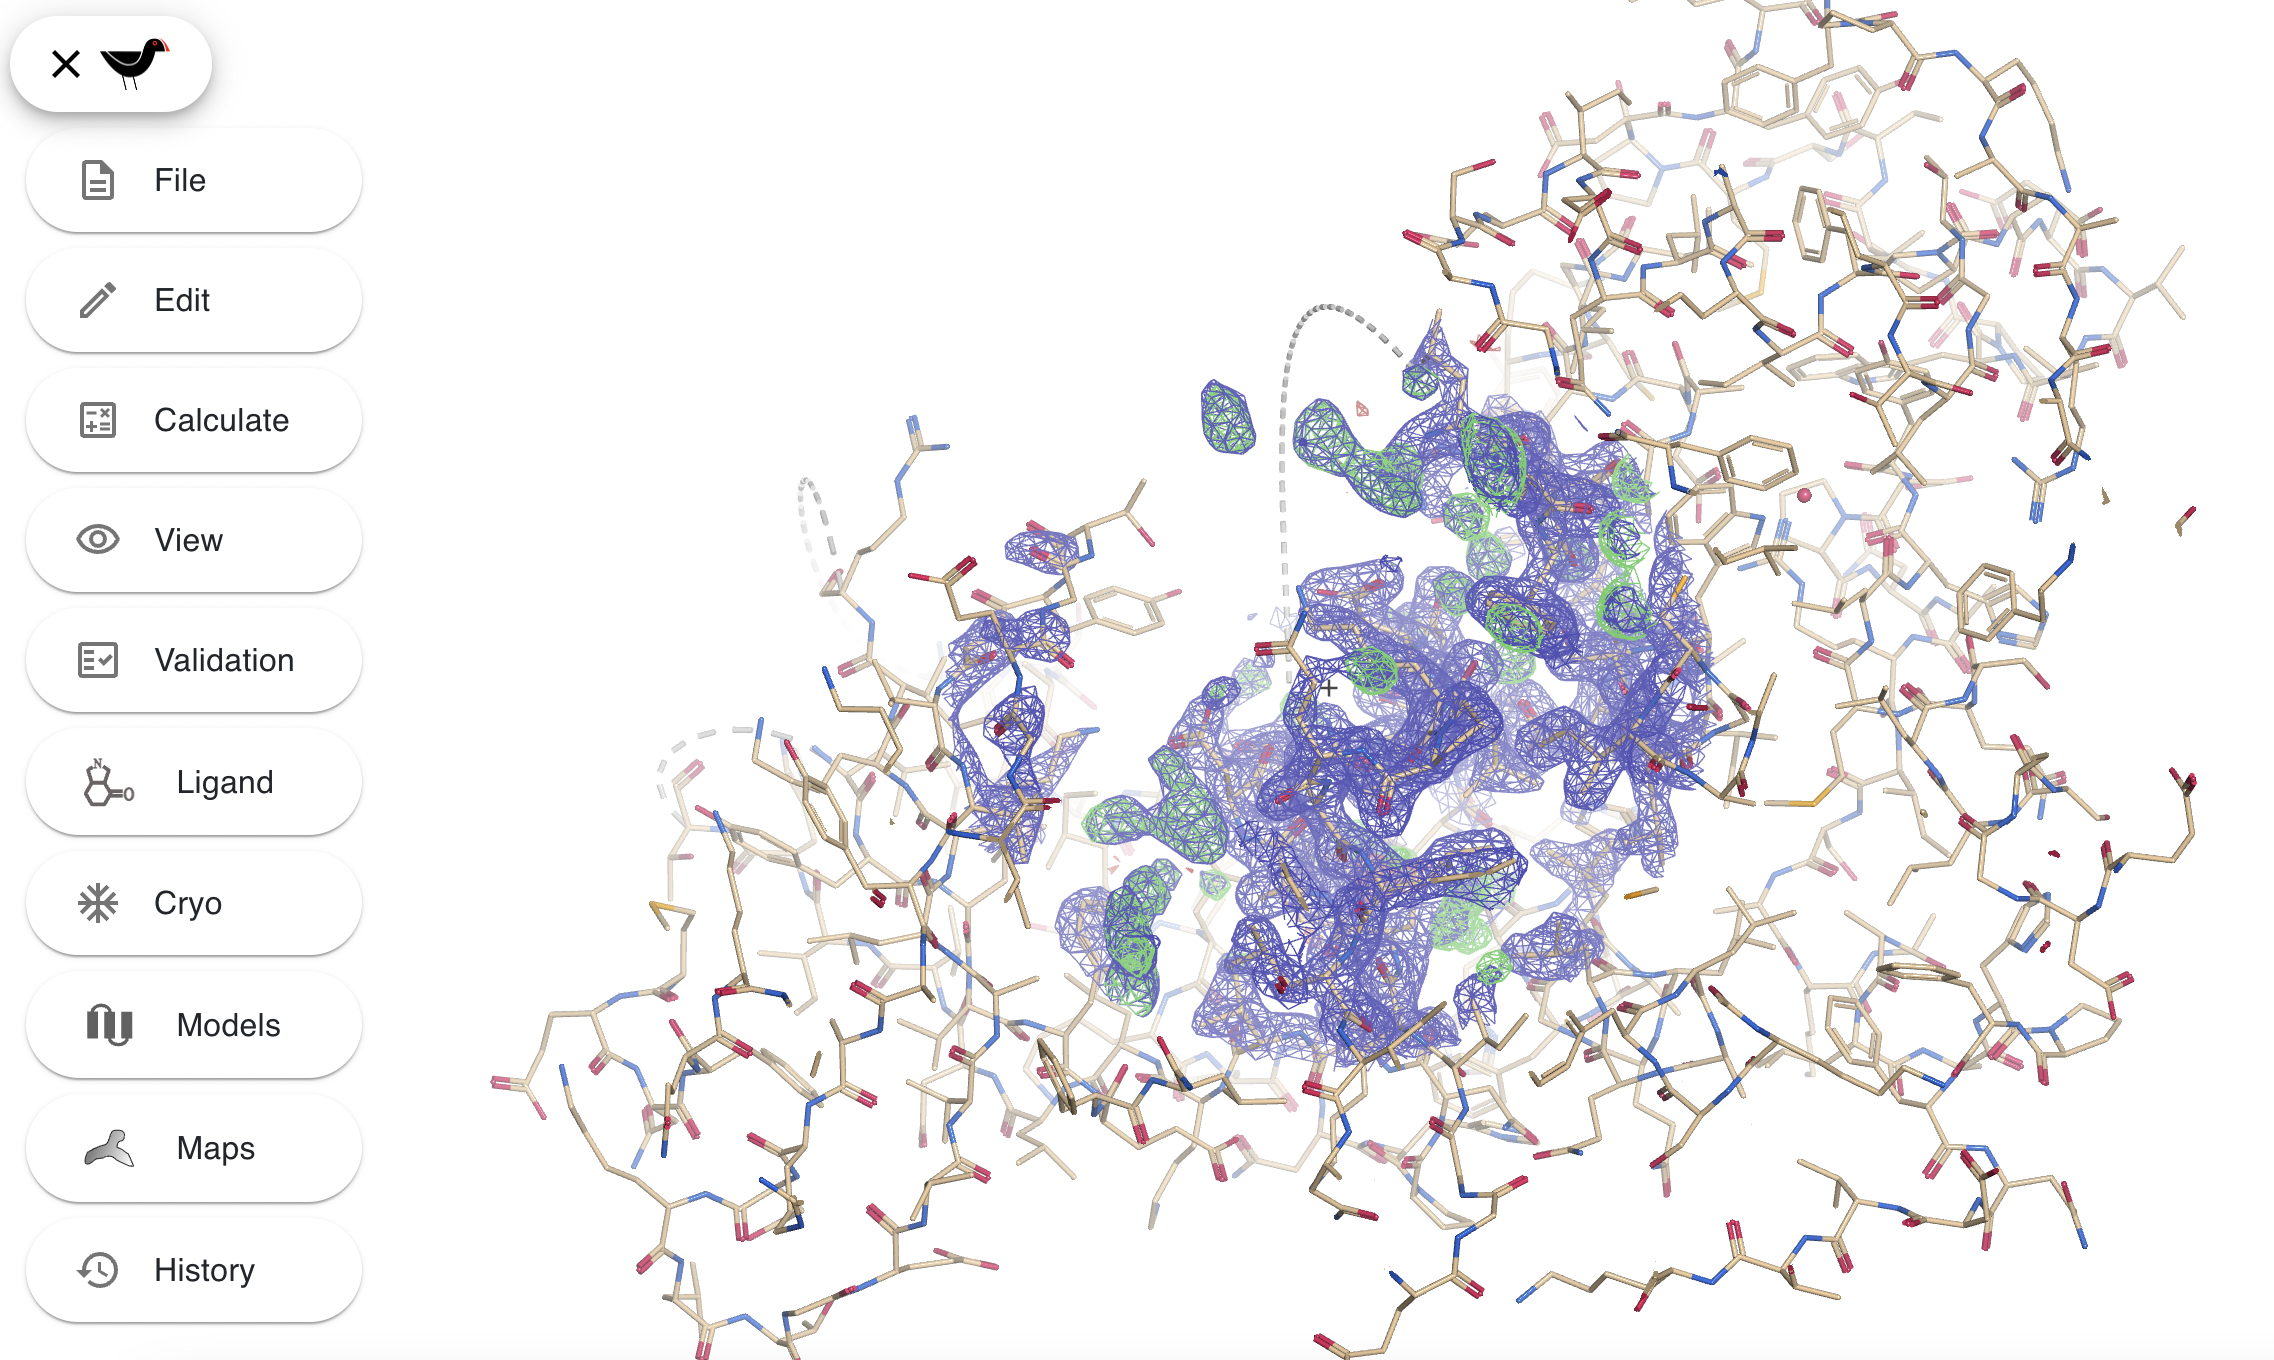
This shows a cylinder representation of the model and a chickenwire representation of the electron density.
Moorhen allows you to have finer control over what is drawn. For instance there are more representations available and we can turn them on or off from the “Models” and “Maps” dialogs.
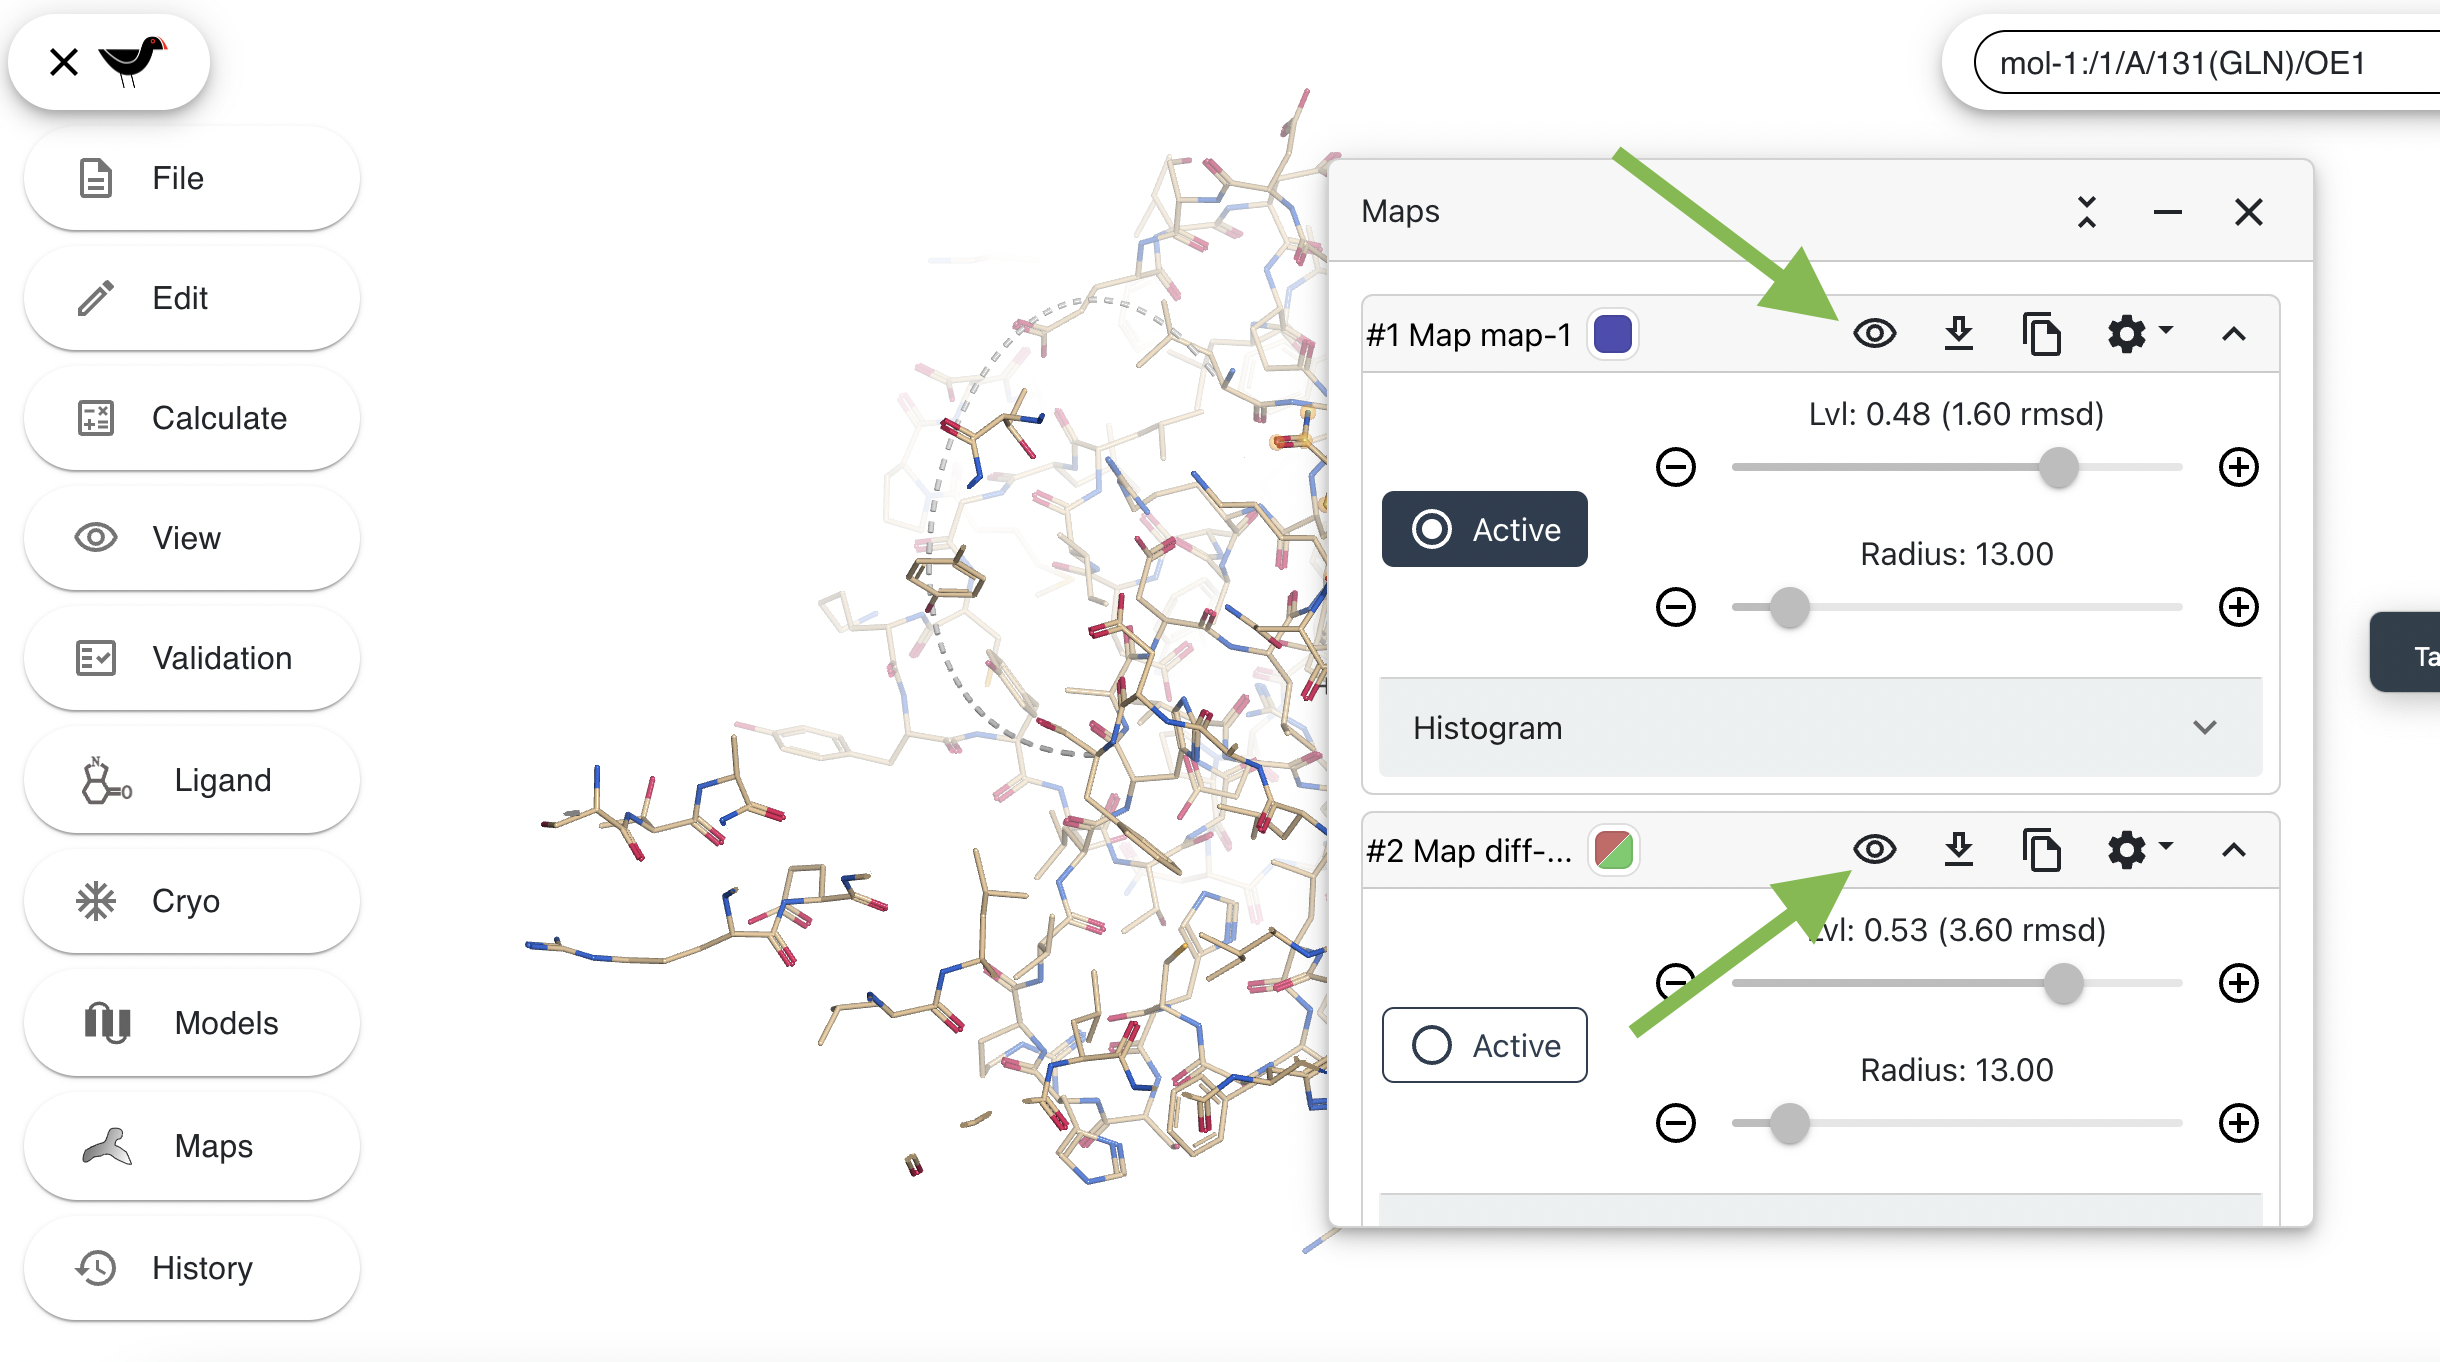
We will begin by turning off the electron density map to allow us to see the model more clearly. To do this first click on “Maps” in the menu. You should see this:
Turn off the maps by clicking on each of the eye icons. The slashes in the eyes will disappear and the maps will be hidden:
Click on the “X” in the top right of the “Maps” dialog to dismiss it.
Switching representation style
Click on “Models” in the left-hand menu to show the “Models” dialog.
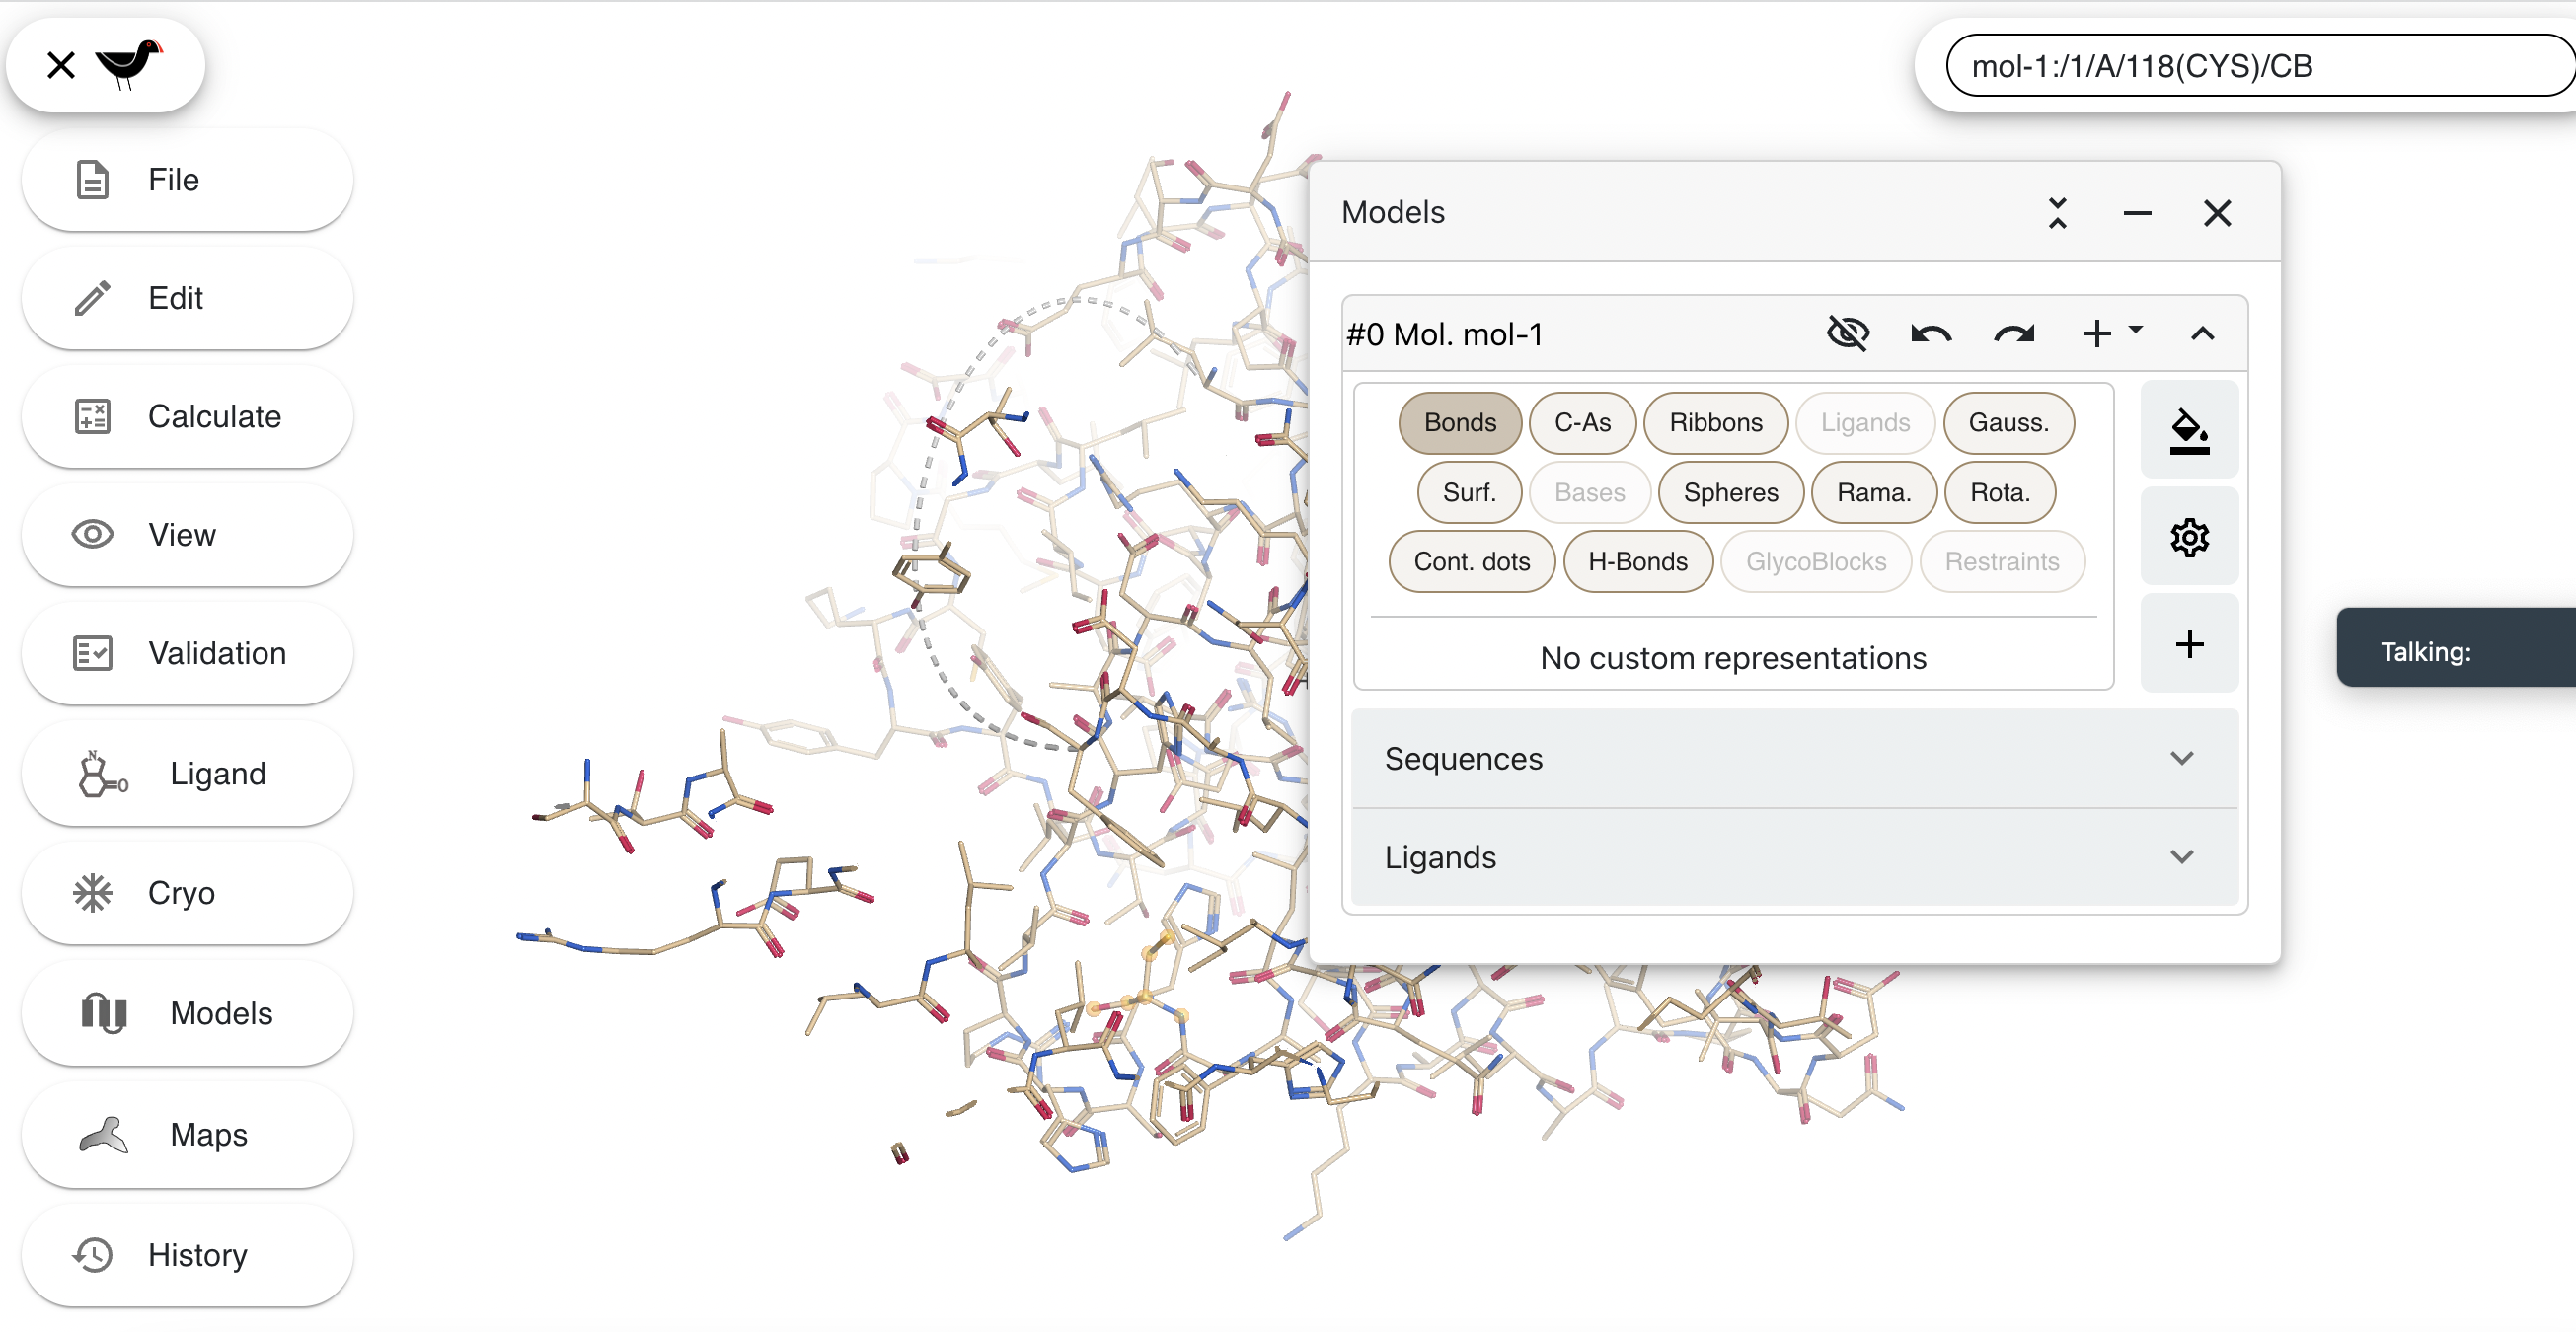
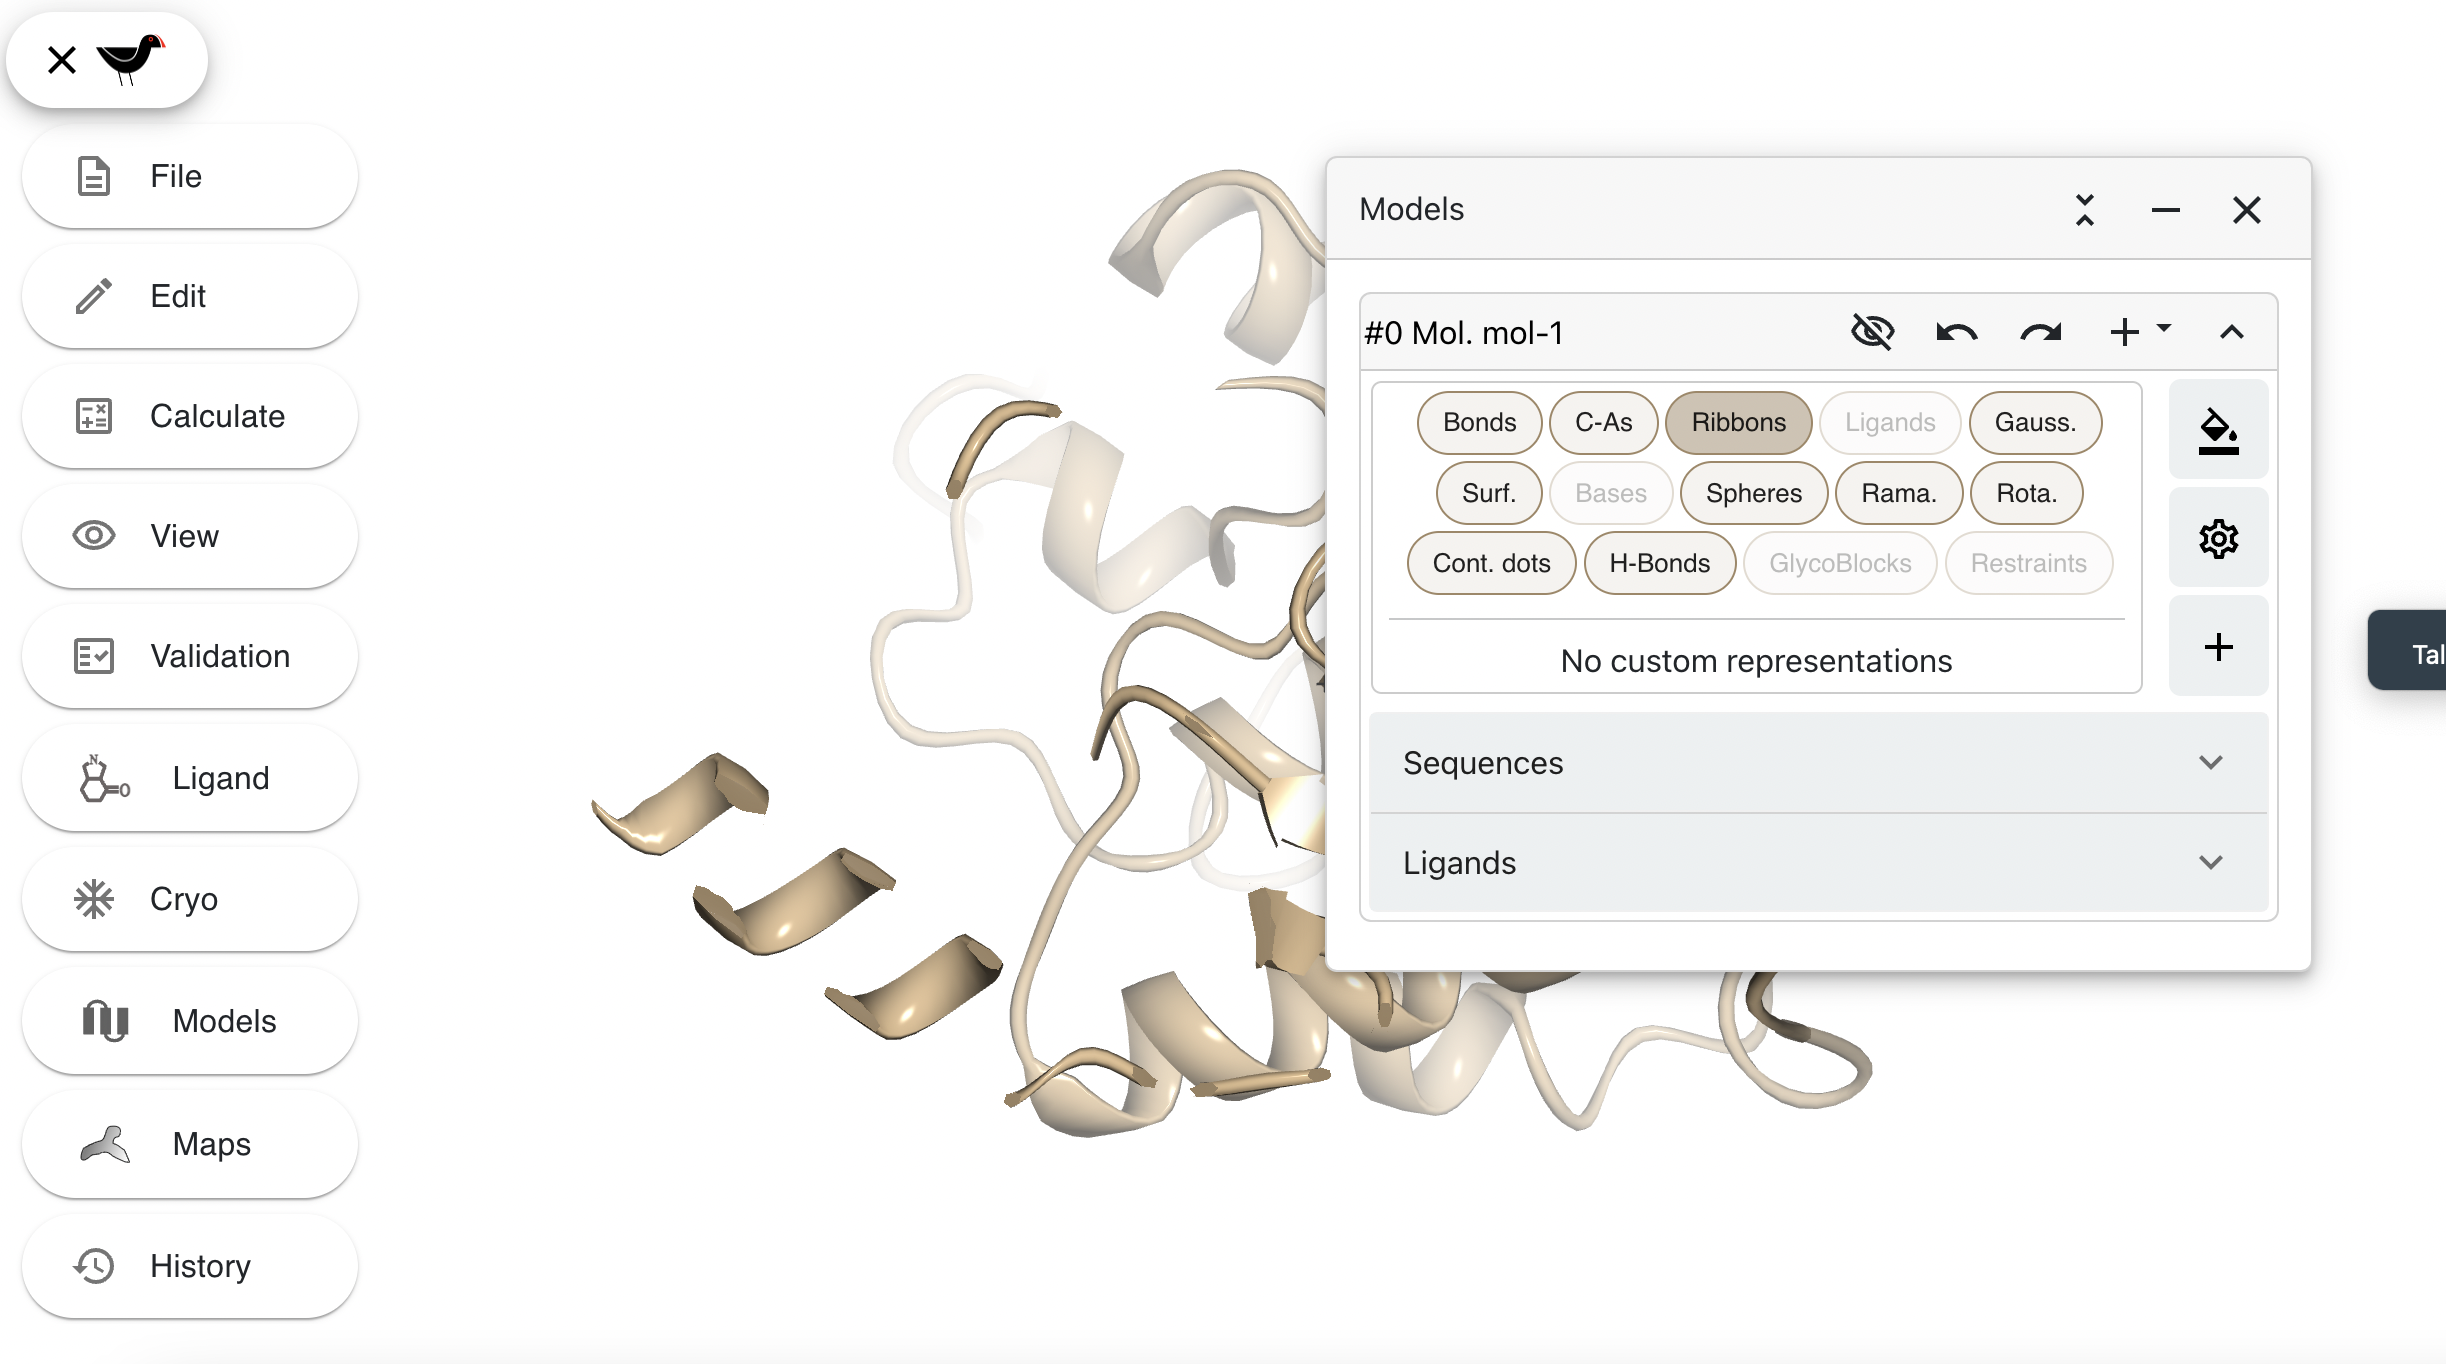
The “Bonds” button is highlighted to show that bonds are being drawn. CVlick on this to hide the bonds and then click on “Ribbons” to show ribbons.
Try the “C-As”, “Gauss.”, “Surf.” and “Spheres” buttons.
Colour Schemes
The model representations shown so far have been coloured with a default colouring scheme: colour by chain mode. Moorhen allows you to change the colour scheme.
Click on the “colour bucket” icon  to the right of the atom representations buttons. This will display the colour edit dialog showing the current colour rules.
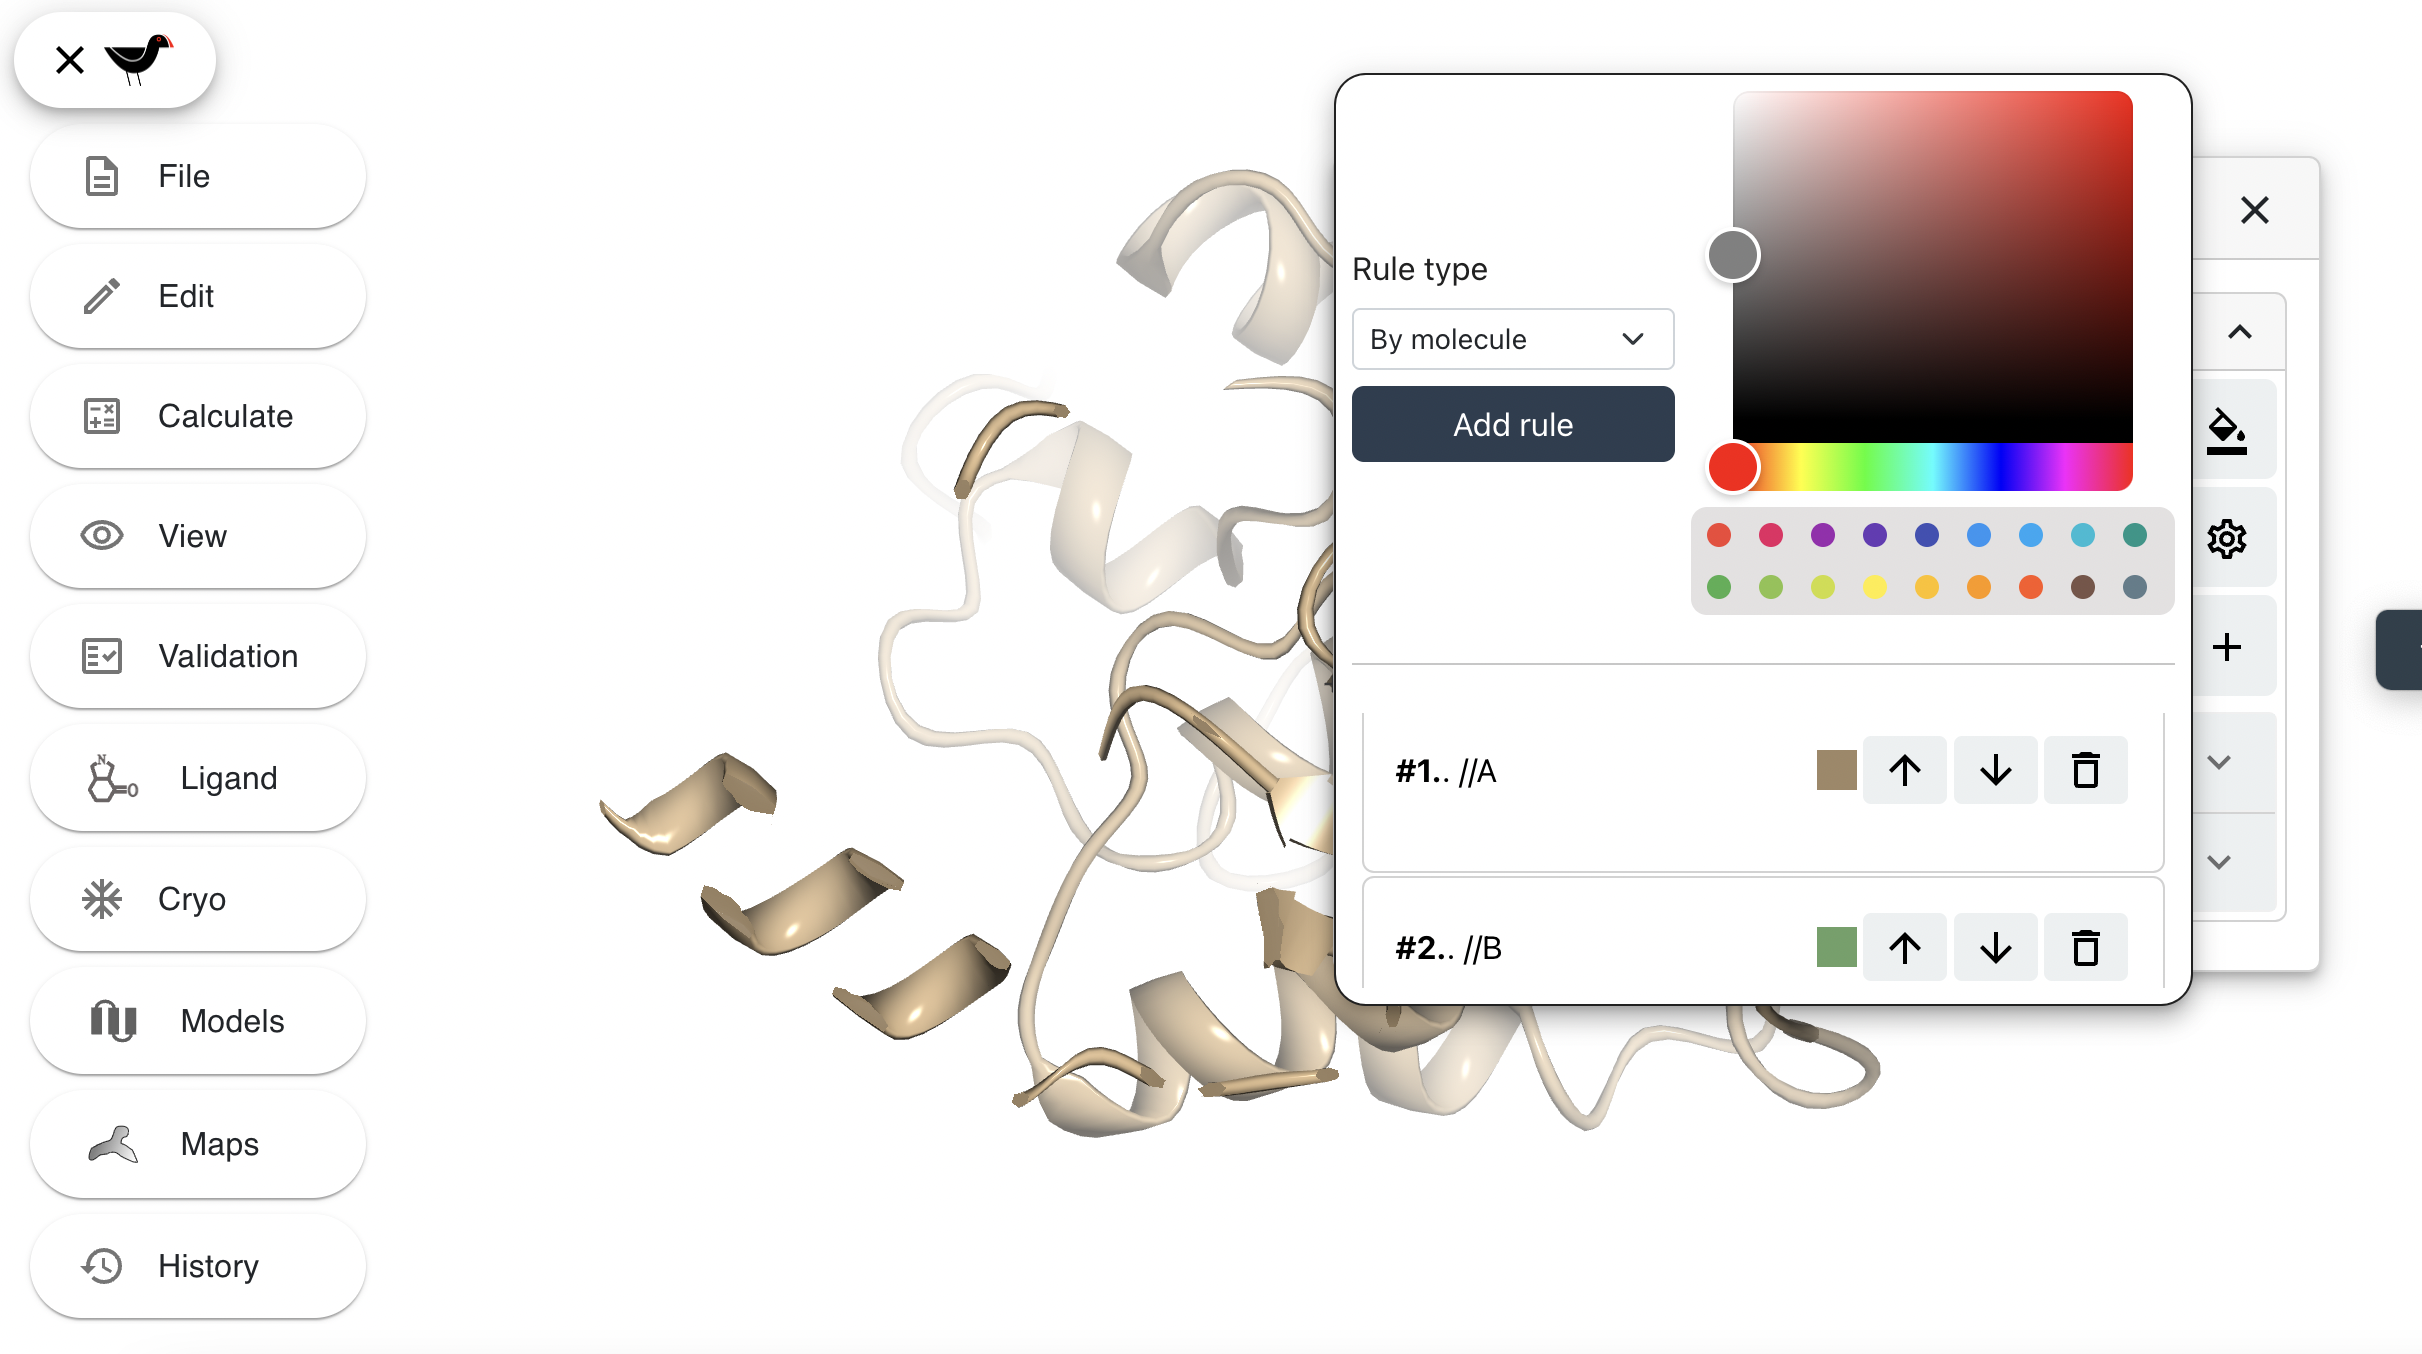
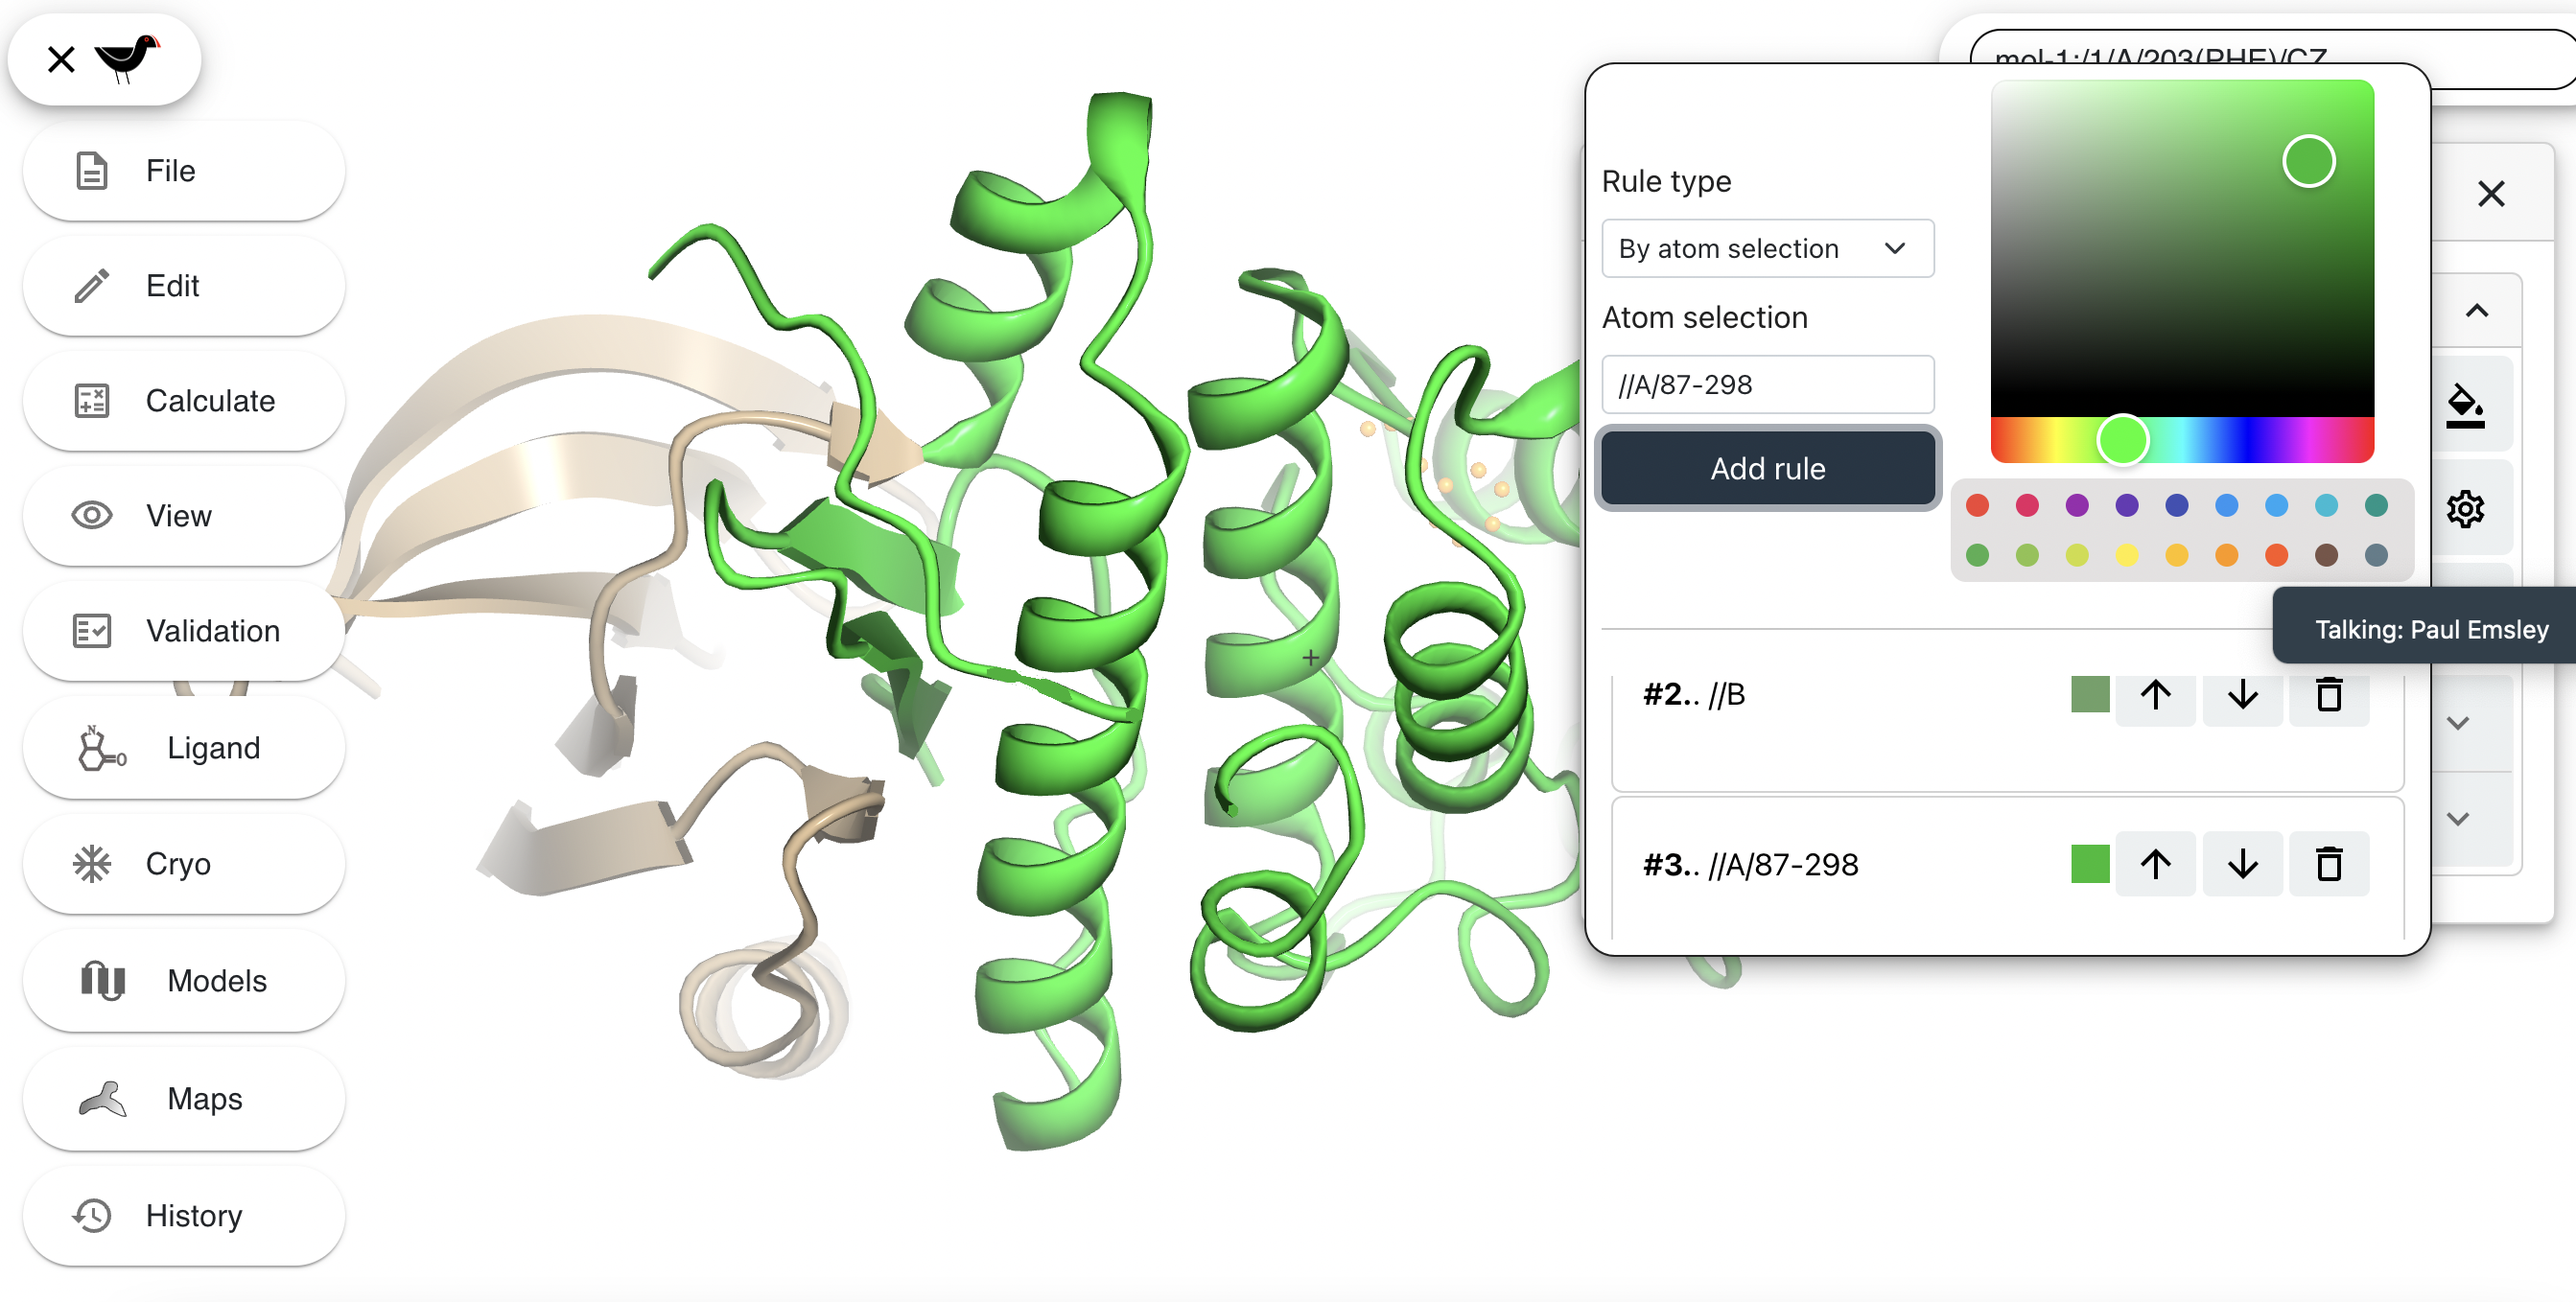
The lower section shows the current colour rules. Each colour rule supersedes the rules above it. To demonstrate this we will create a new colour rule. First change the “Rule type” from “By molecule” to “By atom selection”. An “Atom selection” box appears, type “//A/87-298” into this box. Choose a new colour e.g. bright green from the colour picker to the right. Click “Add rule”. The helical domain will turn bright green and your new colour rule appears at the bottom of the list of rules.
(Clicking on the up arrow of this rule to make it go up the list will mean that is will be superseded by Rule 2 and the model will change back to previous appearance.)
Additional Representations
Sometimes you may wish to add additional representations, e.g. to display only a subset of the atoms in a particular style. To do this, click
on the “+” button to the right of the main representation buttons. A new dialog will appear.
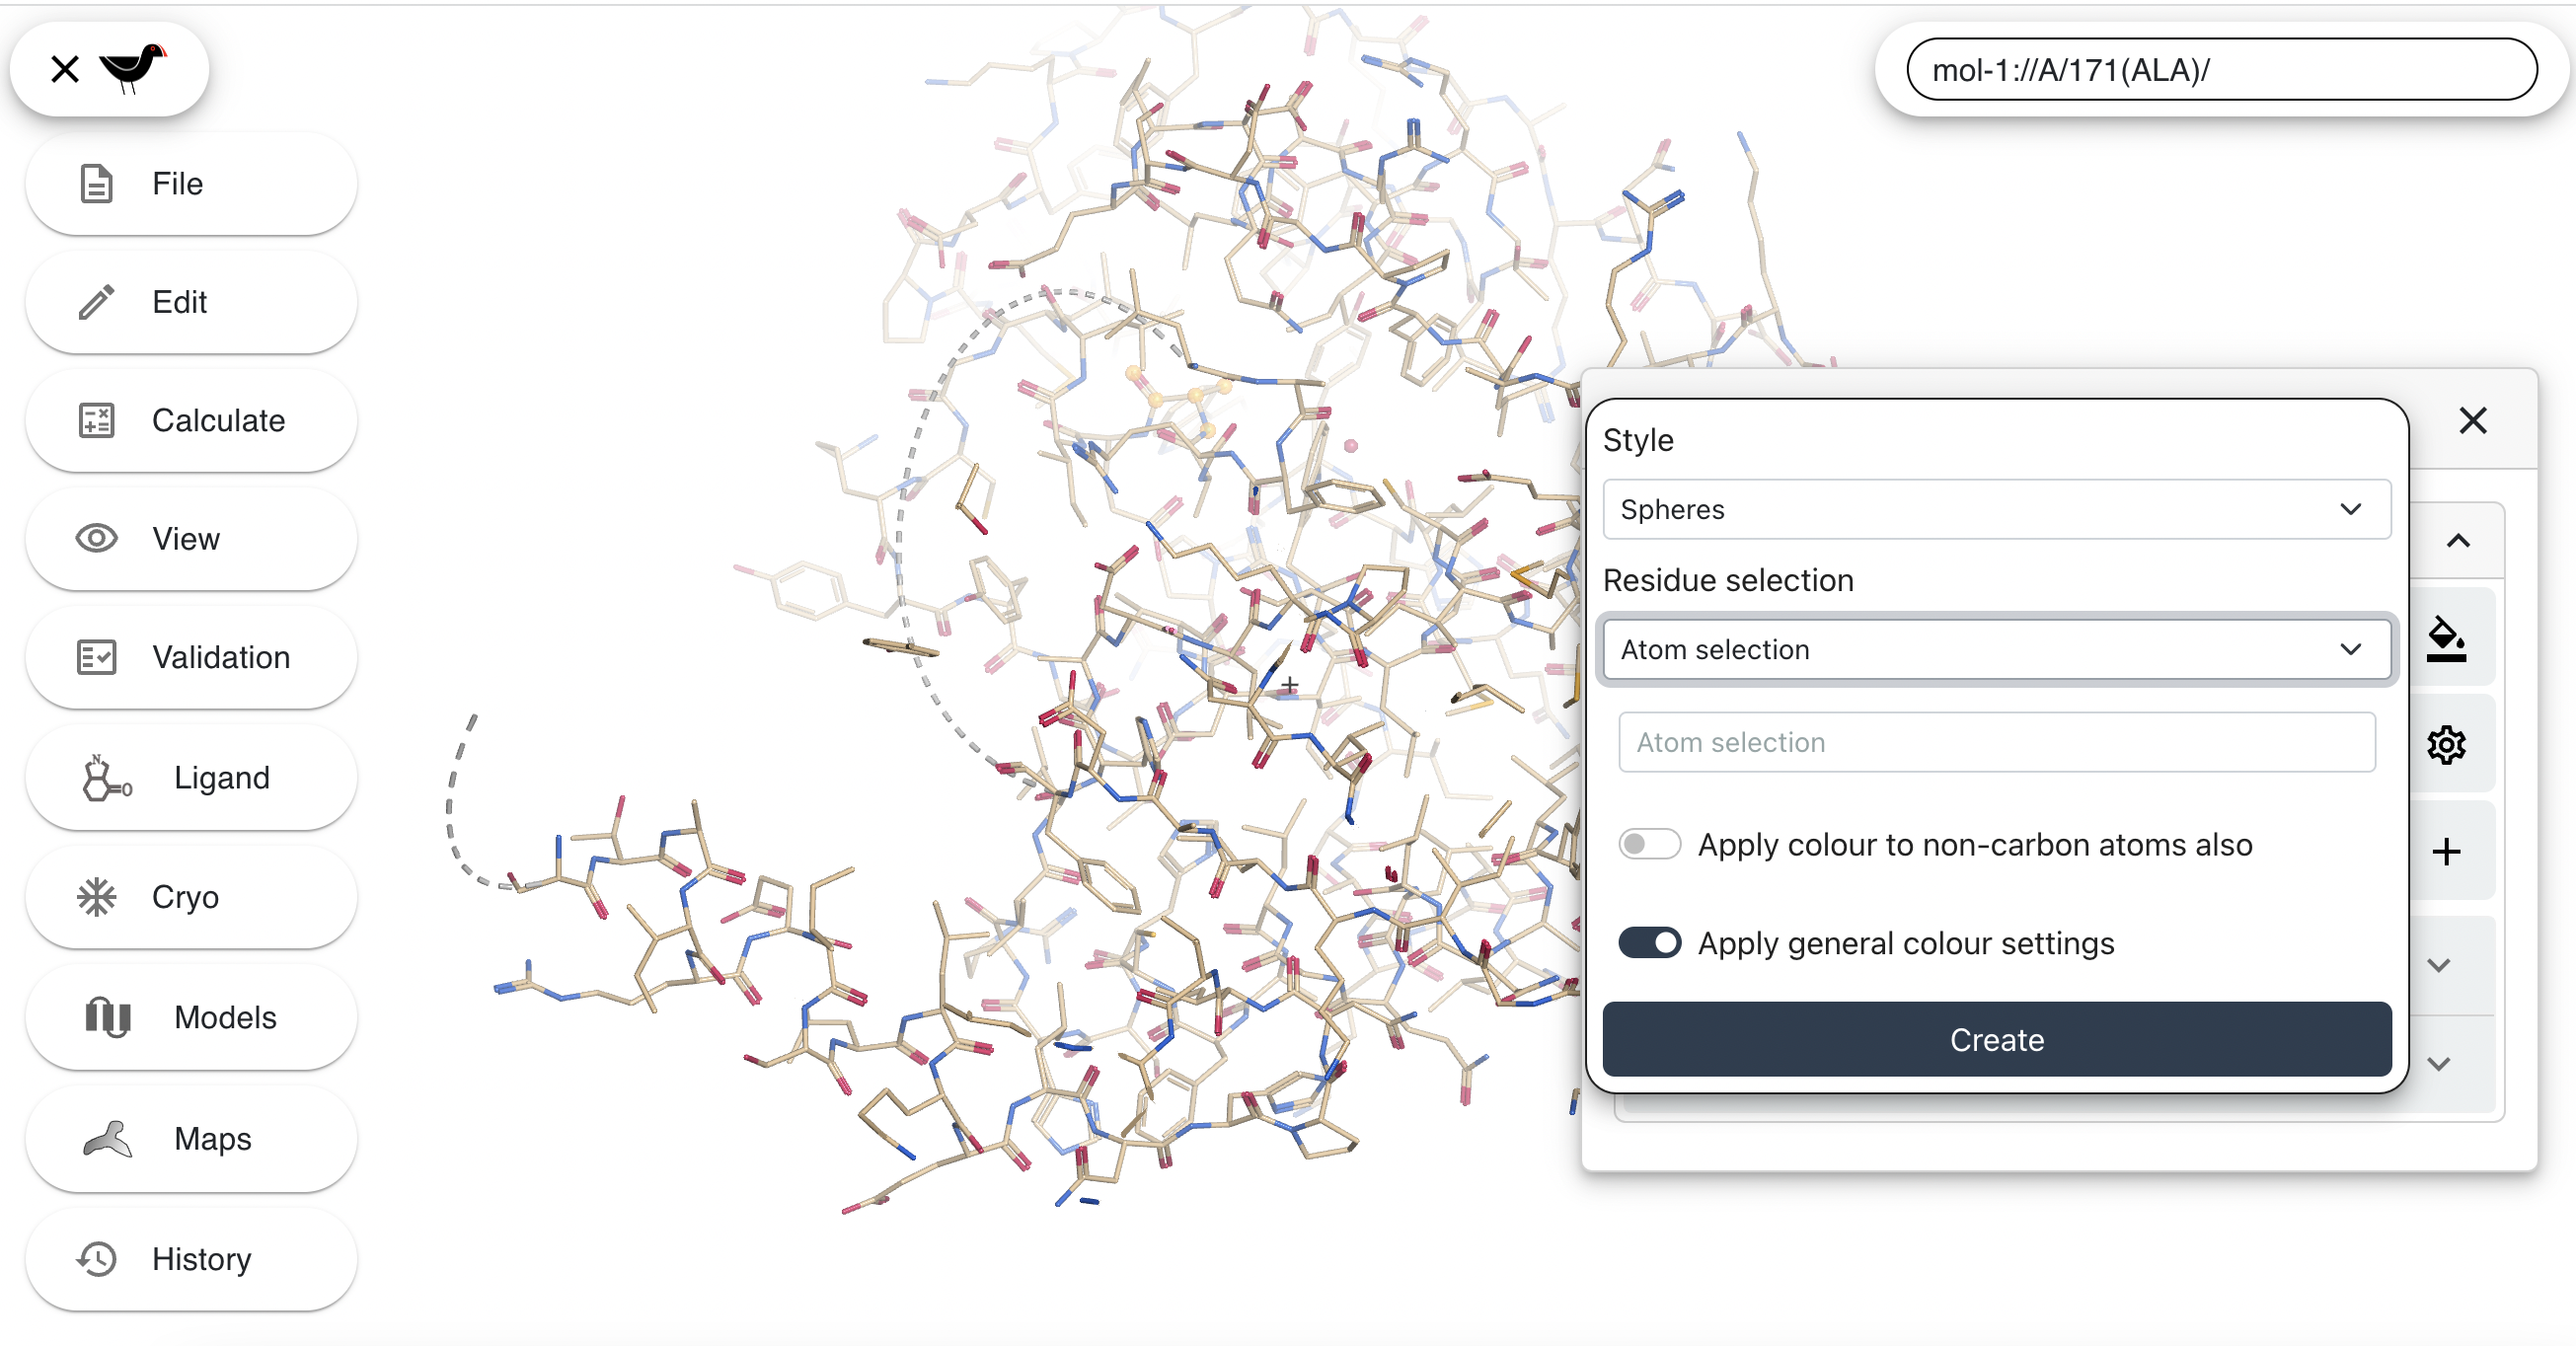
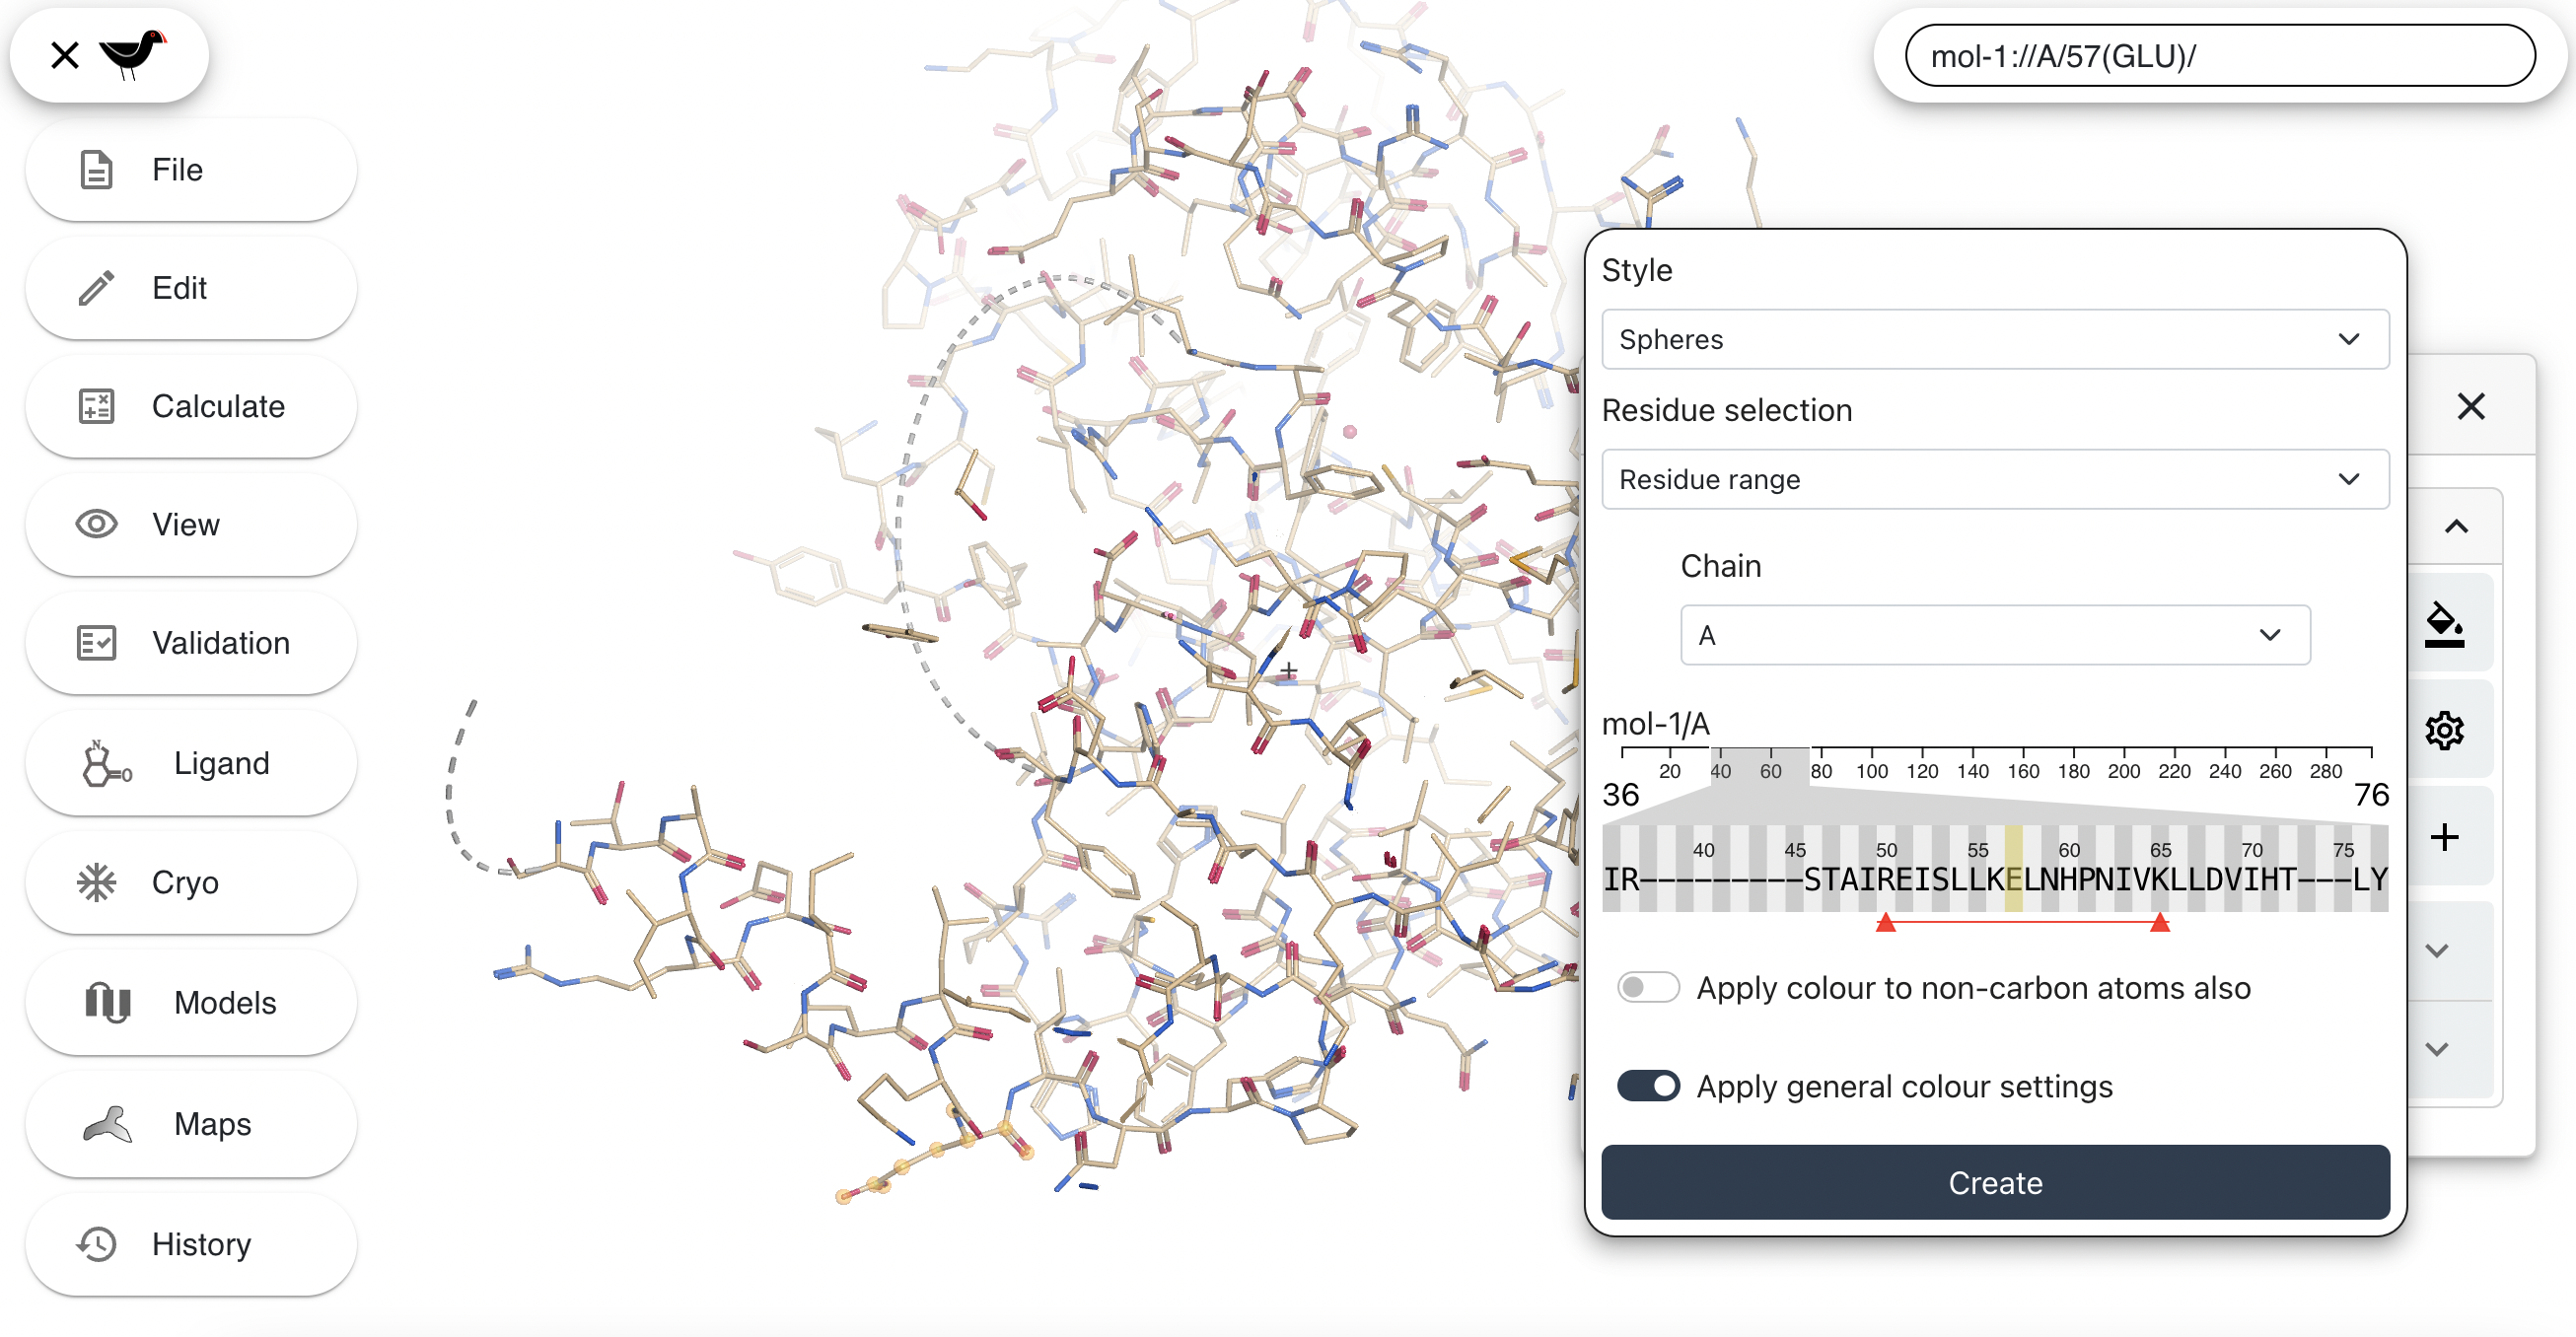
In the new dialog you can select “Style” and “Residue selection” for the new representation. Change “Selection” to “Spheres” and “Residue selection” to “Residue Range”. A “Chain” selector and sequence viewer will appear.
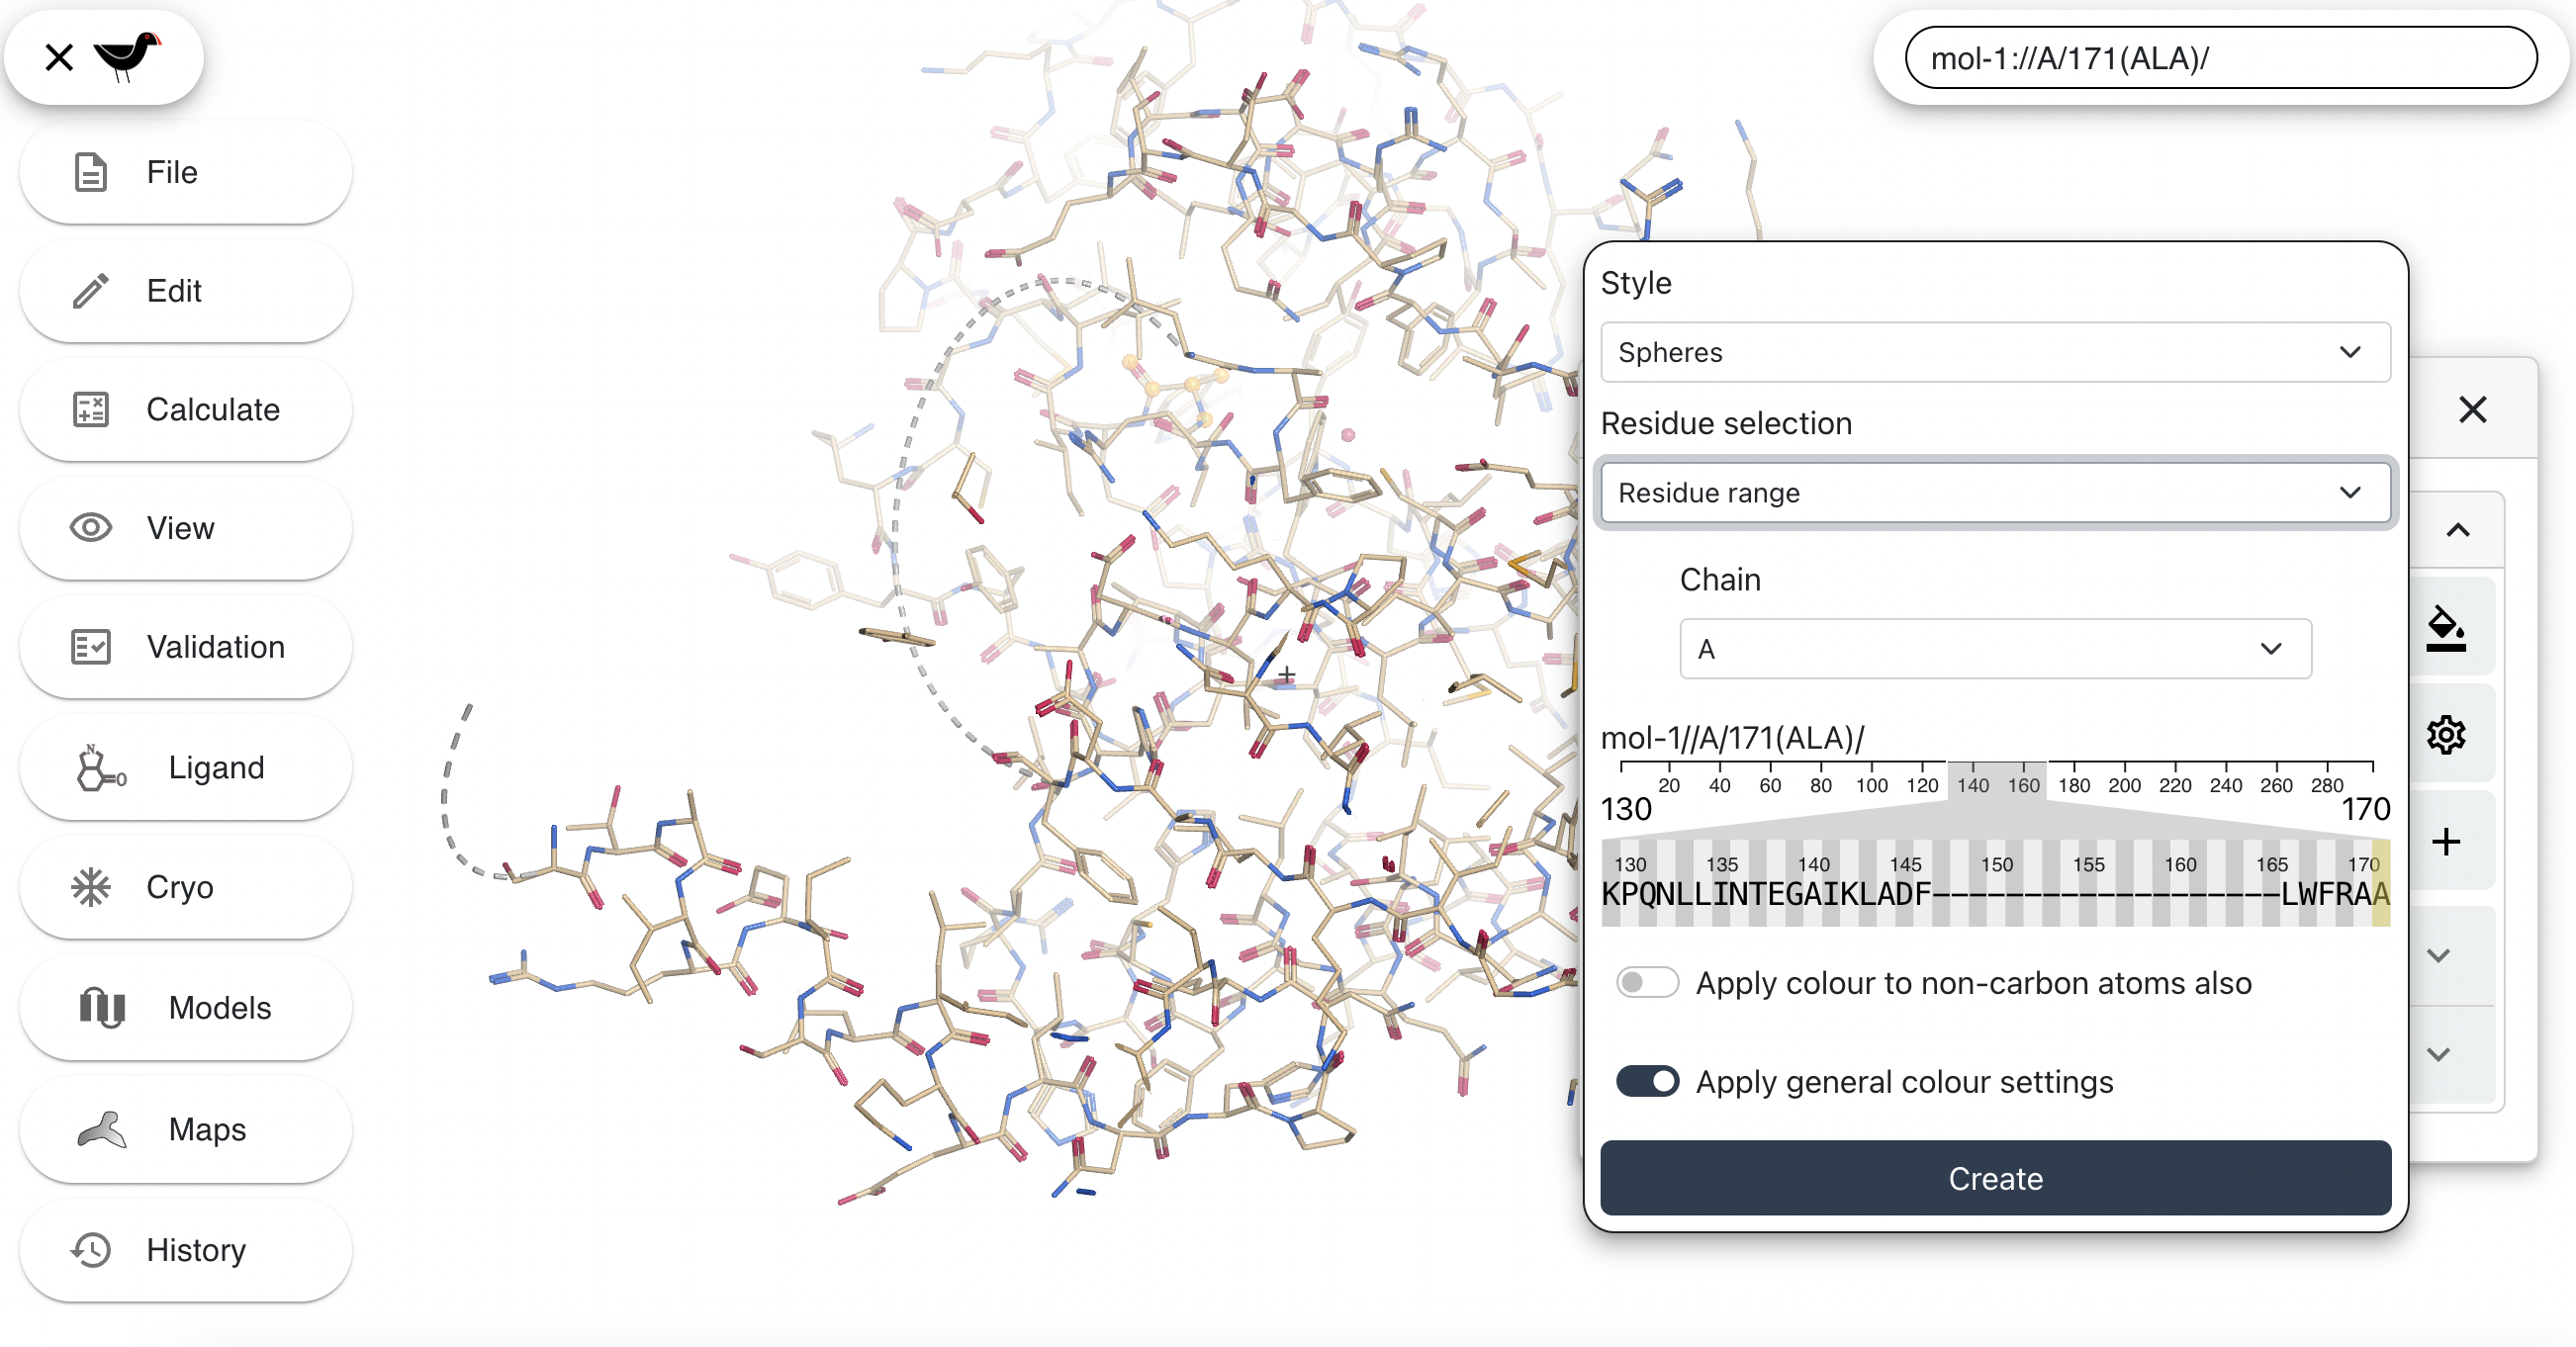
The sequence viewer may be scrolled left and right by clicking on it and dragging. Move it around and then click on residue number 50 (R), then shift-click on residue number 65 (K). Two triangles connected by a line will appear - this represents the residue range selected.
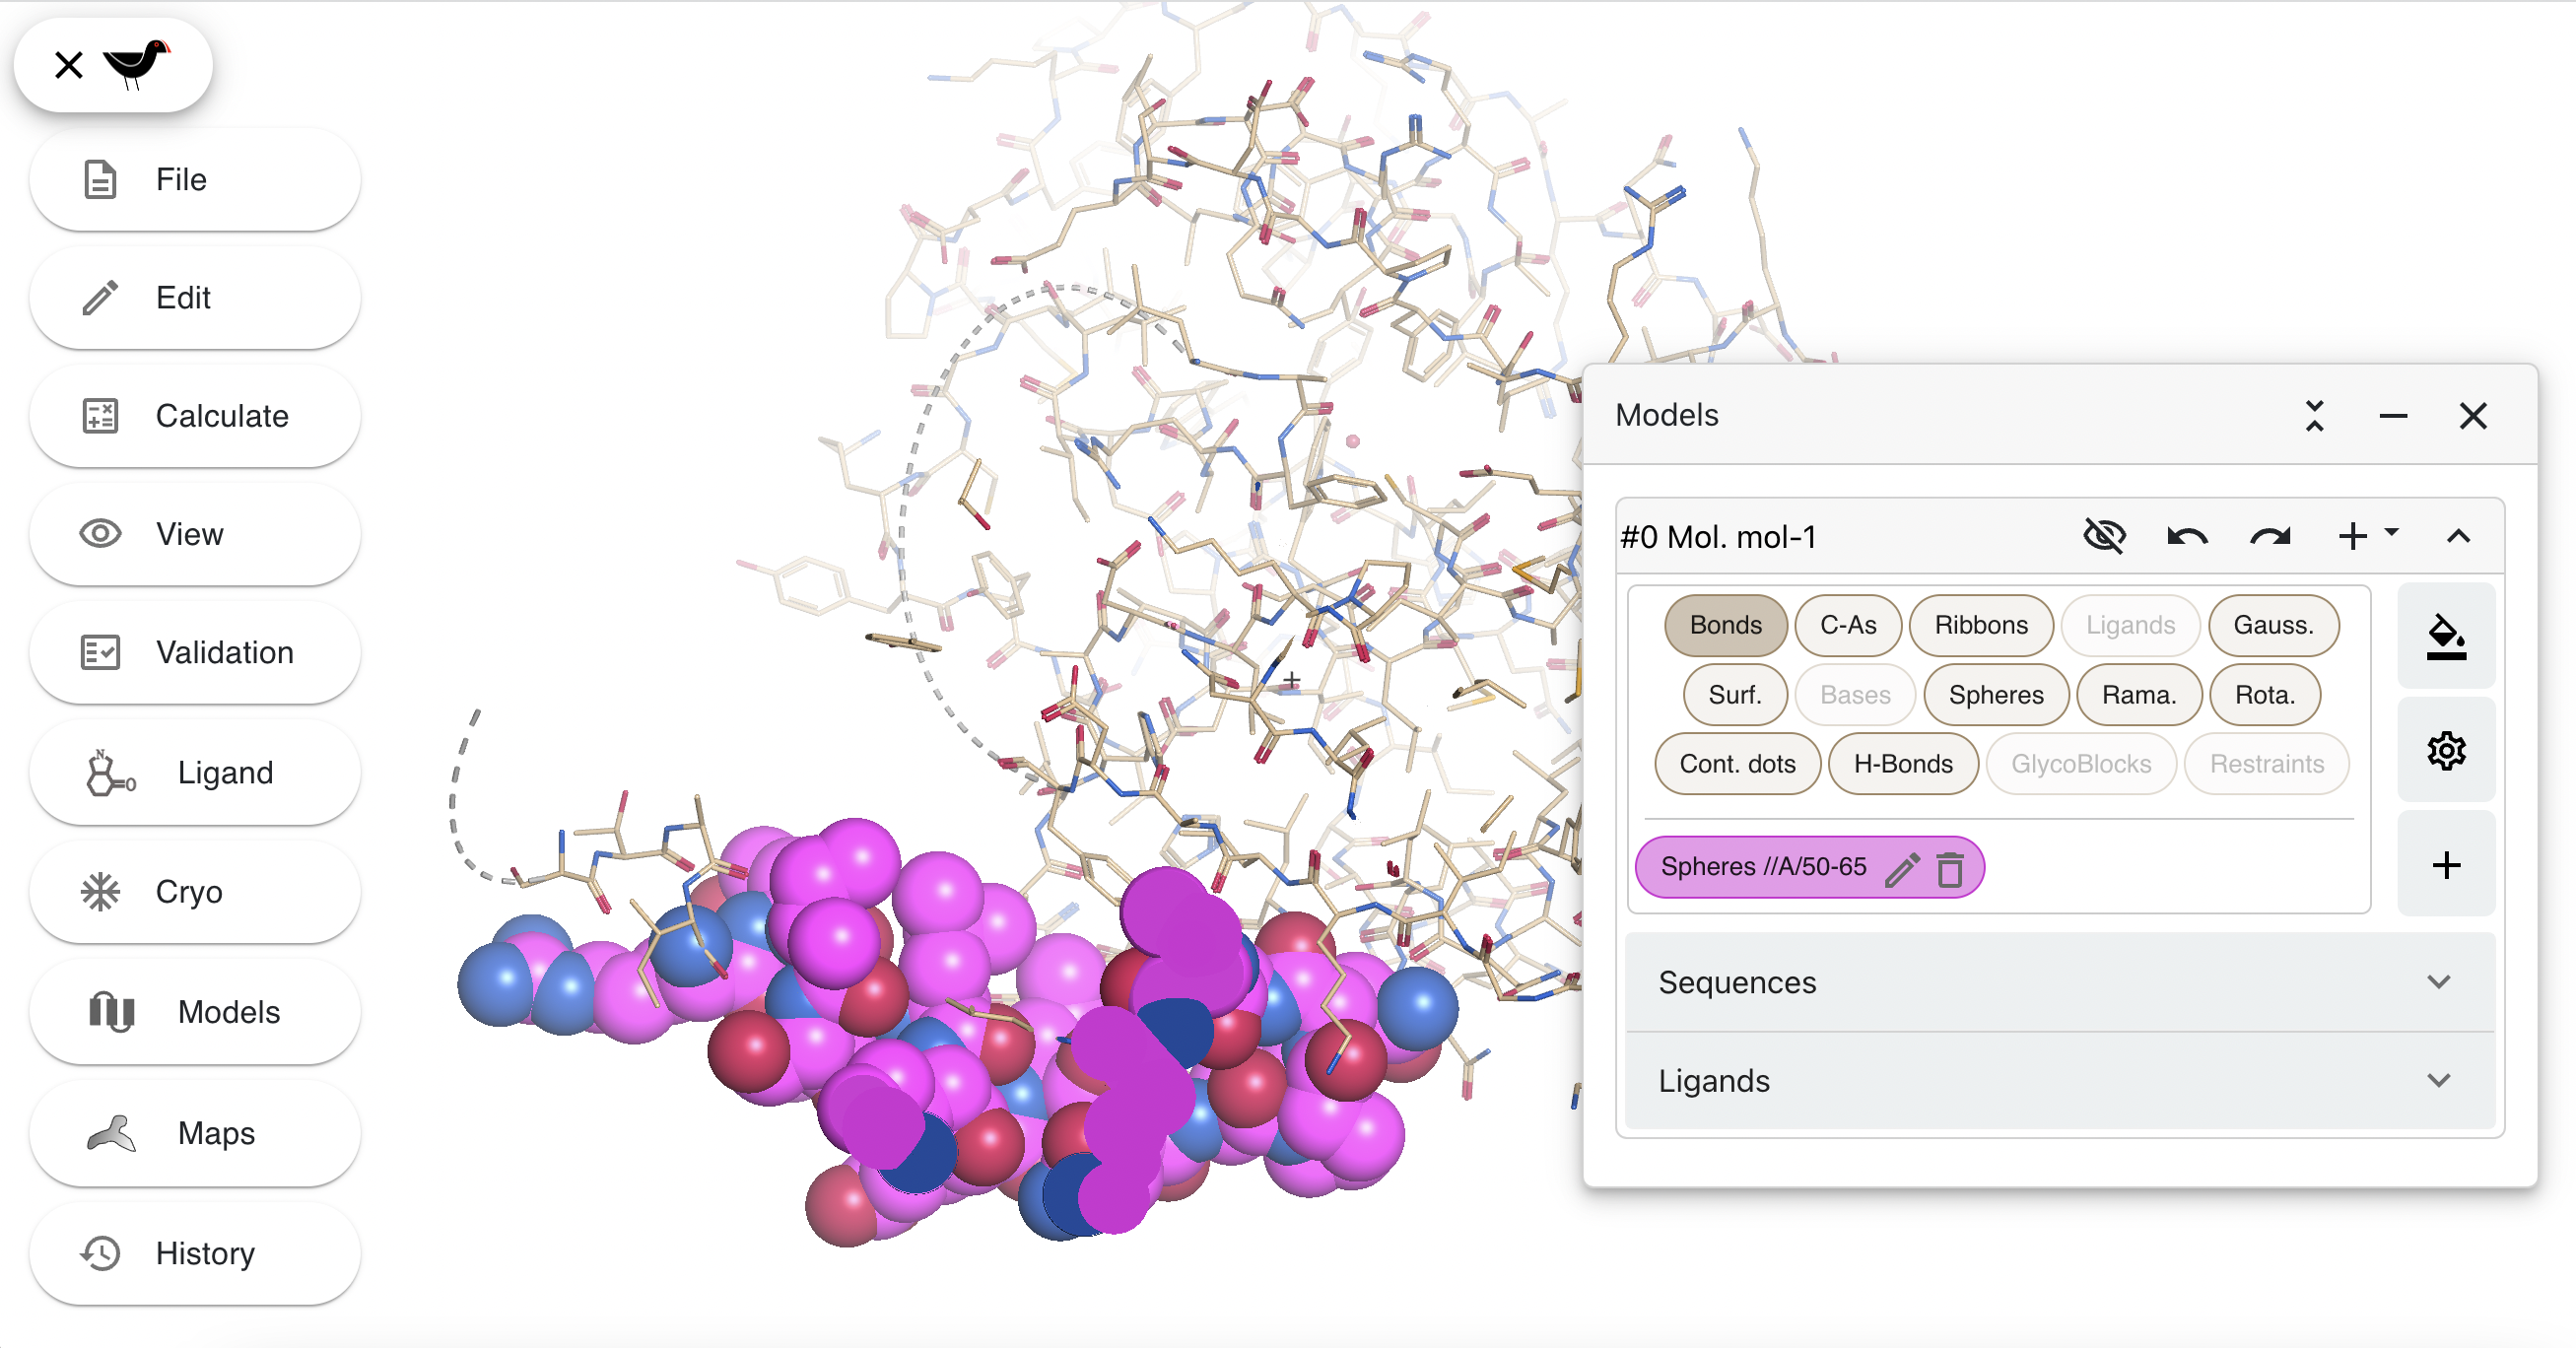
Then click on the “Create” button at the bottom of the dialog. The new spheres will be drawn and a button labelled “Spheres //A/50-65” which allows you to hide/show the spheres (like the main representations) will be shown in the “Models” dialog.
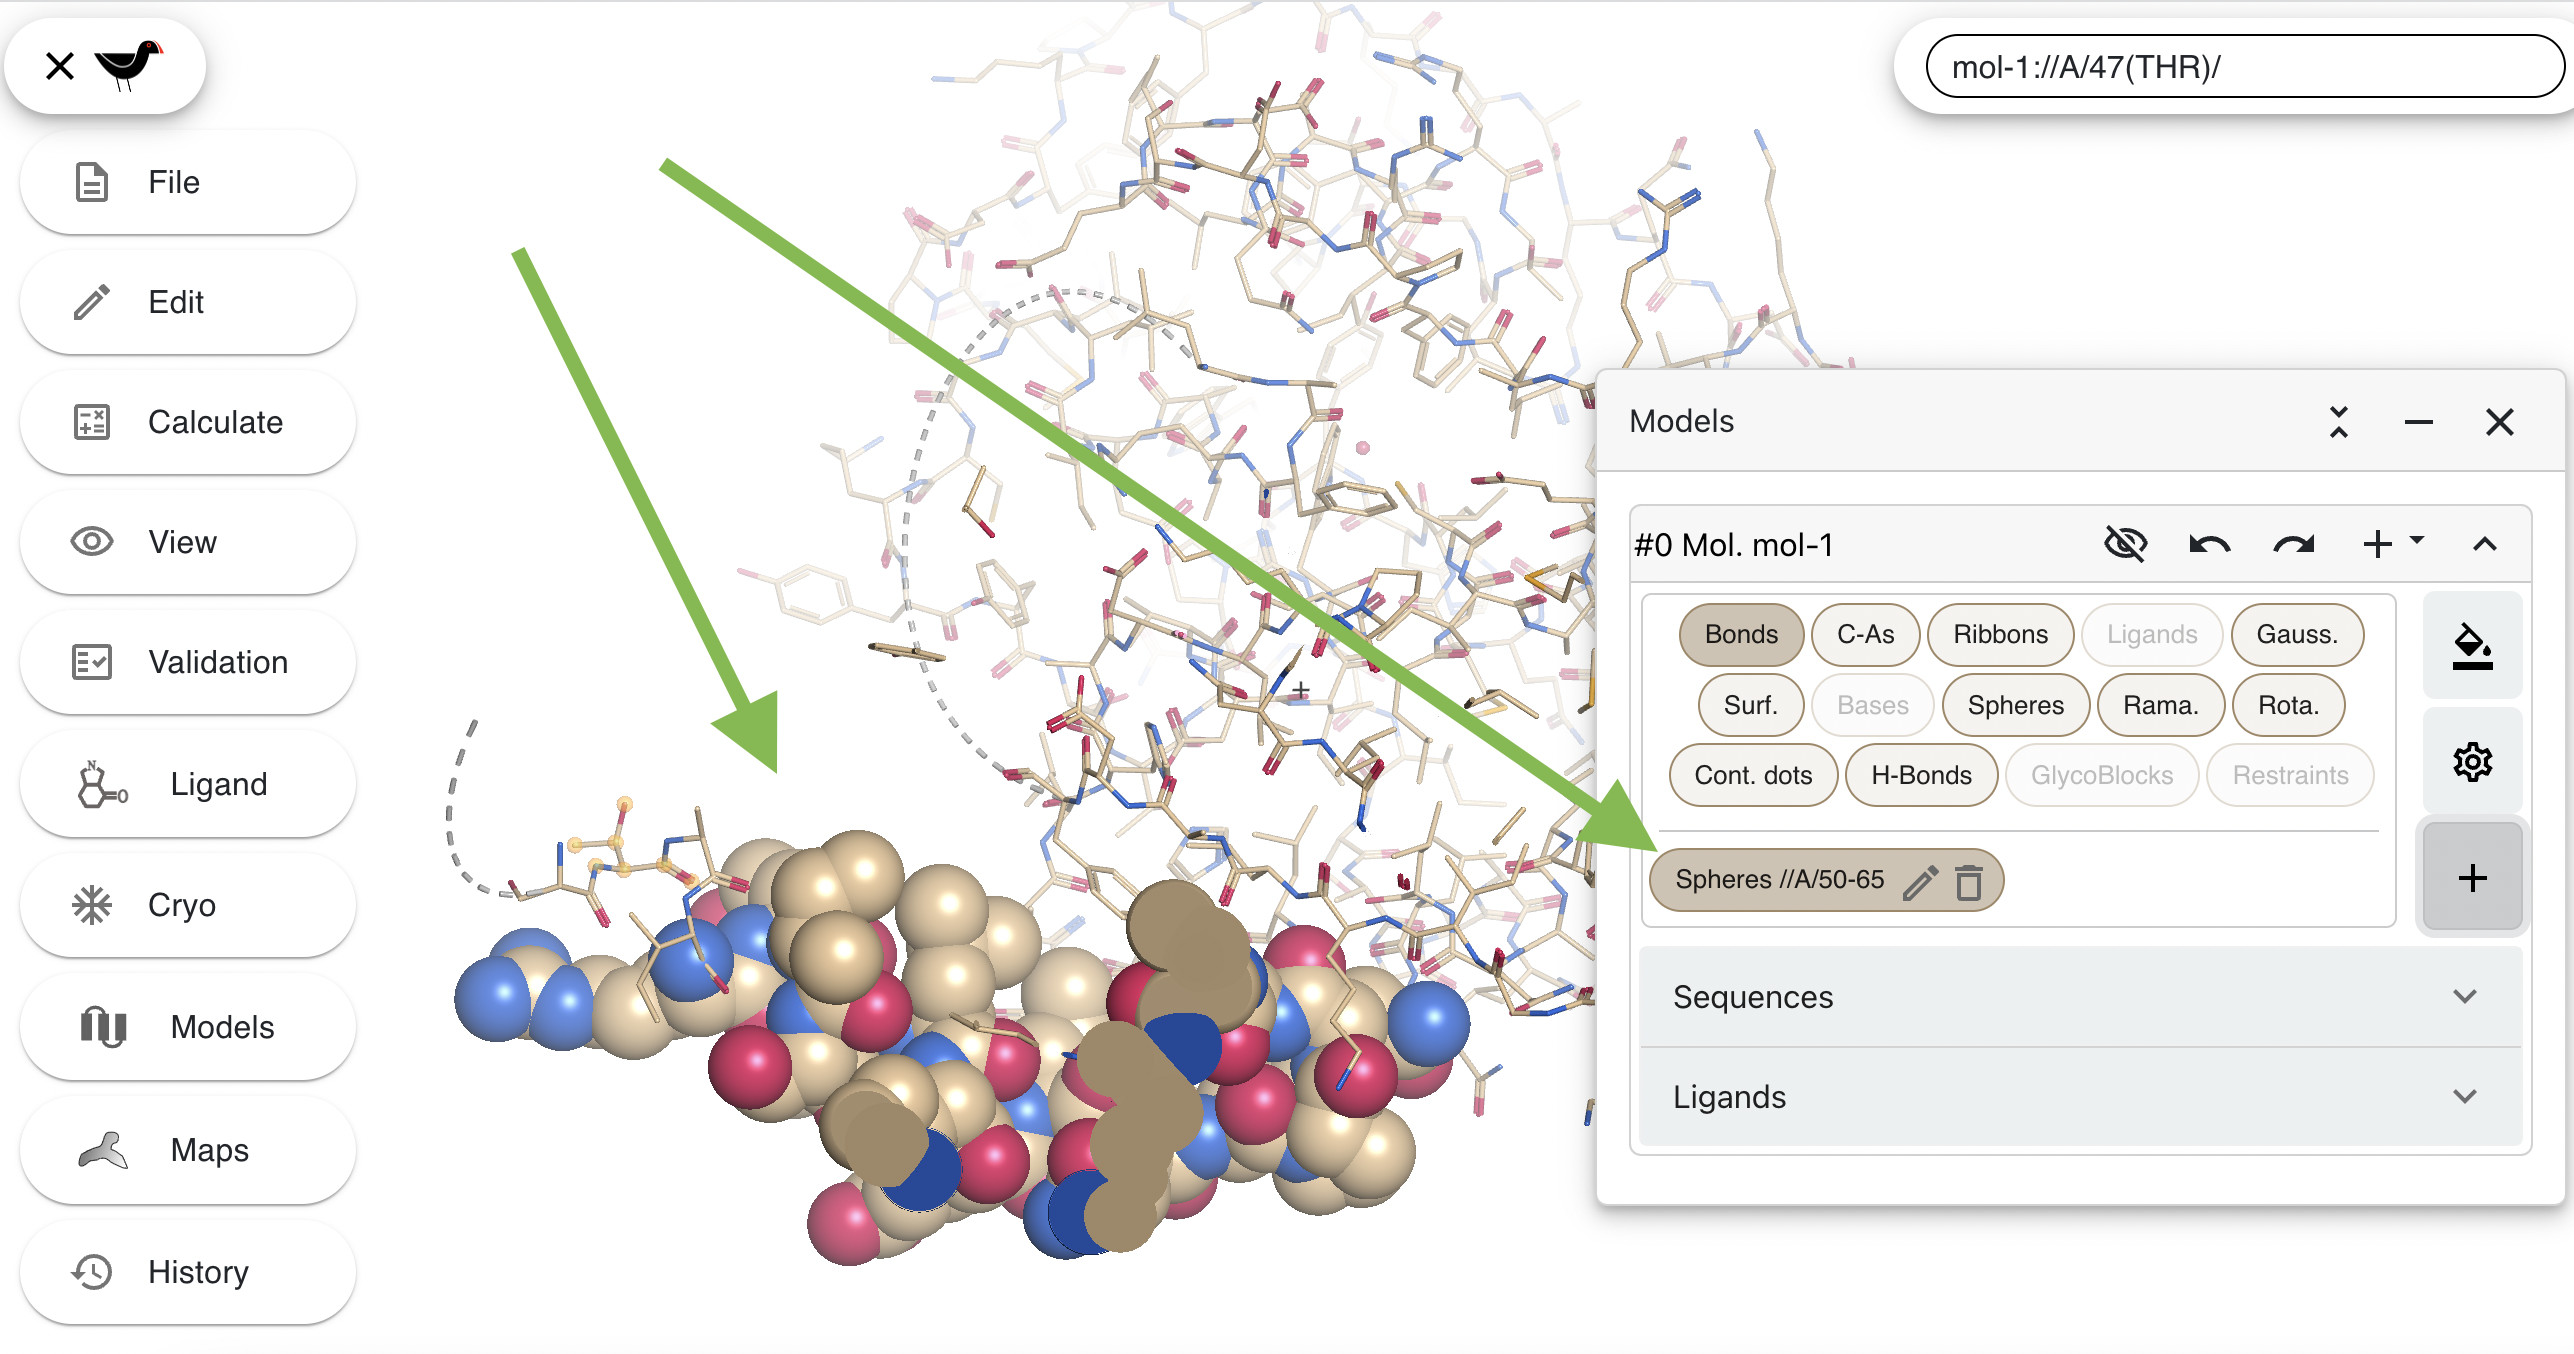
The new button also has “pen” and “dustbin” parts. The “pen” allows you to edit the atom selection/colouring/style; the “dustbin” deletes the new representation. Click on the pen and then uncheck the “Apply general colours settings” button. You will a new drop down menu, this will be set to “User defined colour”:
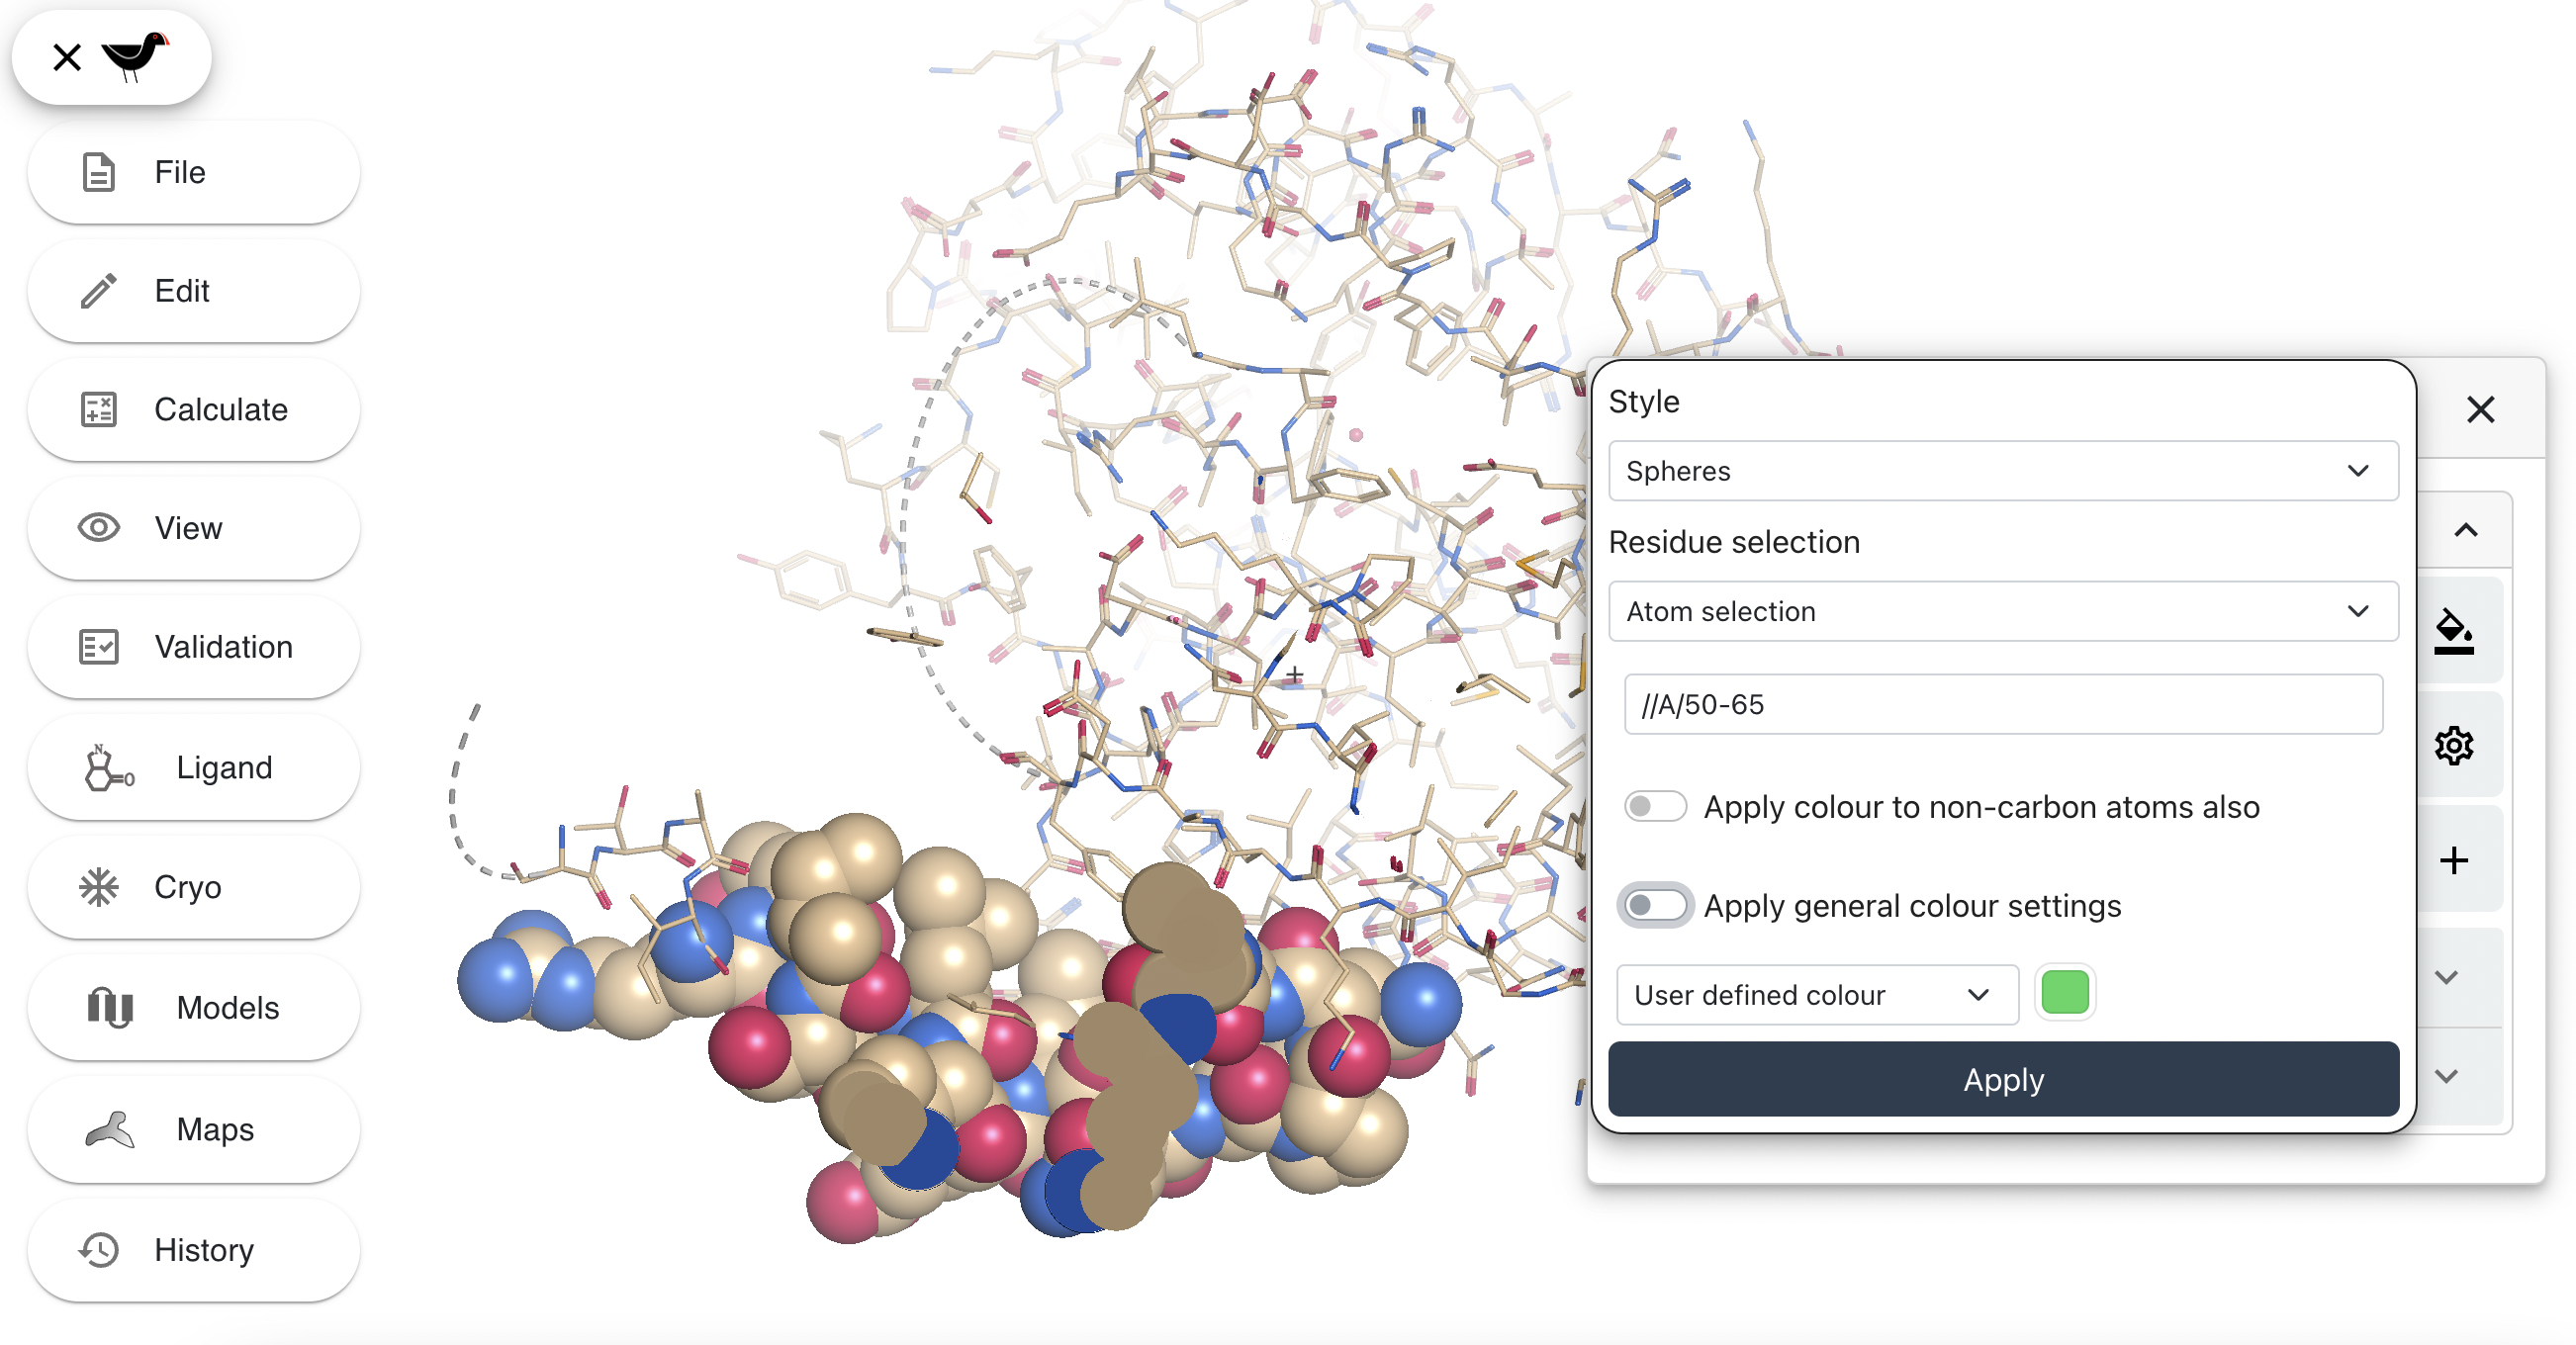
Click on the green square to the right of this menu. A colour picker will appear. Pick a new colour (e.g. a shade of purple) and then click “Apply”. Your spheres (and the representation hide/show button) will change colour.
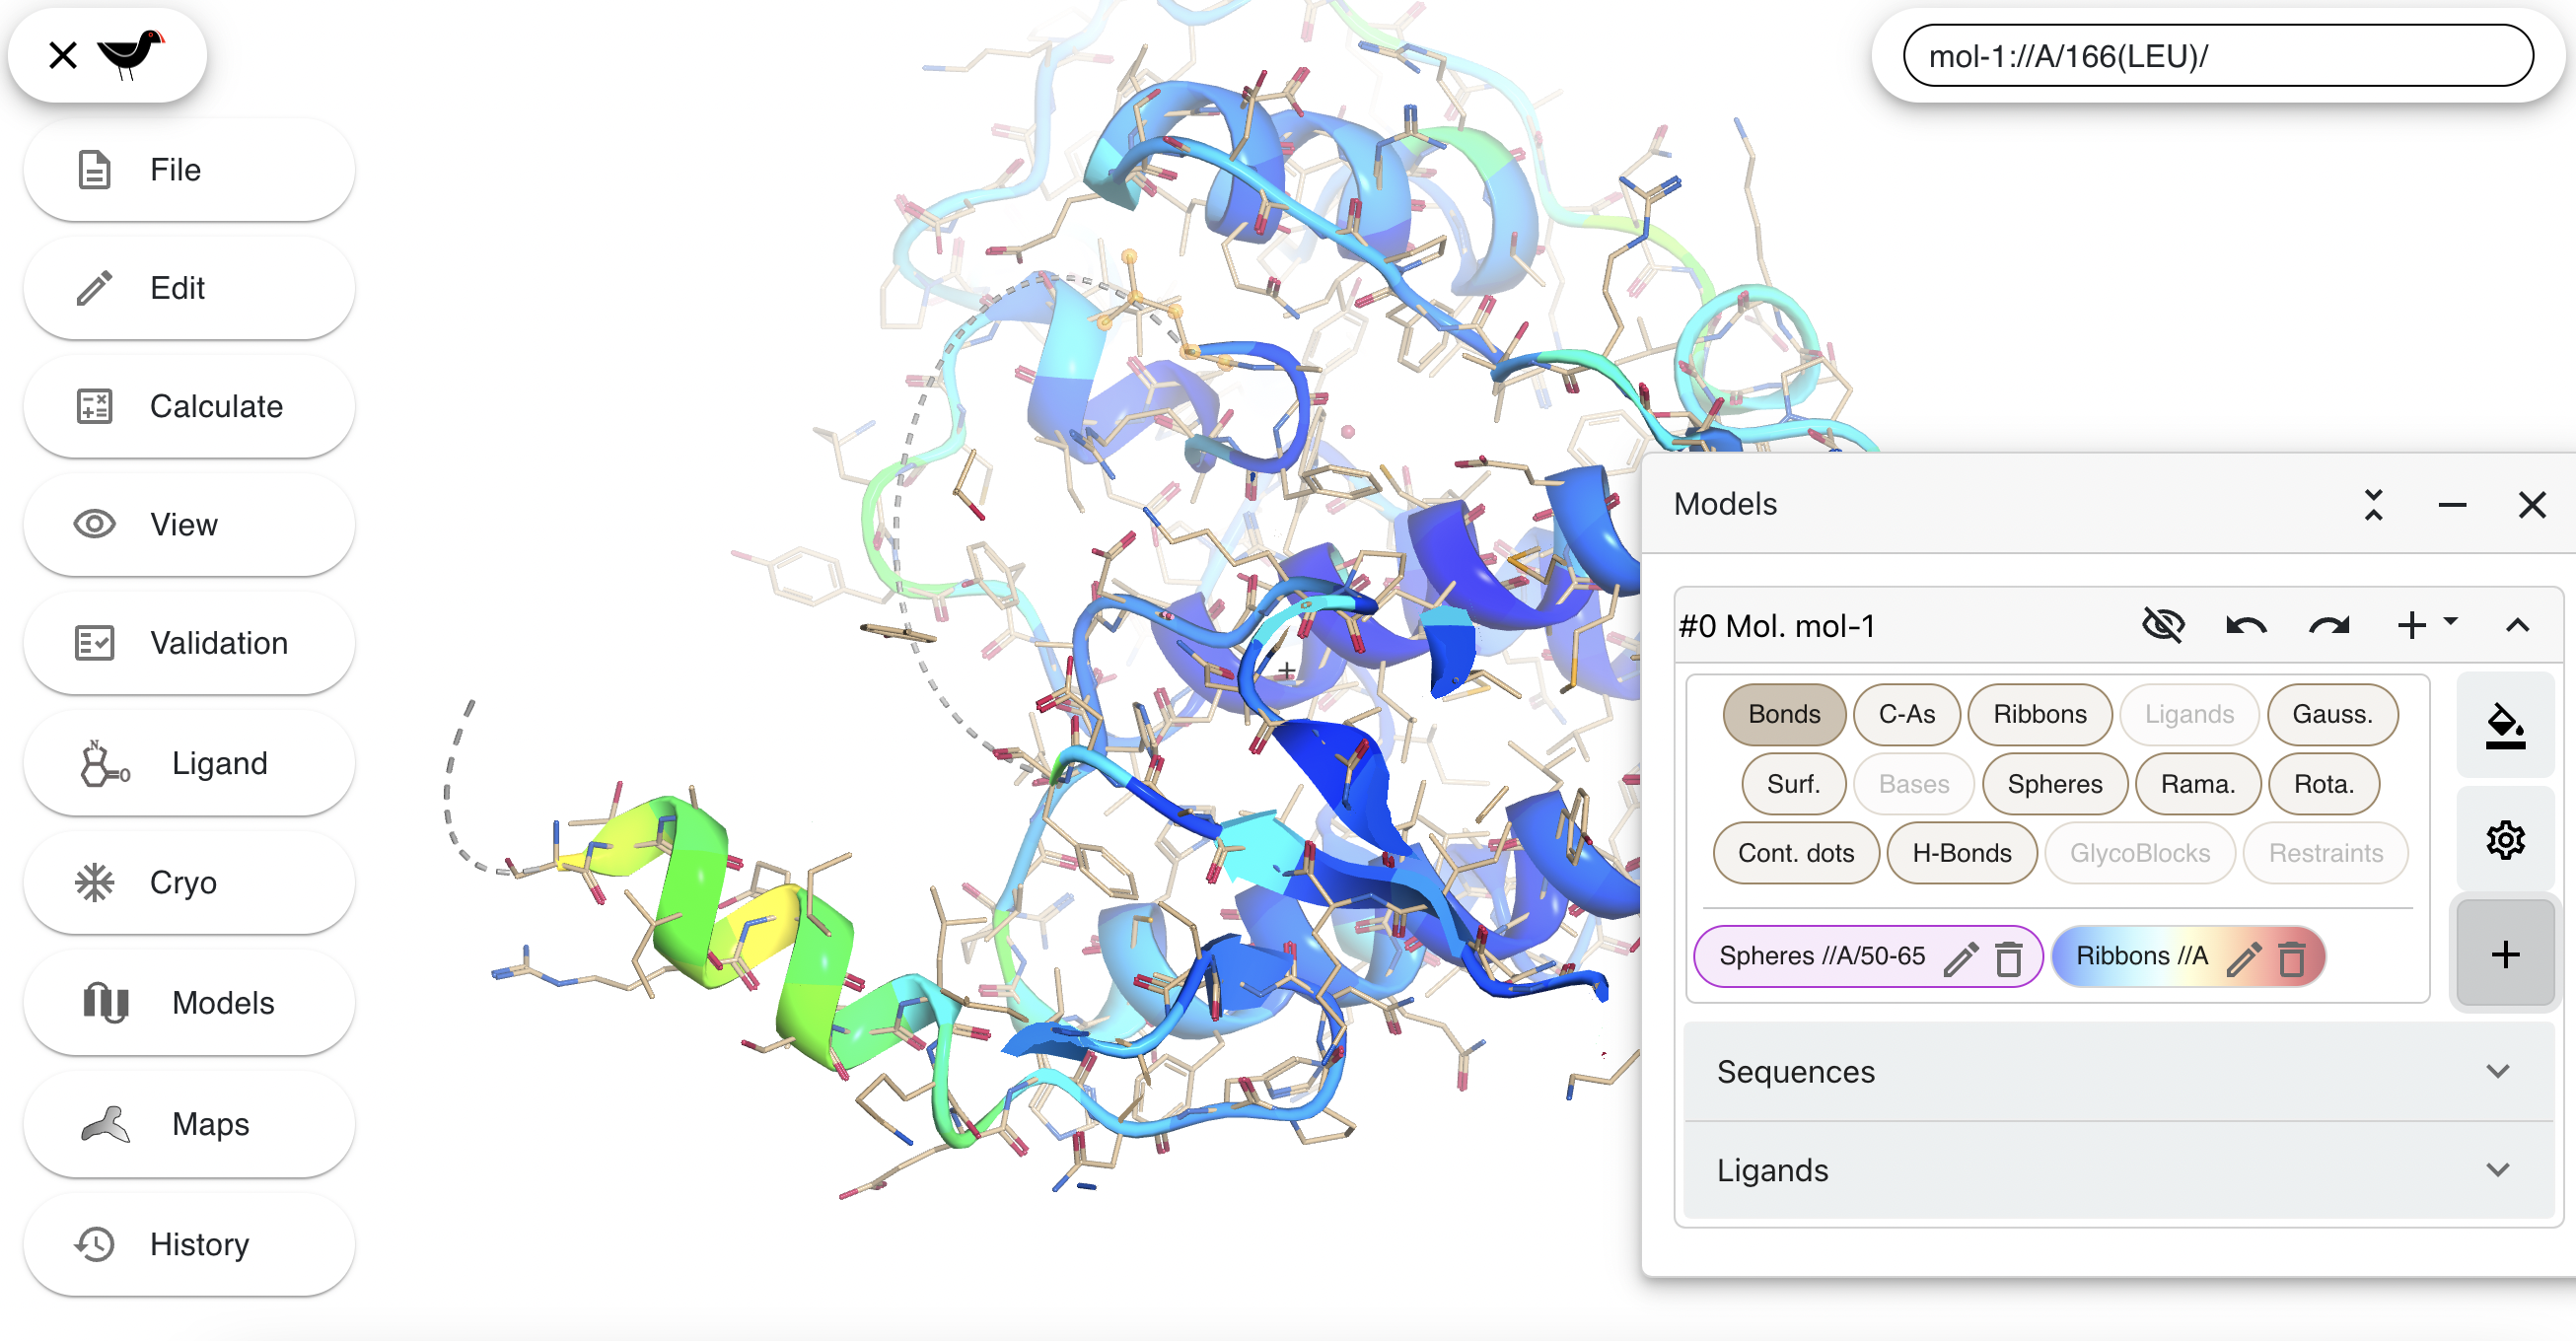
Now hide the new spheres and the default bond representations by clicking the appropriate buttons in the “Models” dialog. Then create a new “Ribbons” representation coloured by temperate factor. First click on “+” again and then use the following settings:
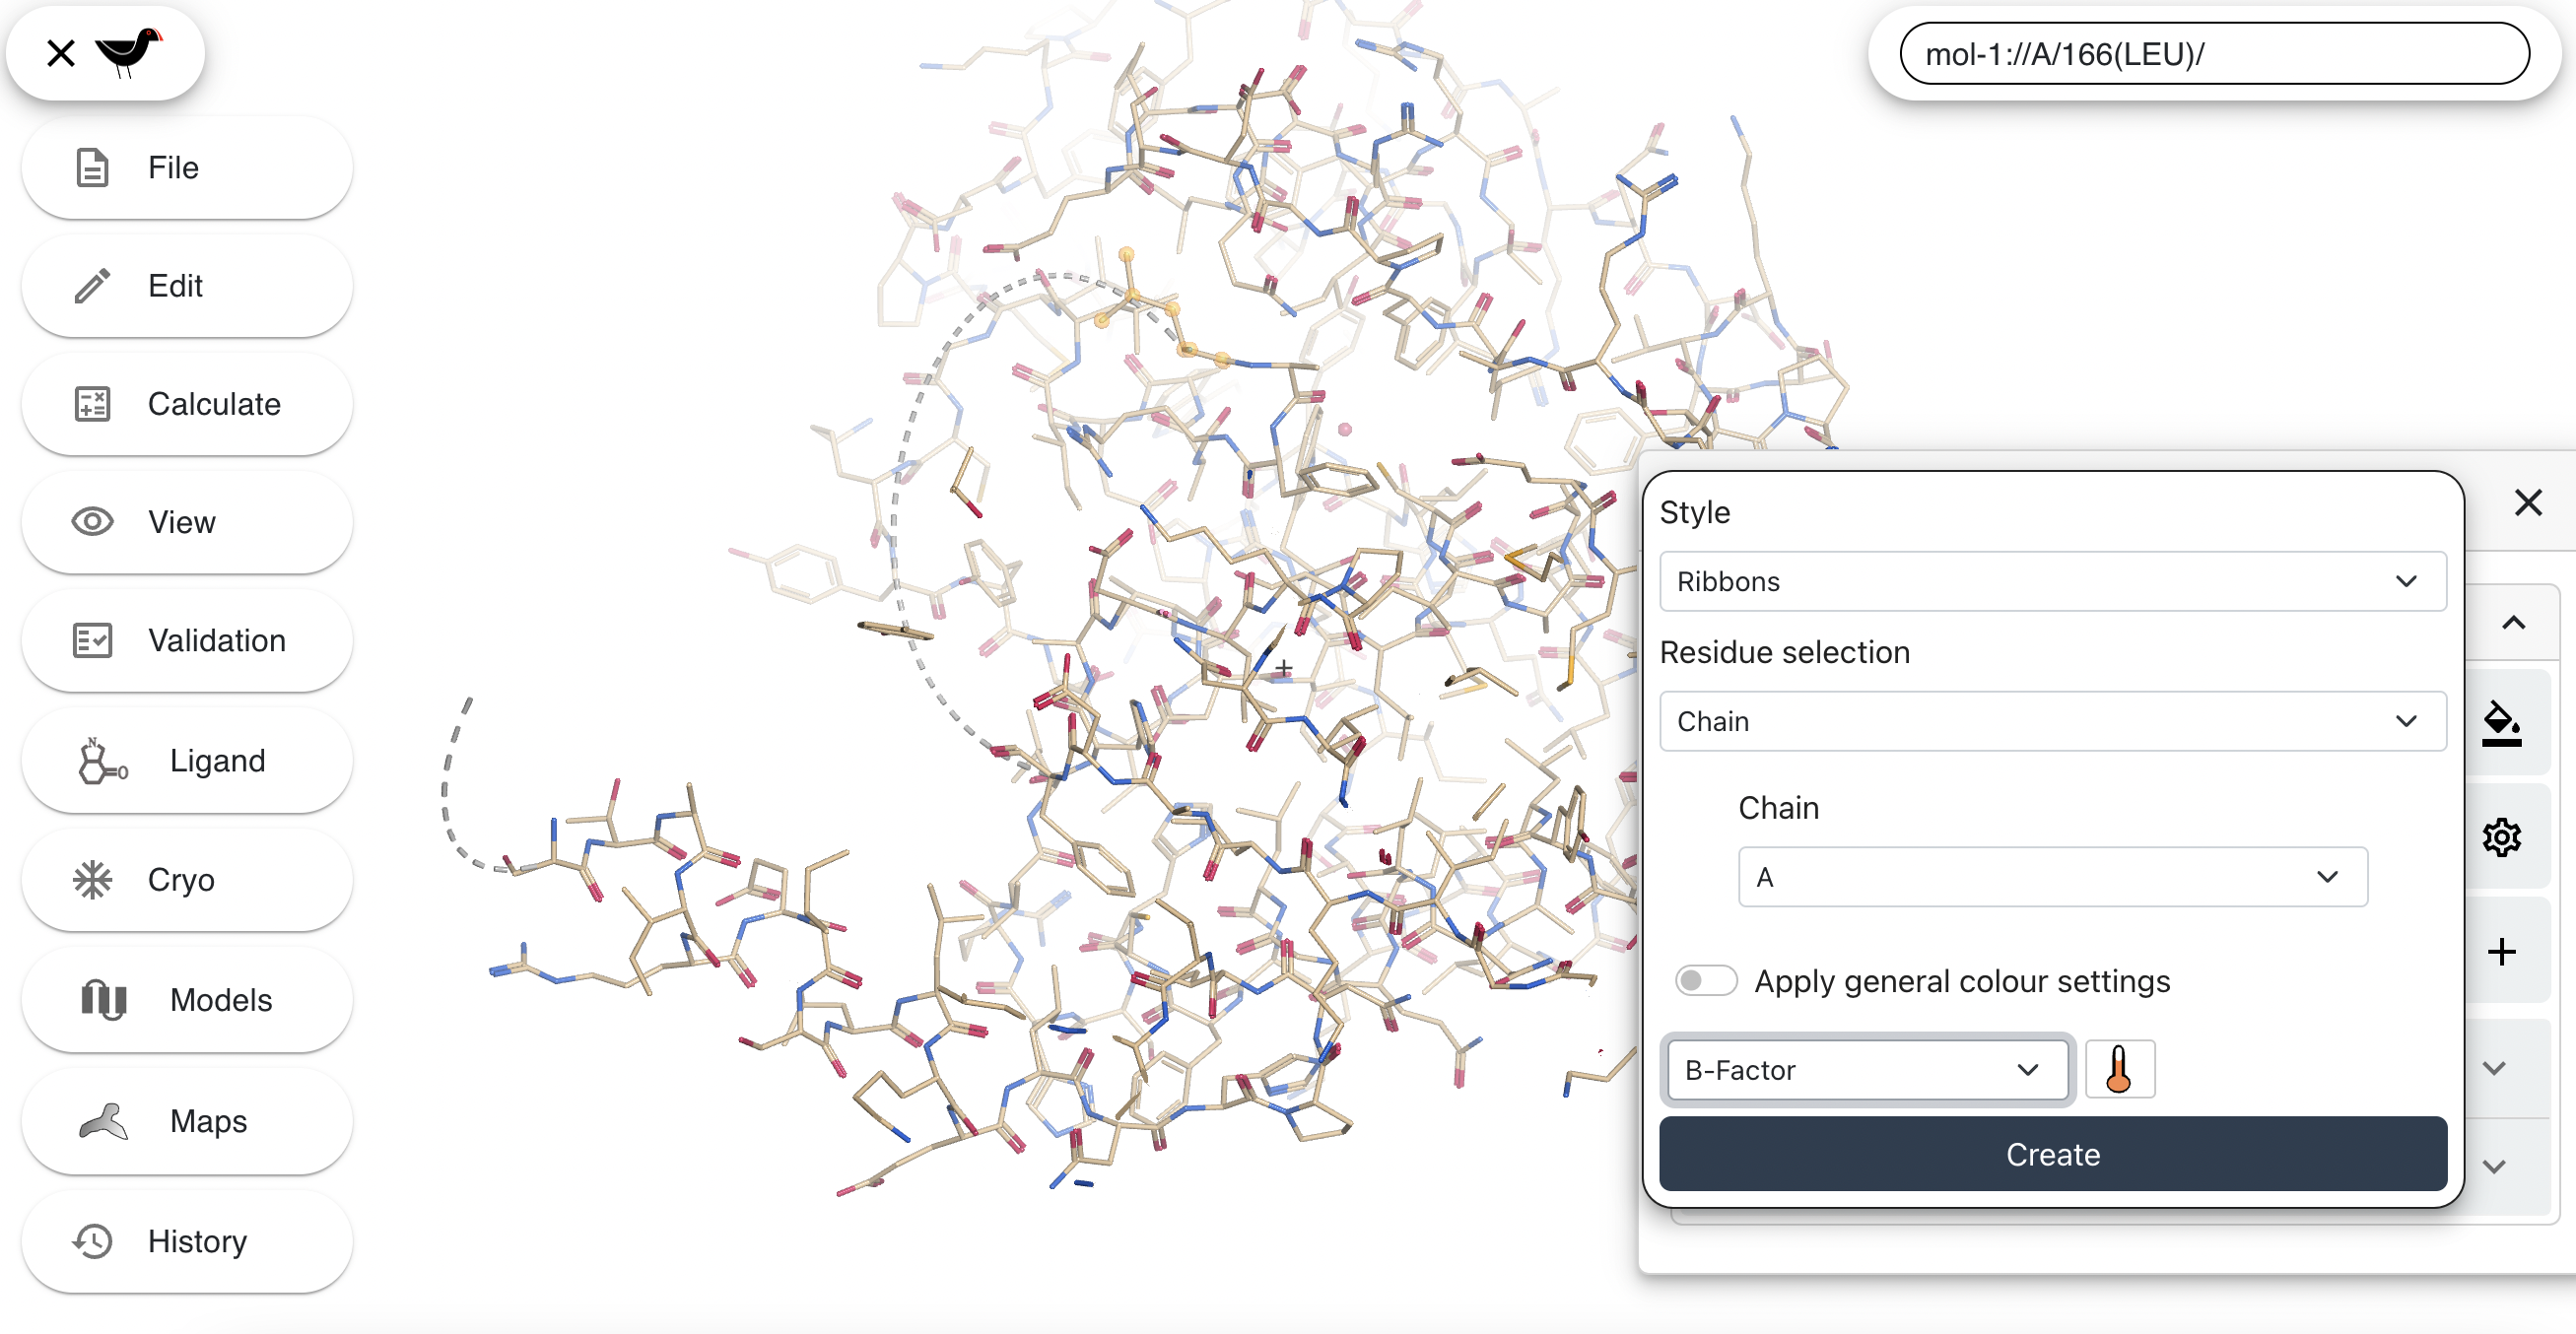
Then click “Apply”:
Ball and Stick Variants
There are many options to customize the drawing of both maps and models. We begin here by showing how to change some settings for
the drawing of “Bonds” model representations. Click on the gear wheel button  to the right of the atom representations buttons. A large dialog with many options will appear:
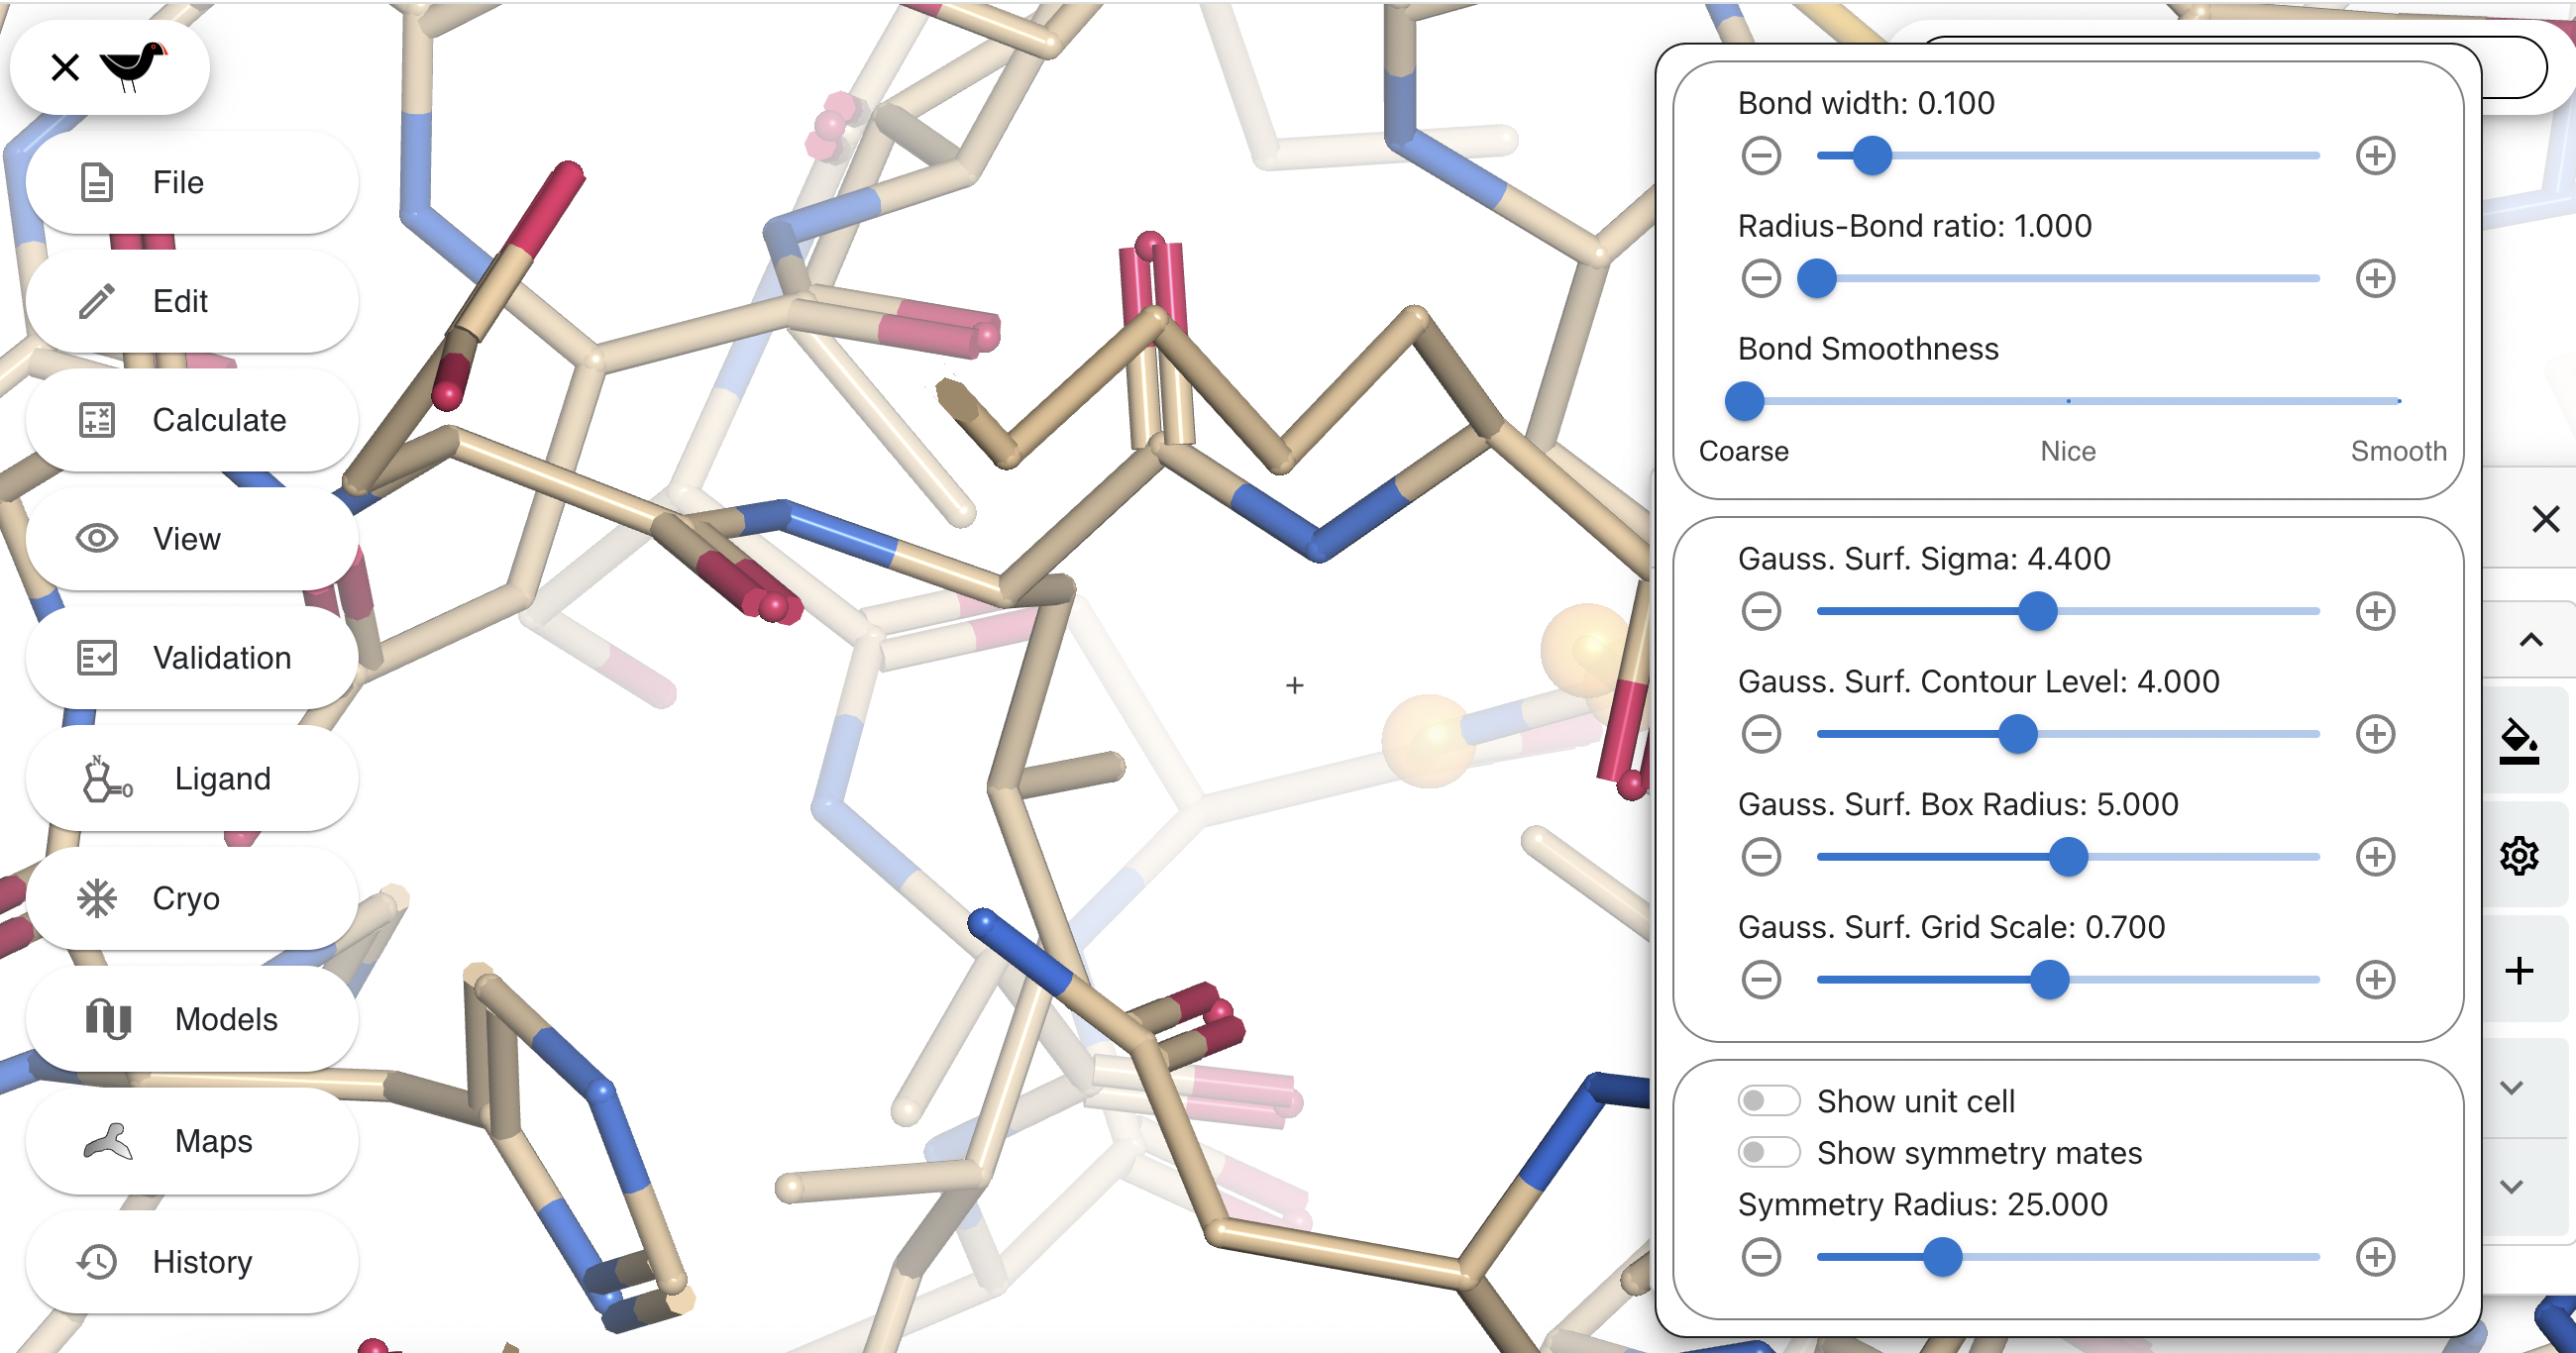
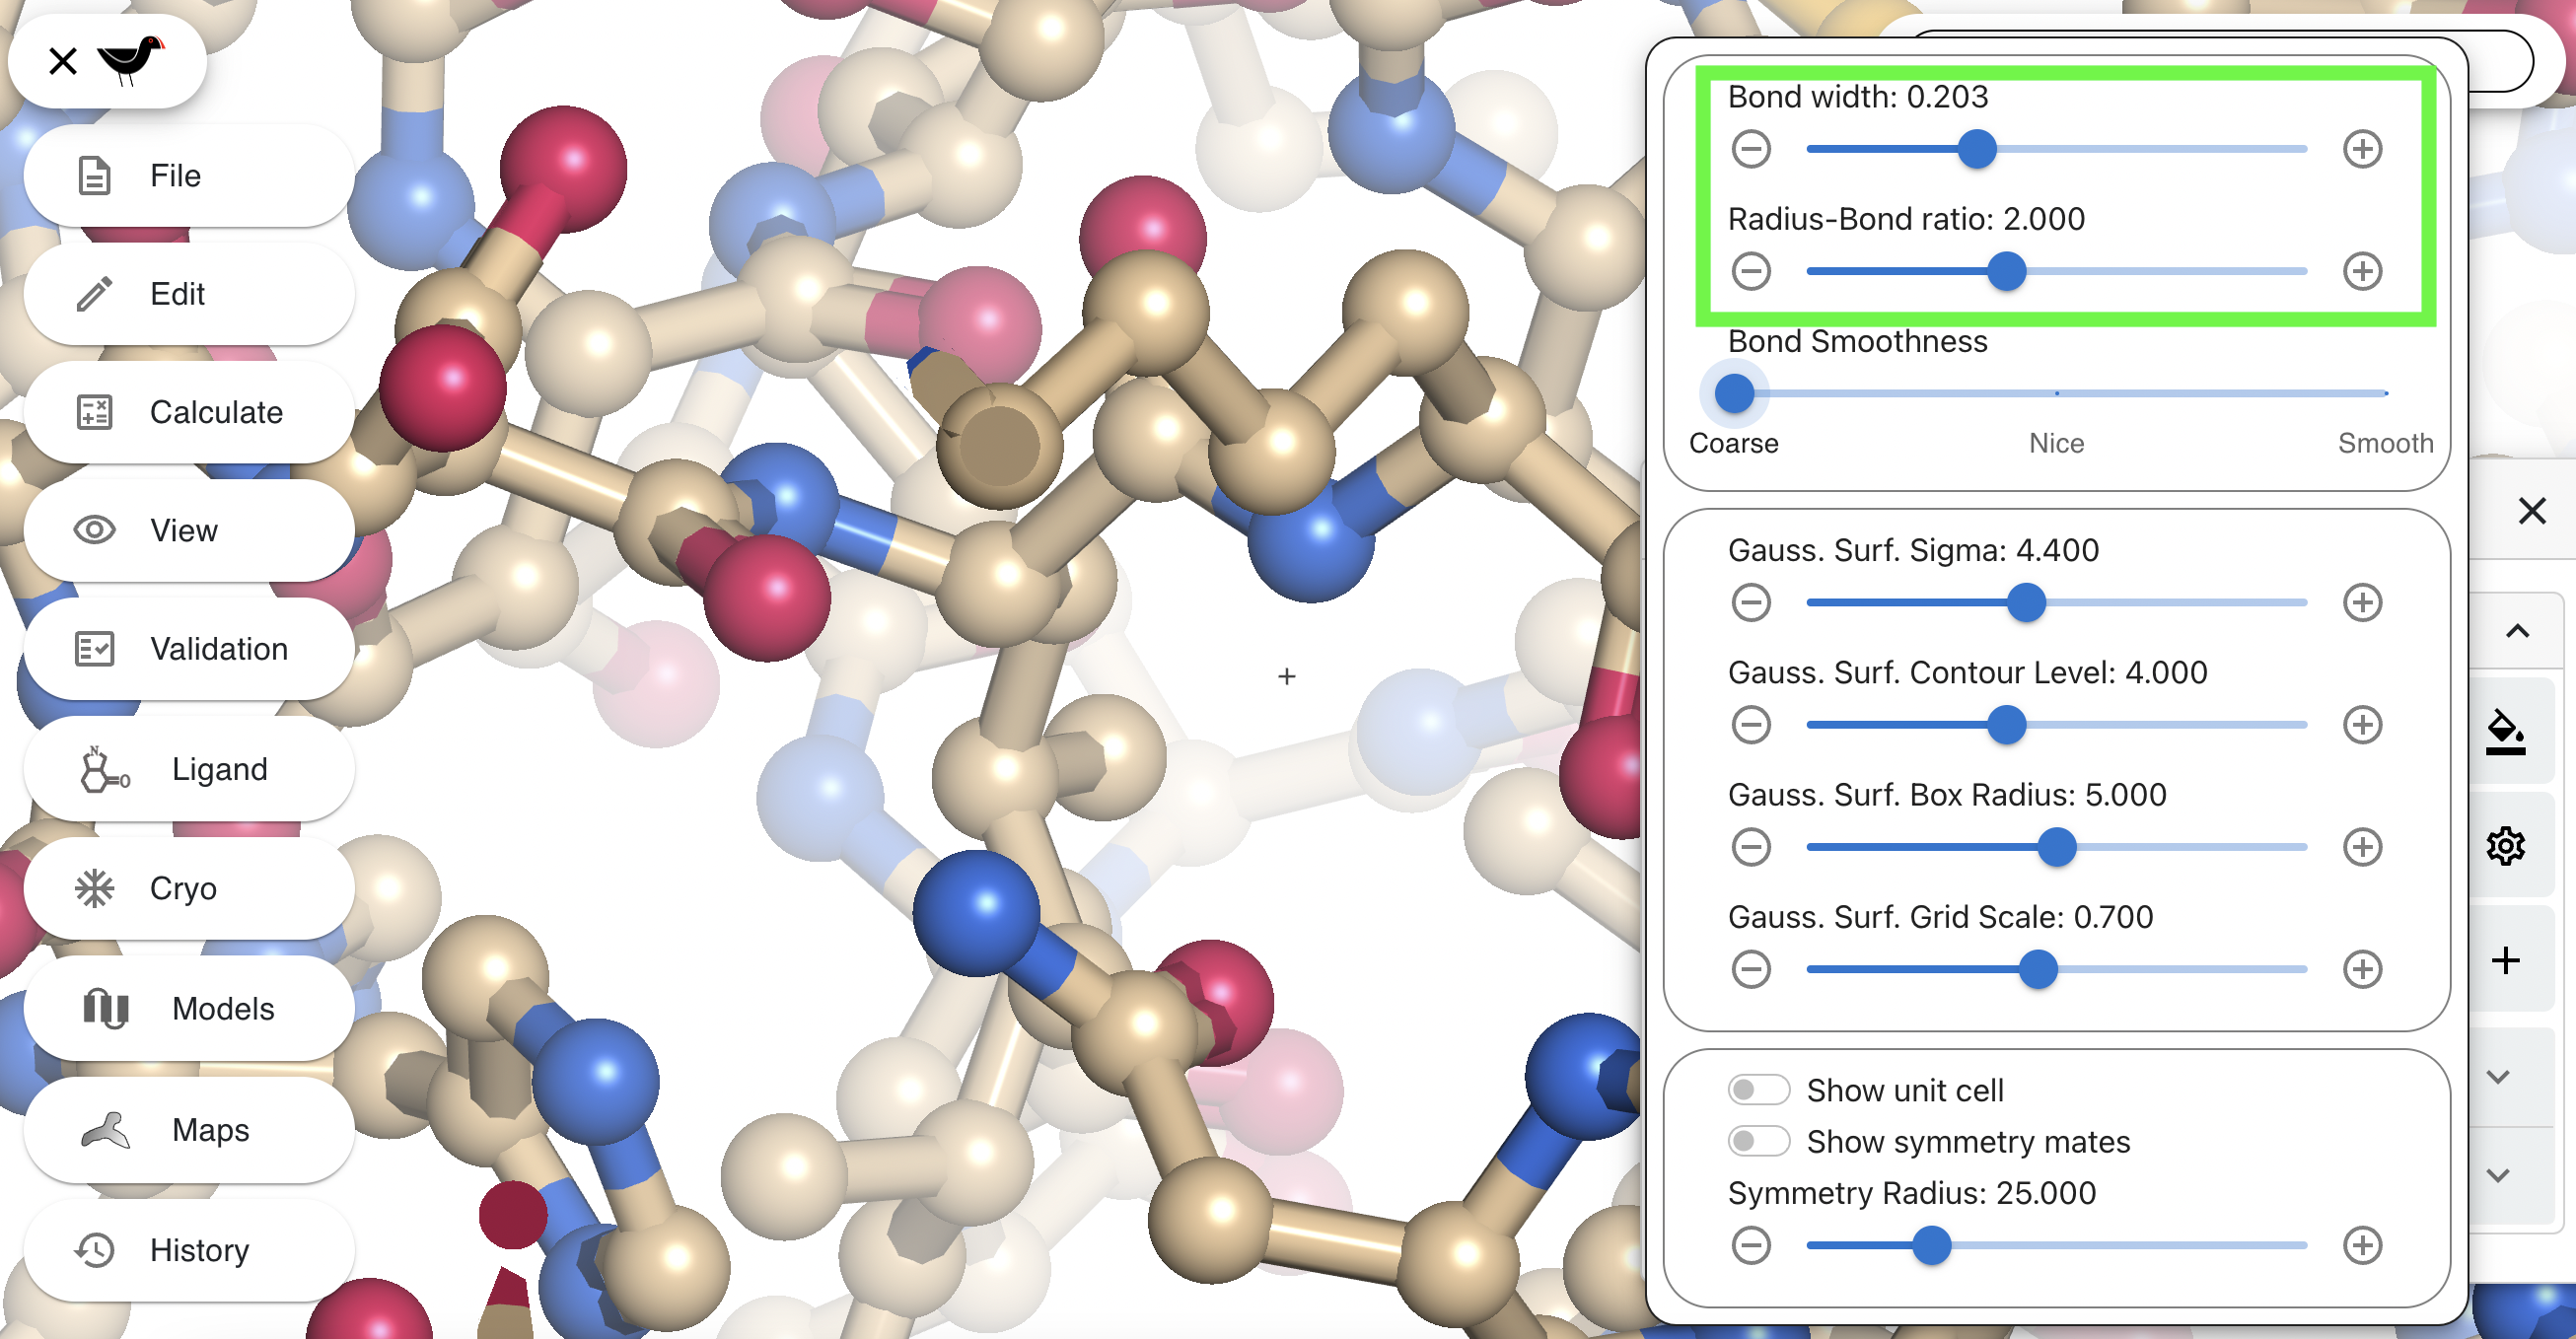
The top slider (“Bond width”) controls the thickness of the bond. The second slider (“Radius-Bond ratio”) changes the relative size of the sphere drawn at each atom position to the bond. Try changing these two sliders to about 0.2 and 2.0 respectively. Your “bonds” will change to balls and sticks.
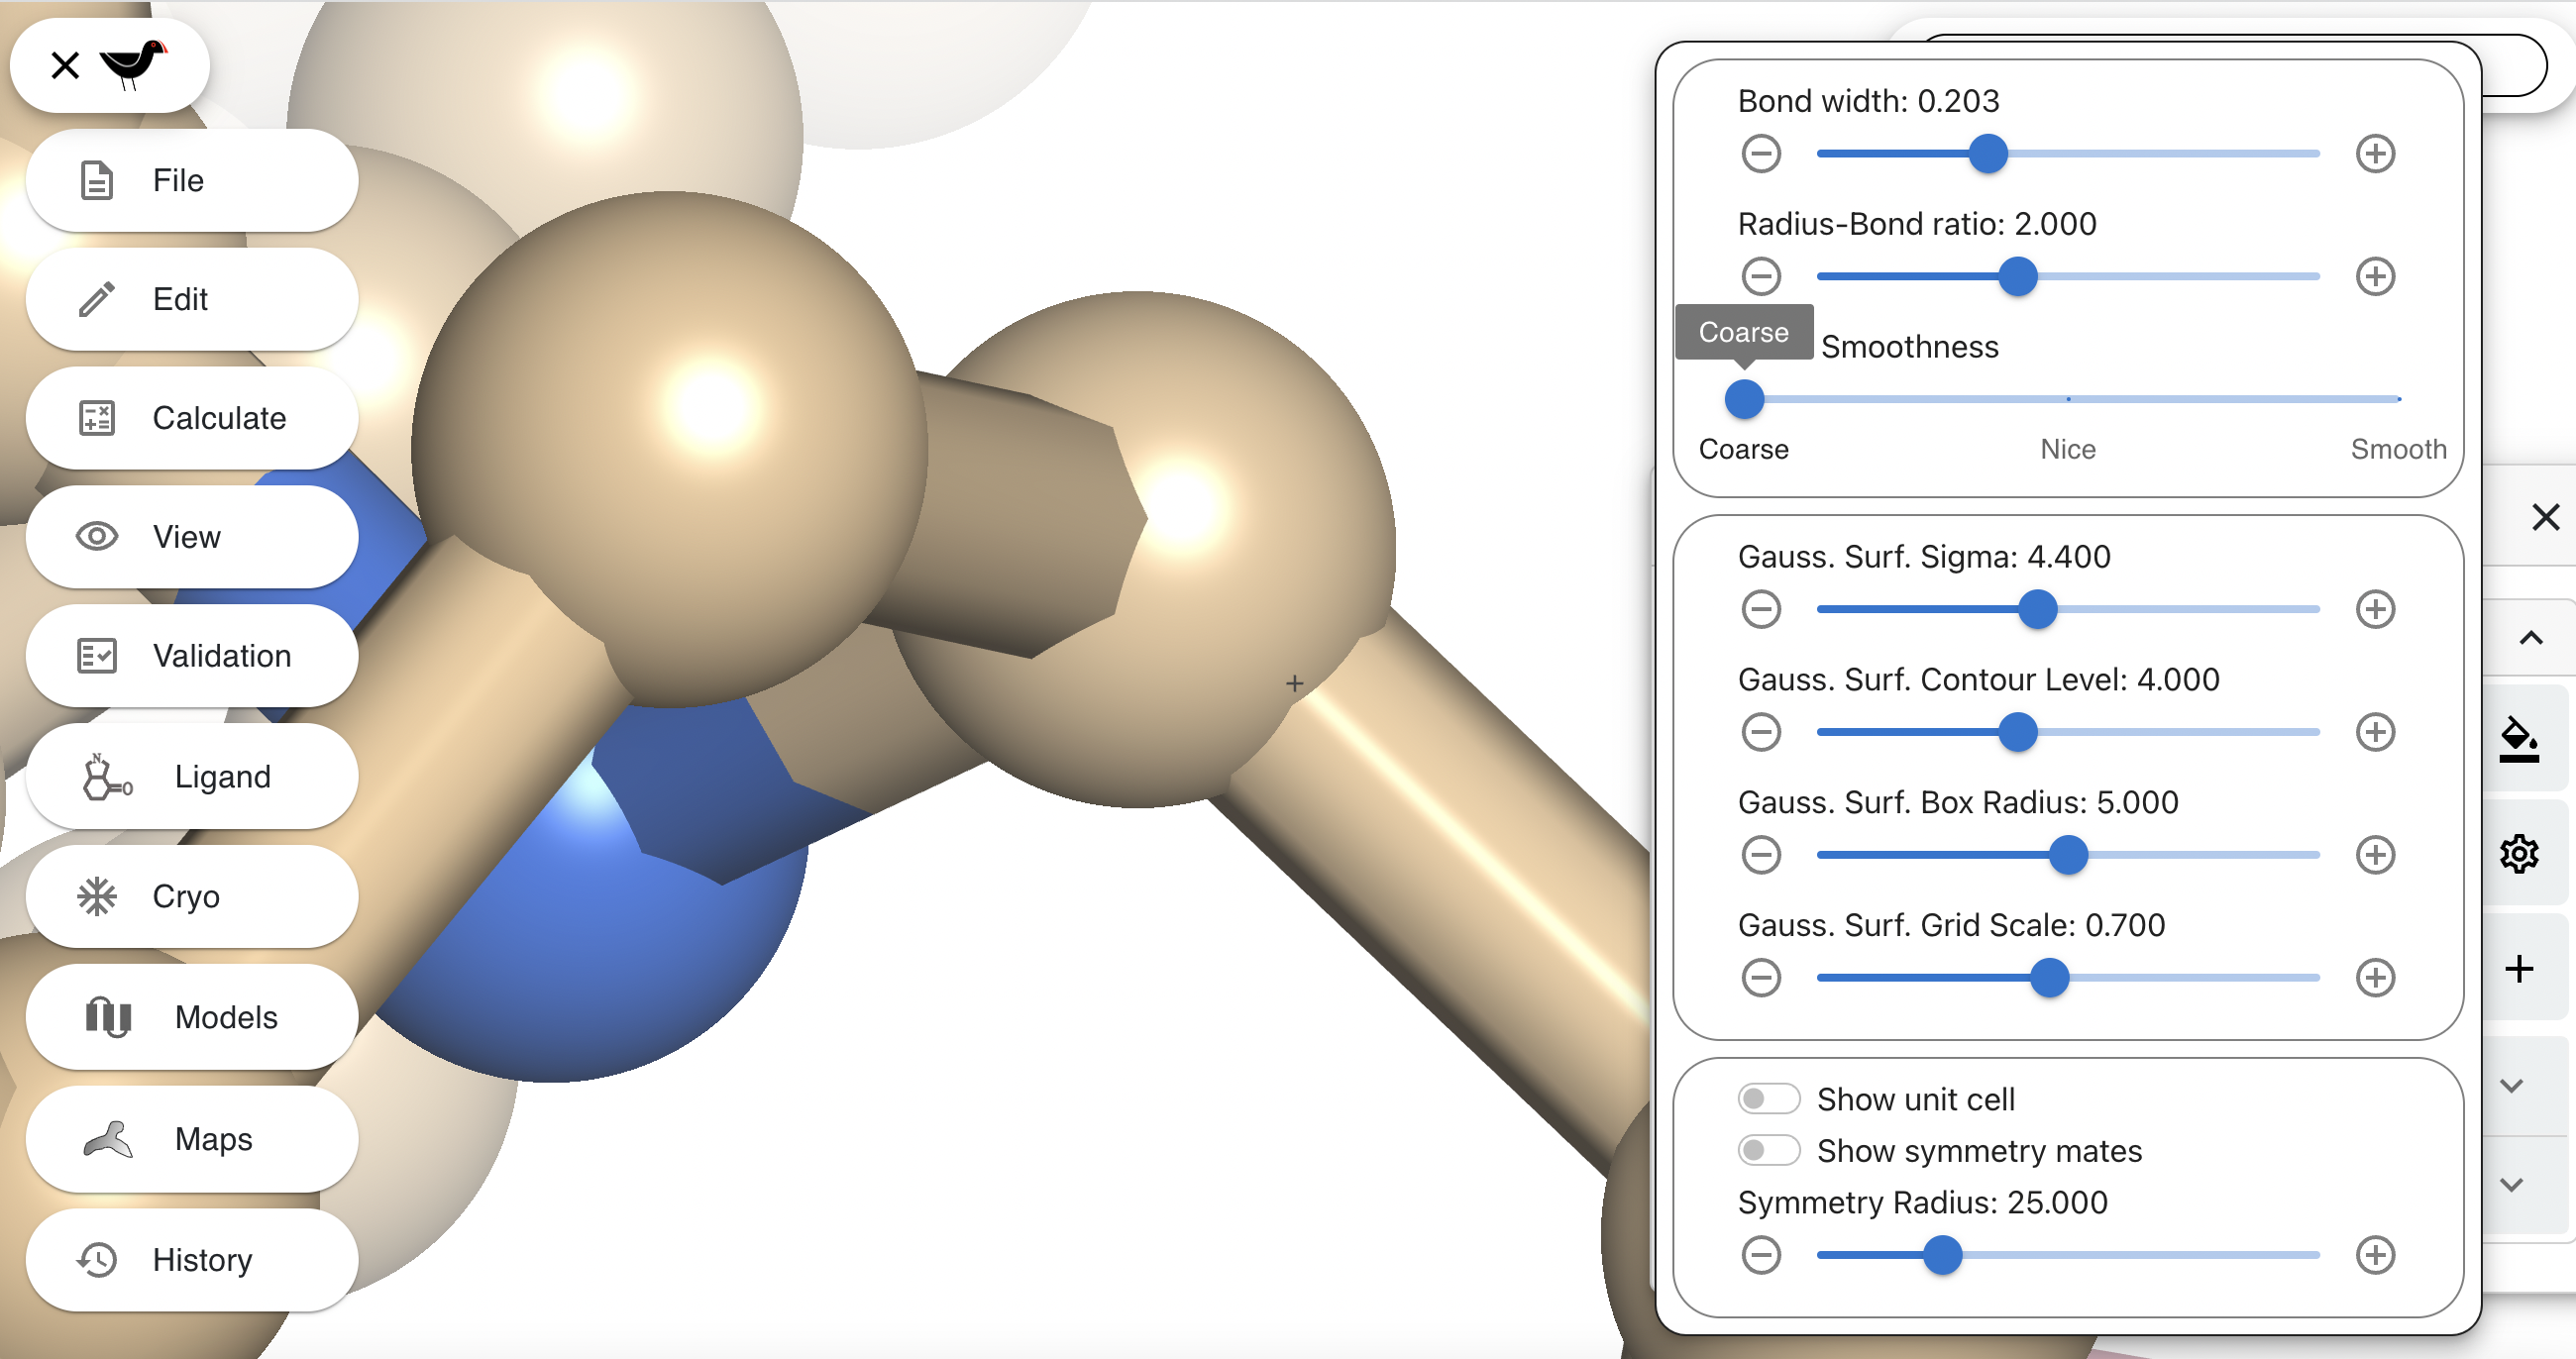
The third slider in the settings dialog varies the smoothness of the cylinders drawing the bonds. The effect of this slider will be most noticed in close up scenes. Zoom in closely and rotate the scene so that you can see a bond/sphere intersection clearly:
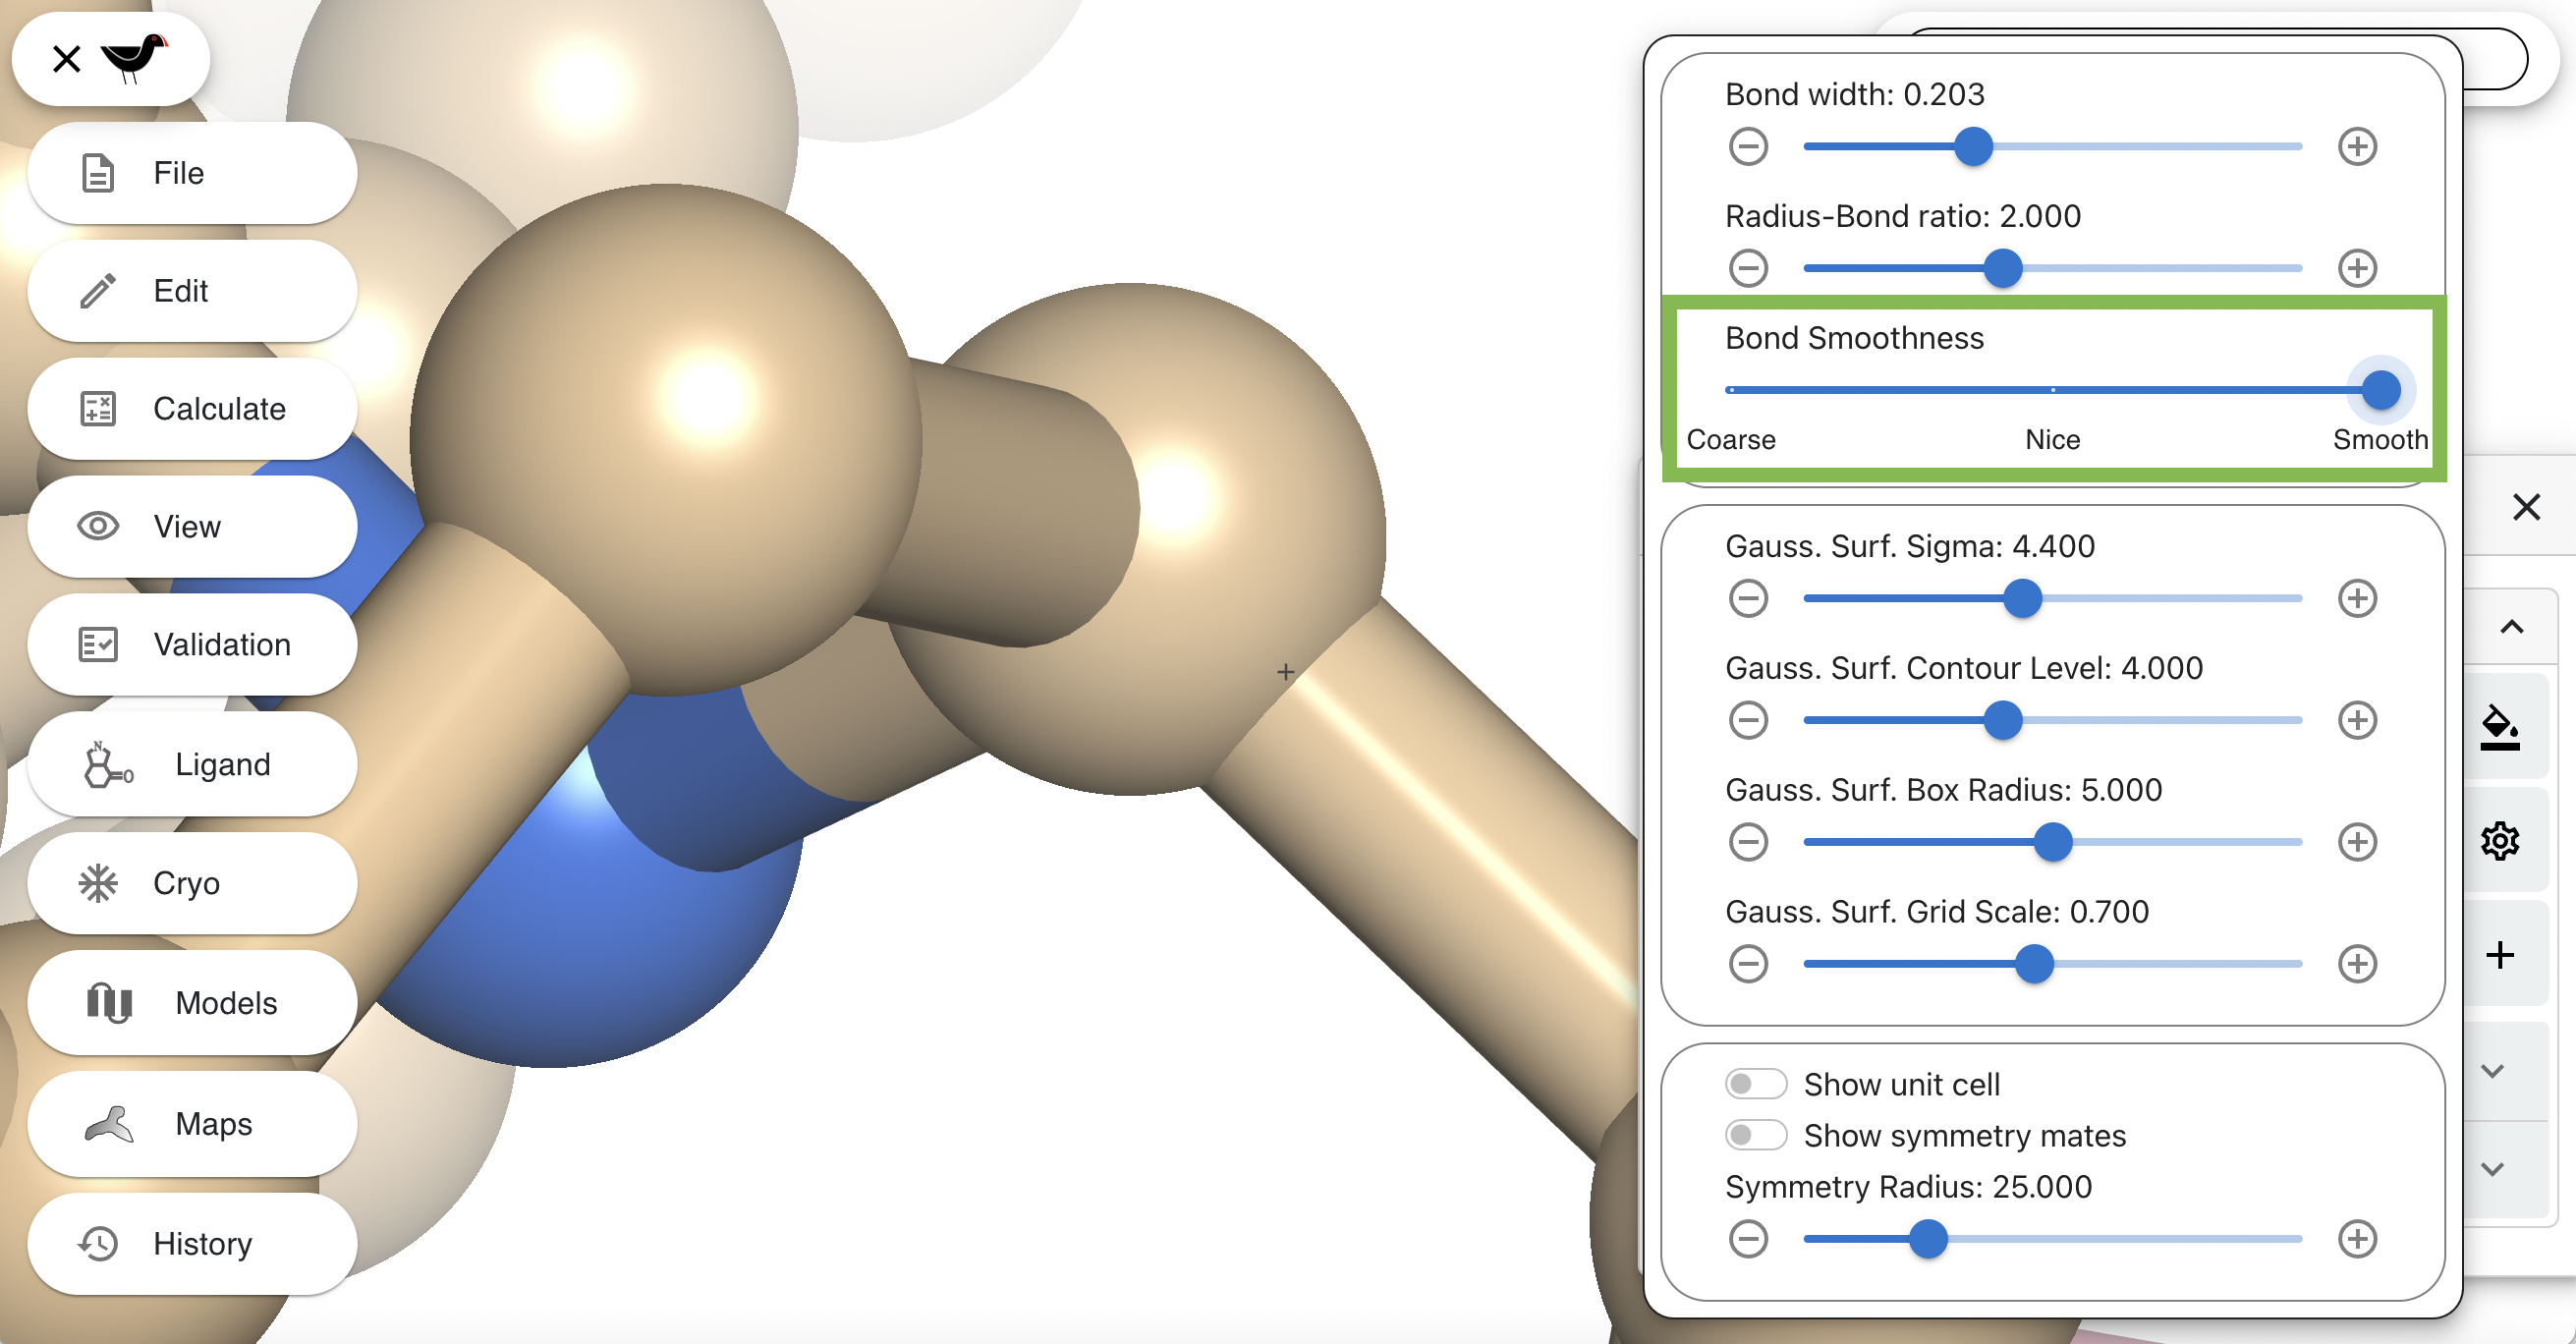
Now change “Bond Smoothness” to smooth to produce a much rounder cylinder:
Symmetry
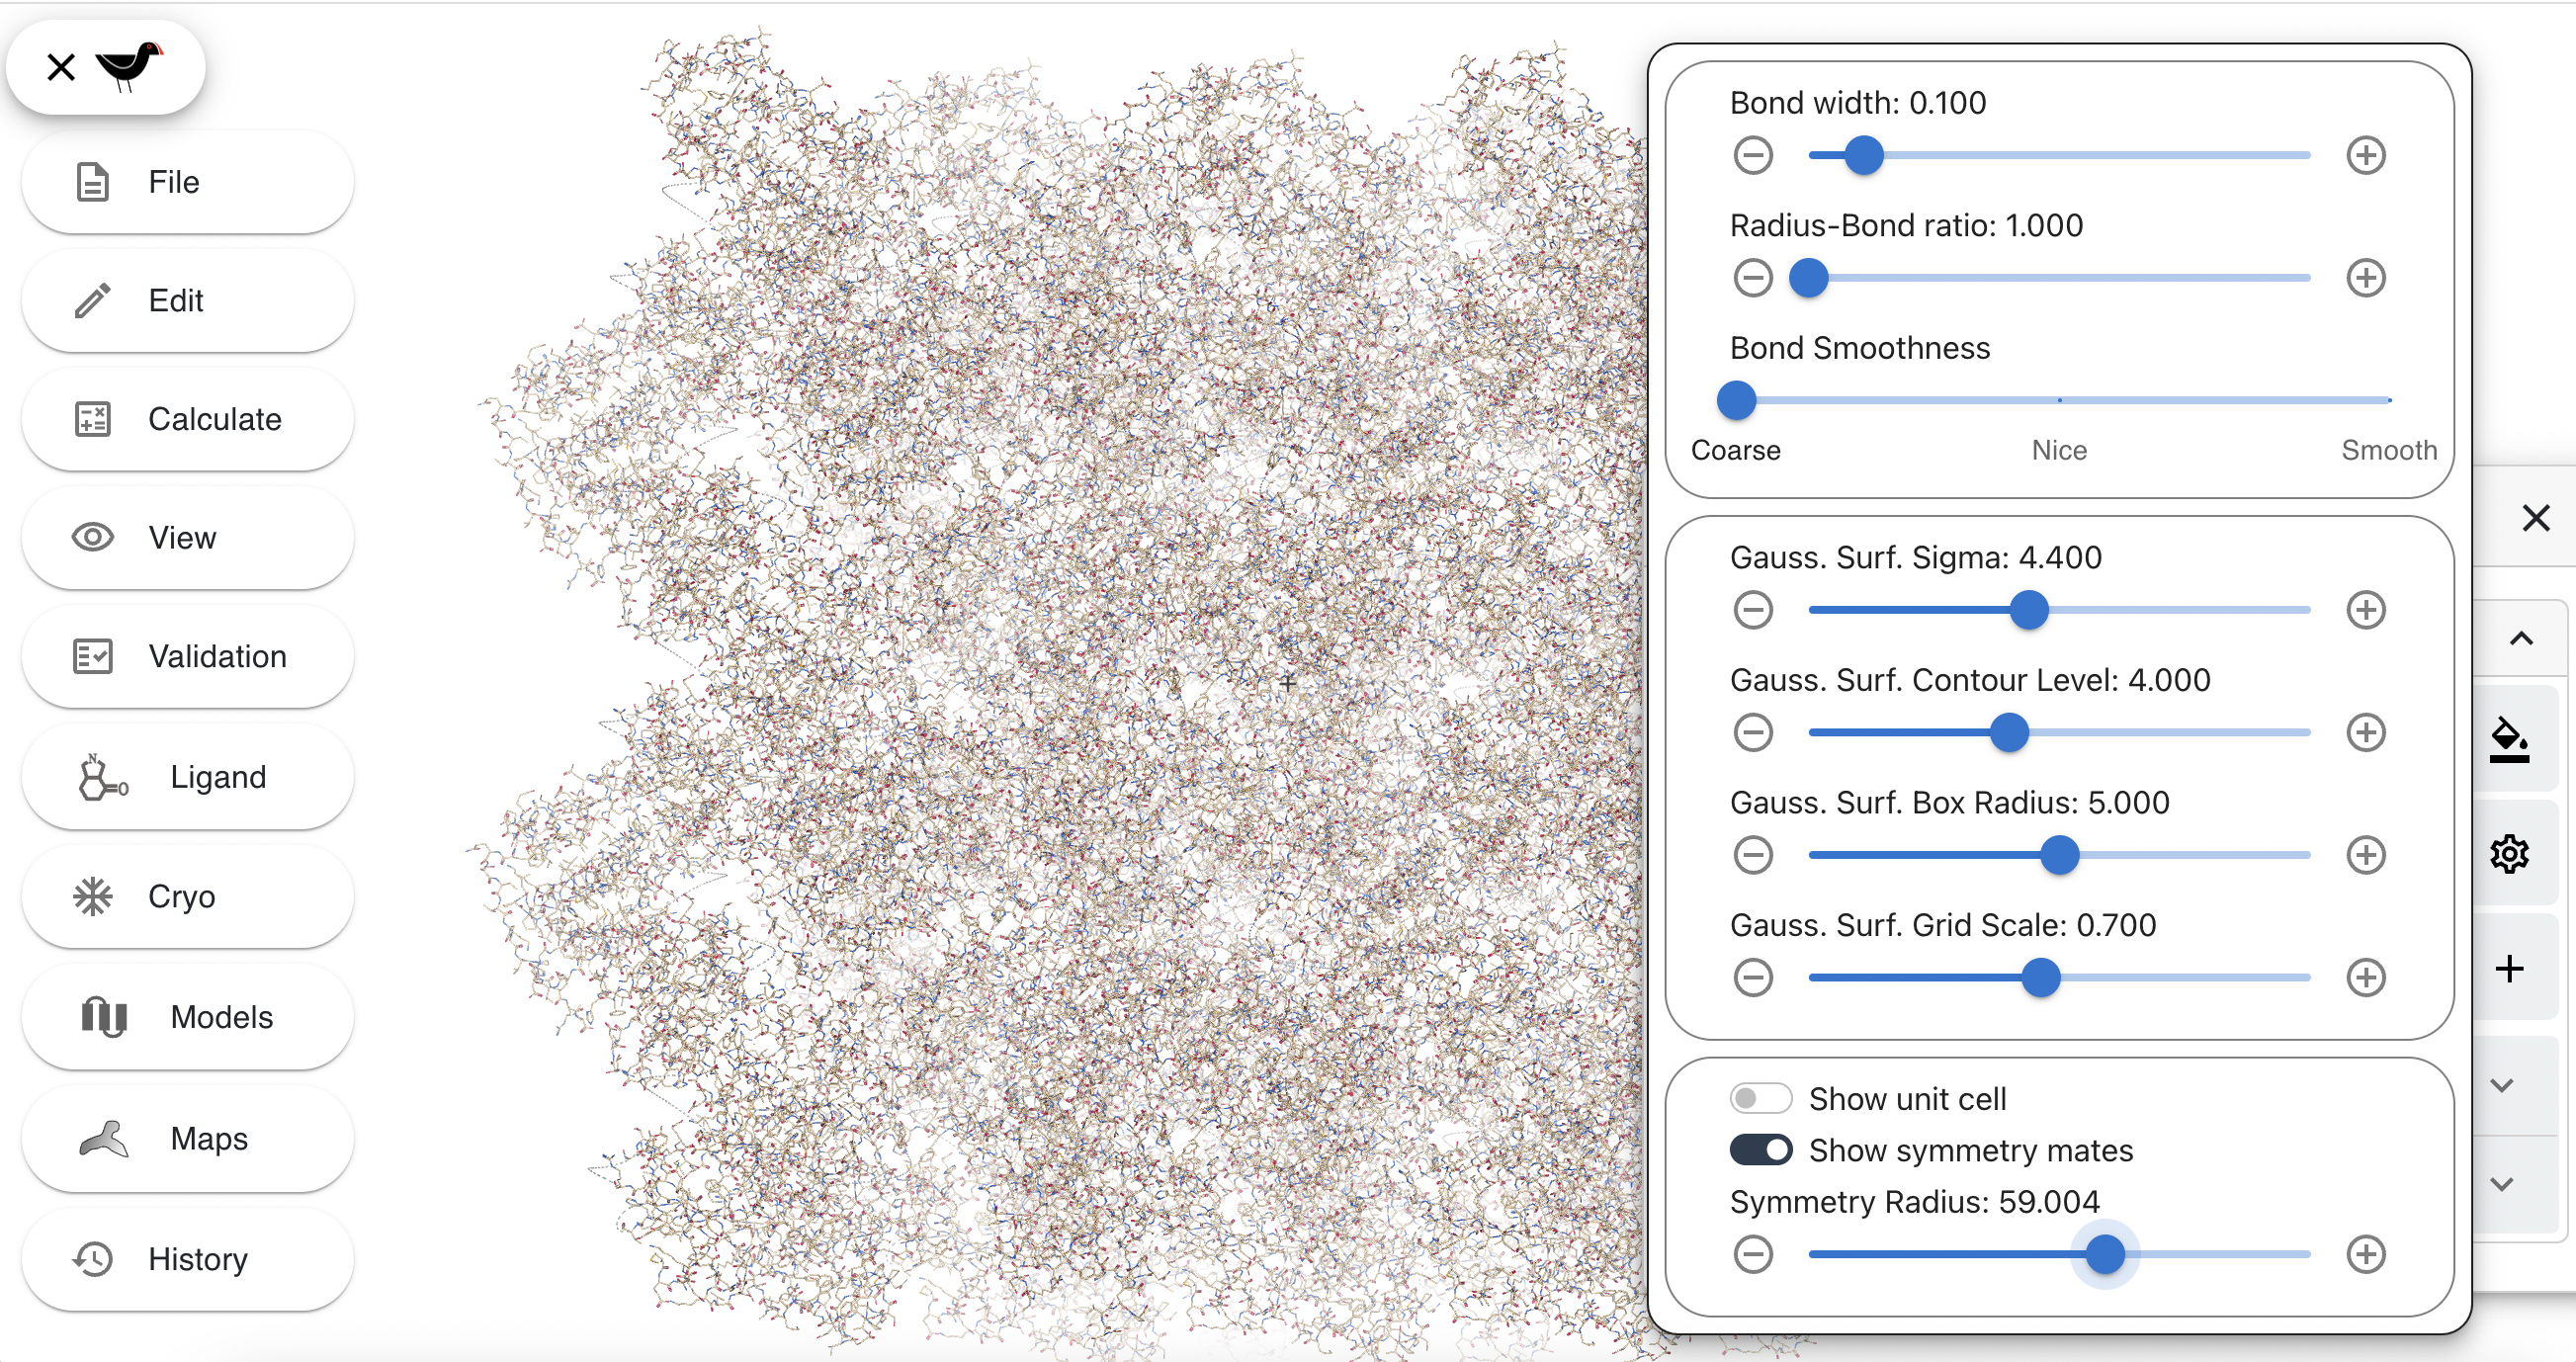
Molecular models obtained from crystallographic methods calculations normally contain information about the symmetry of the crystal. This information can be used to display symmetry mates of the molecule. Zoom the view out so that there is space around the view of the molecule. Click on the gear wheel icon (described in previous section) to show the draw settings.
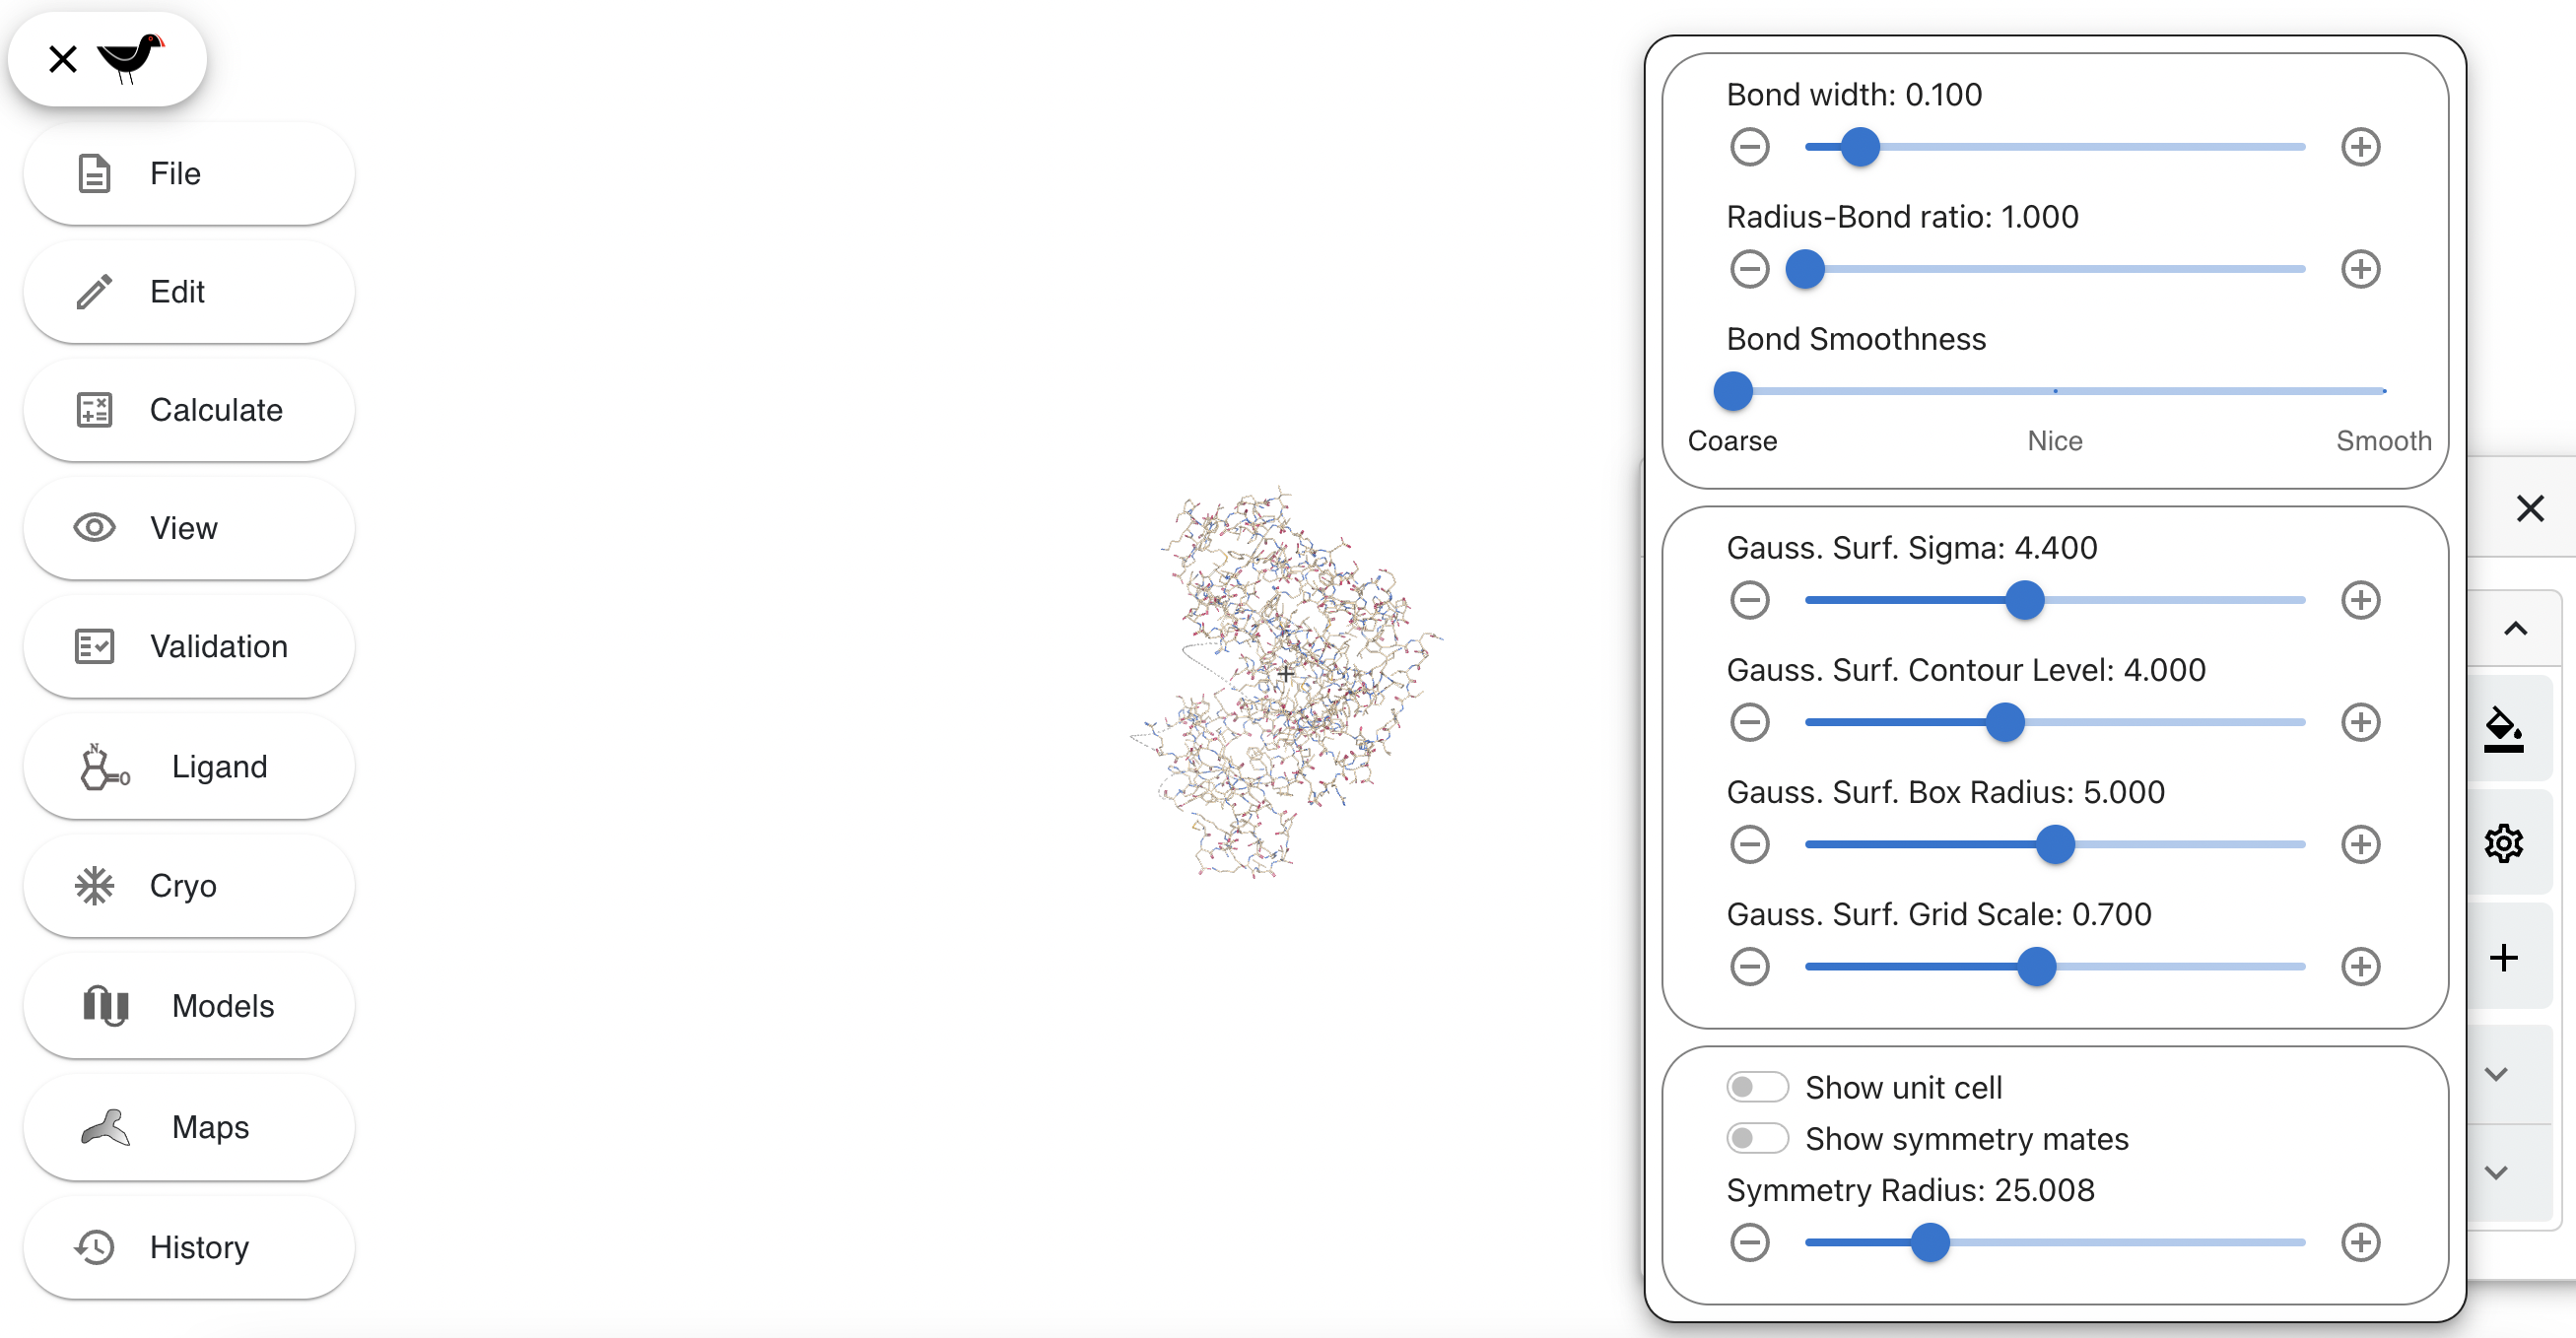
Then turn on the “Show symmetry mates” button. This will show symmetry mates within the distance specified by the “Symmetry Radius” slider immediately below. Play around with the radius.
Surfaces
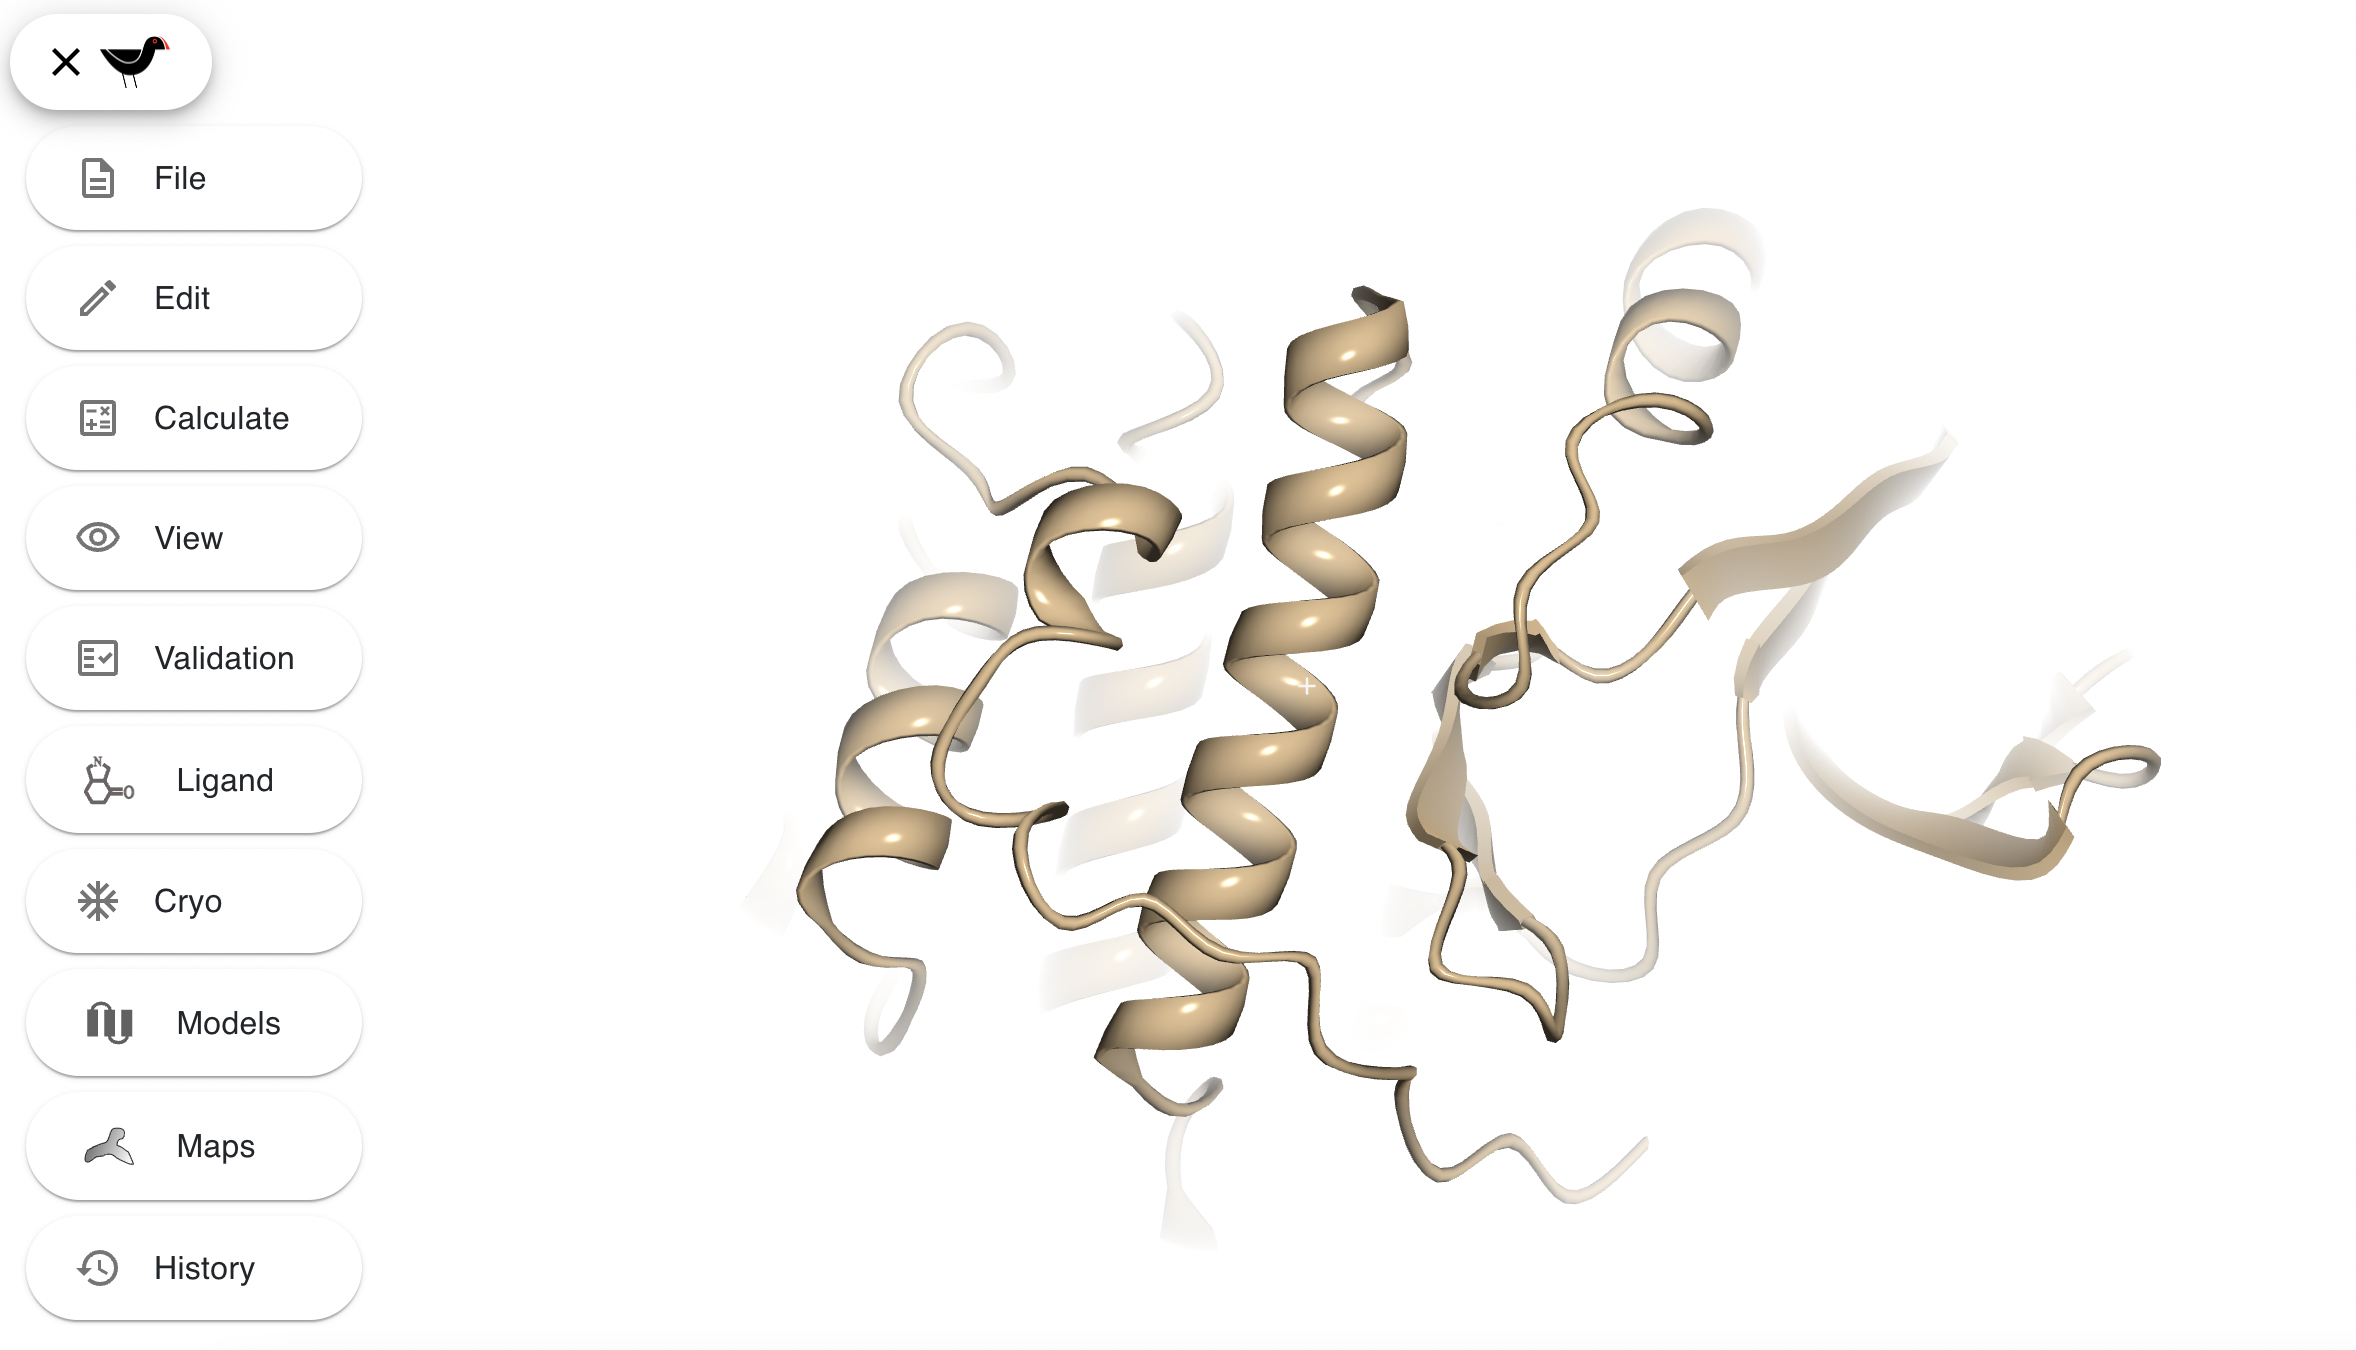
While completing previous sections you may have noticed buttons labelled with “Surf.” and “Gauss.” among the different representation styles for a molecule. These buttons let you display your model as a surface. Let’s first try to draw a Gaussian surface. Go to the “Models” window and click on the button labelled with “Gauss.”.
Moorhen displays the model as a Gaussian surface.
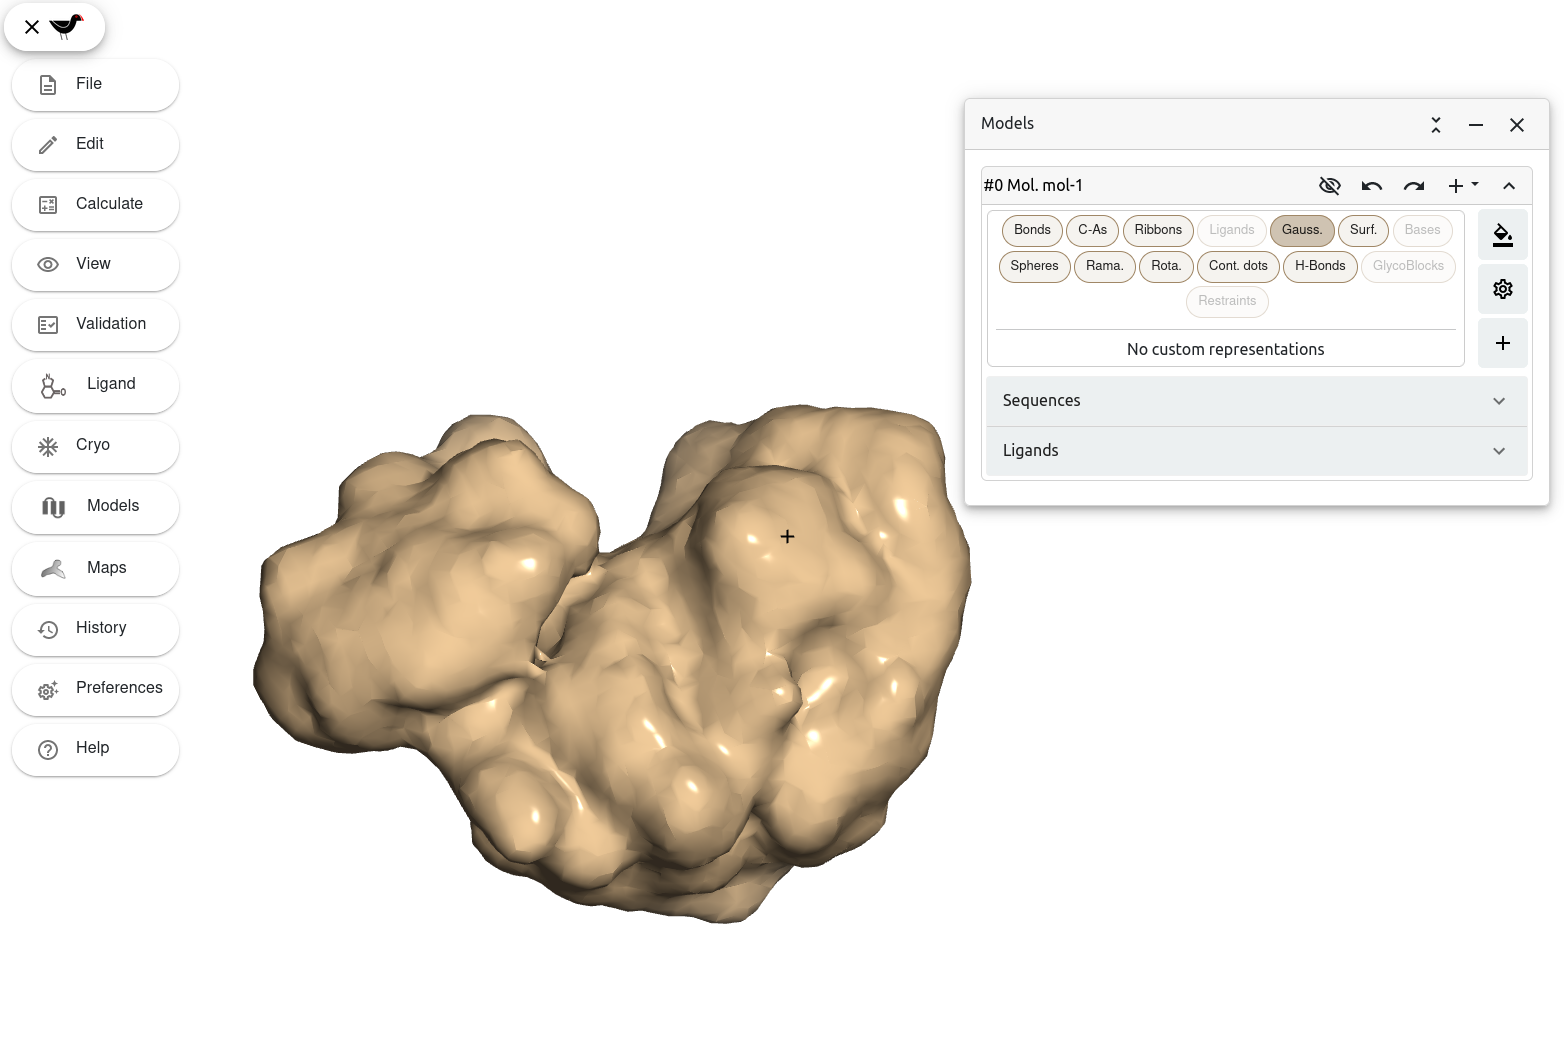 Note: Notice how we have turned off Bond representations to have a better view of the surface. We have also changed the “Scene preset” to figure making.
Moorhen lets you modify the different parameters used to calculate this surface (and therefore the way it looks) under the settings menu. To open this menu, click on the wheel button in the “Models” window. You can find this button right under the colour schemes button and on top of the additional represetations button.
Moorhen displays a popover with different representation settings.
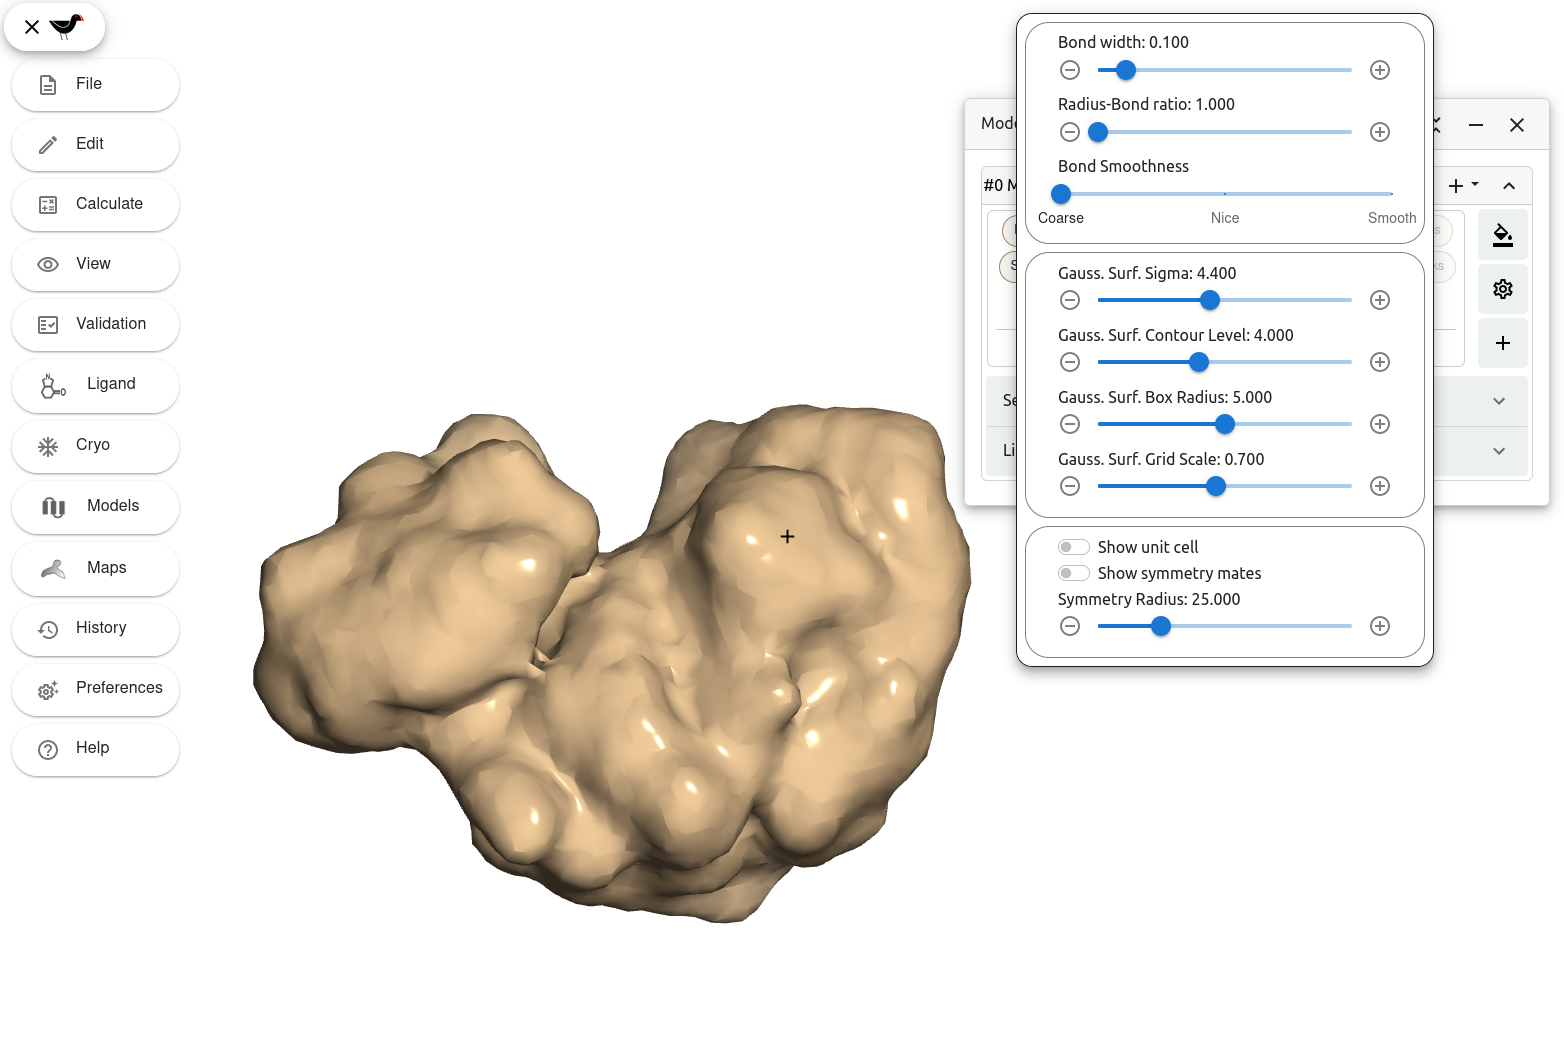
Right under the settings for the bond representations and above the settings for model symmetry, we find a series of sliders for different parameters labelled “Gauss. Surf.” Try to move the different sliders and see how the Gaussian surfaces changes. By applying these changes Moorhen gives us full control of how the surface is contoured.
Let’s now try a different type of molecule surface representation. Turn off the Gaussian surface by clicking on the “Gauss.” button and turn on the “Surf.” representation button. Don’t worry if this takes a bit of time, the calculations involved in this representation are more complex than Gauss. surfaces.
After a few seconds, Moorhen displays the model as a molecular surface.
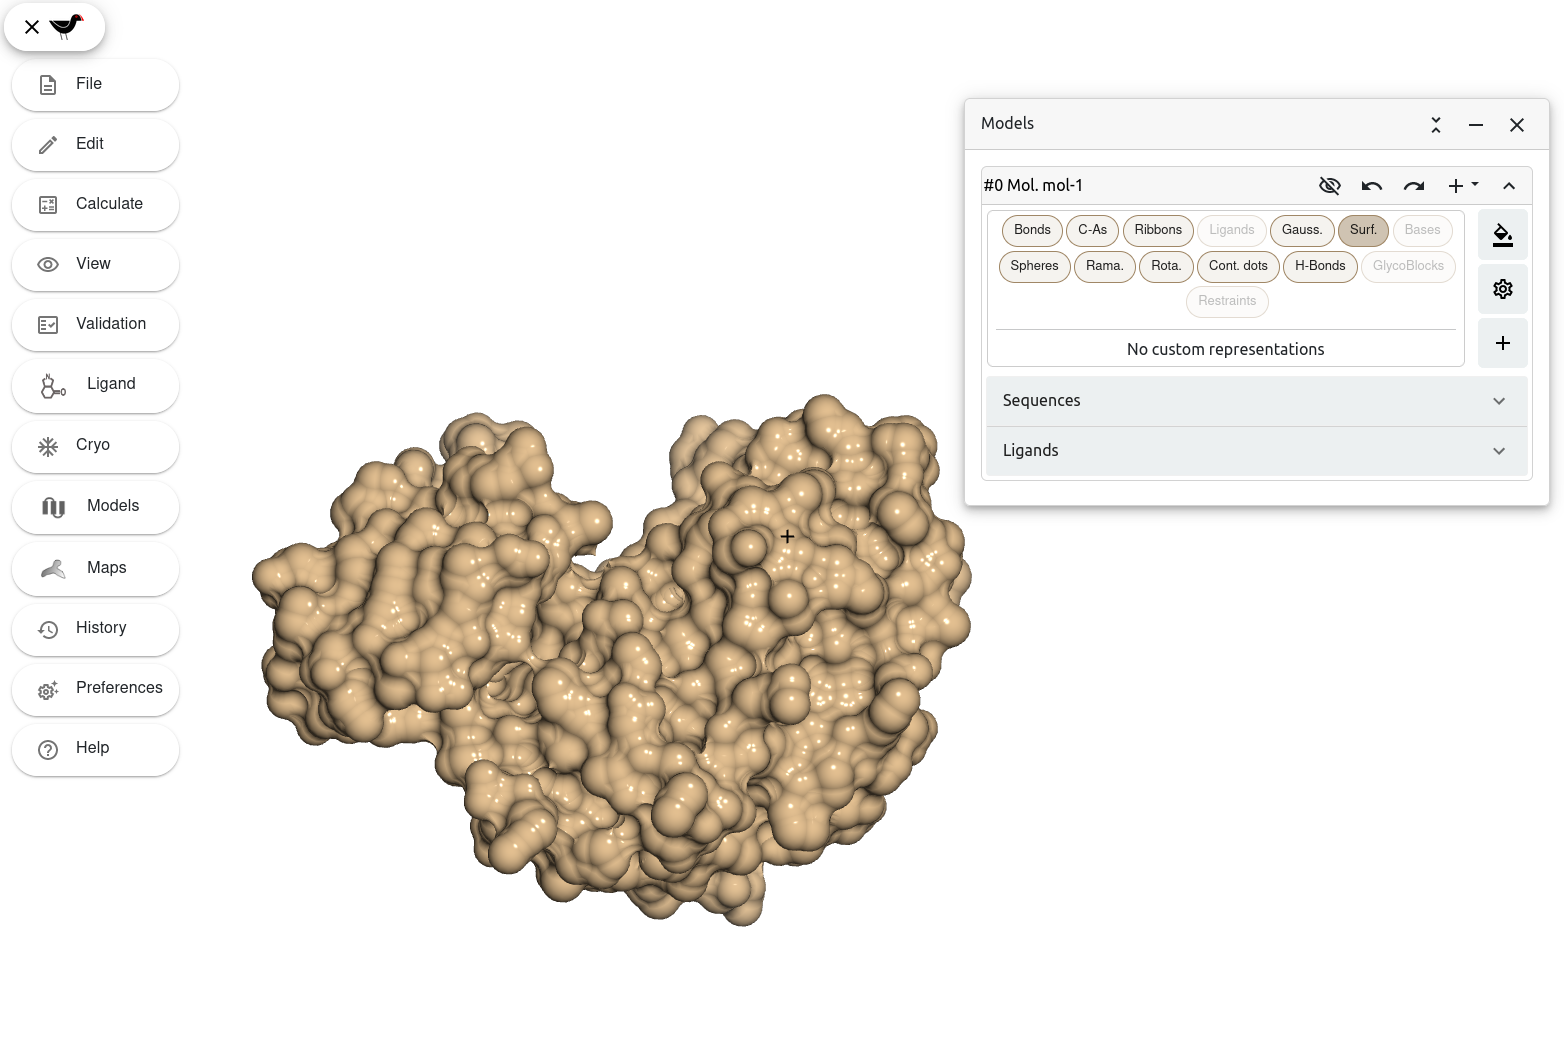
Moorhen has now combined the van der Waals surfaces of the atoms in the molecule into a single surface representation. As you can see, this representation offers great detail of the surface area of the biomolecule that is accessible to solvent, or in other words the so-called solvent-accessible surface area (SASA). Can you spot any big solvent-exposed cavity in the molecule’s surface where a ligand could potentially bind?
Labelling atoms, bond lengths and other distances
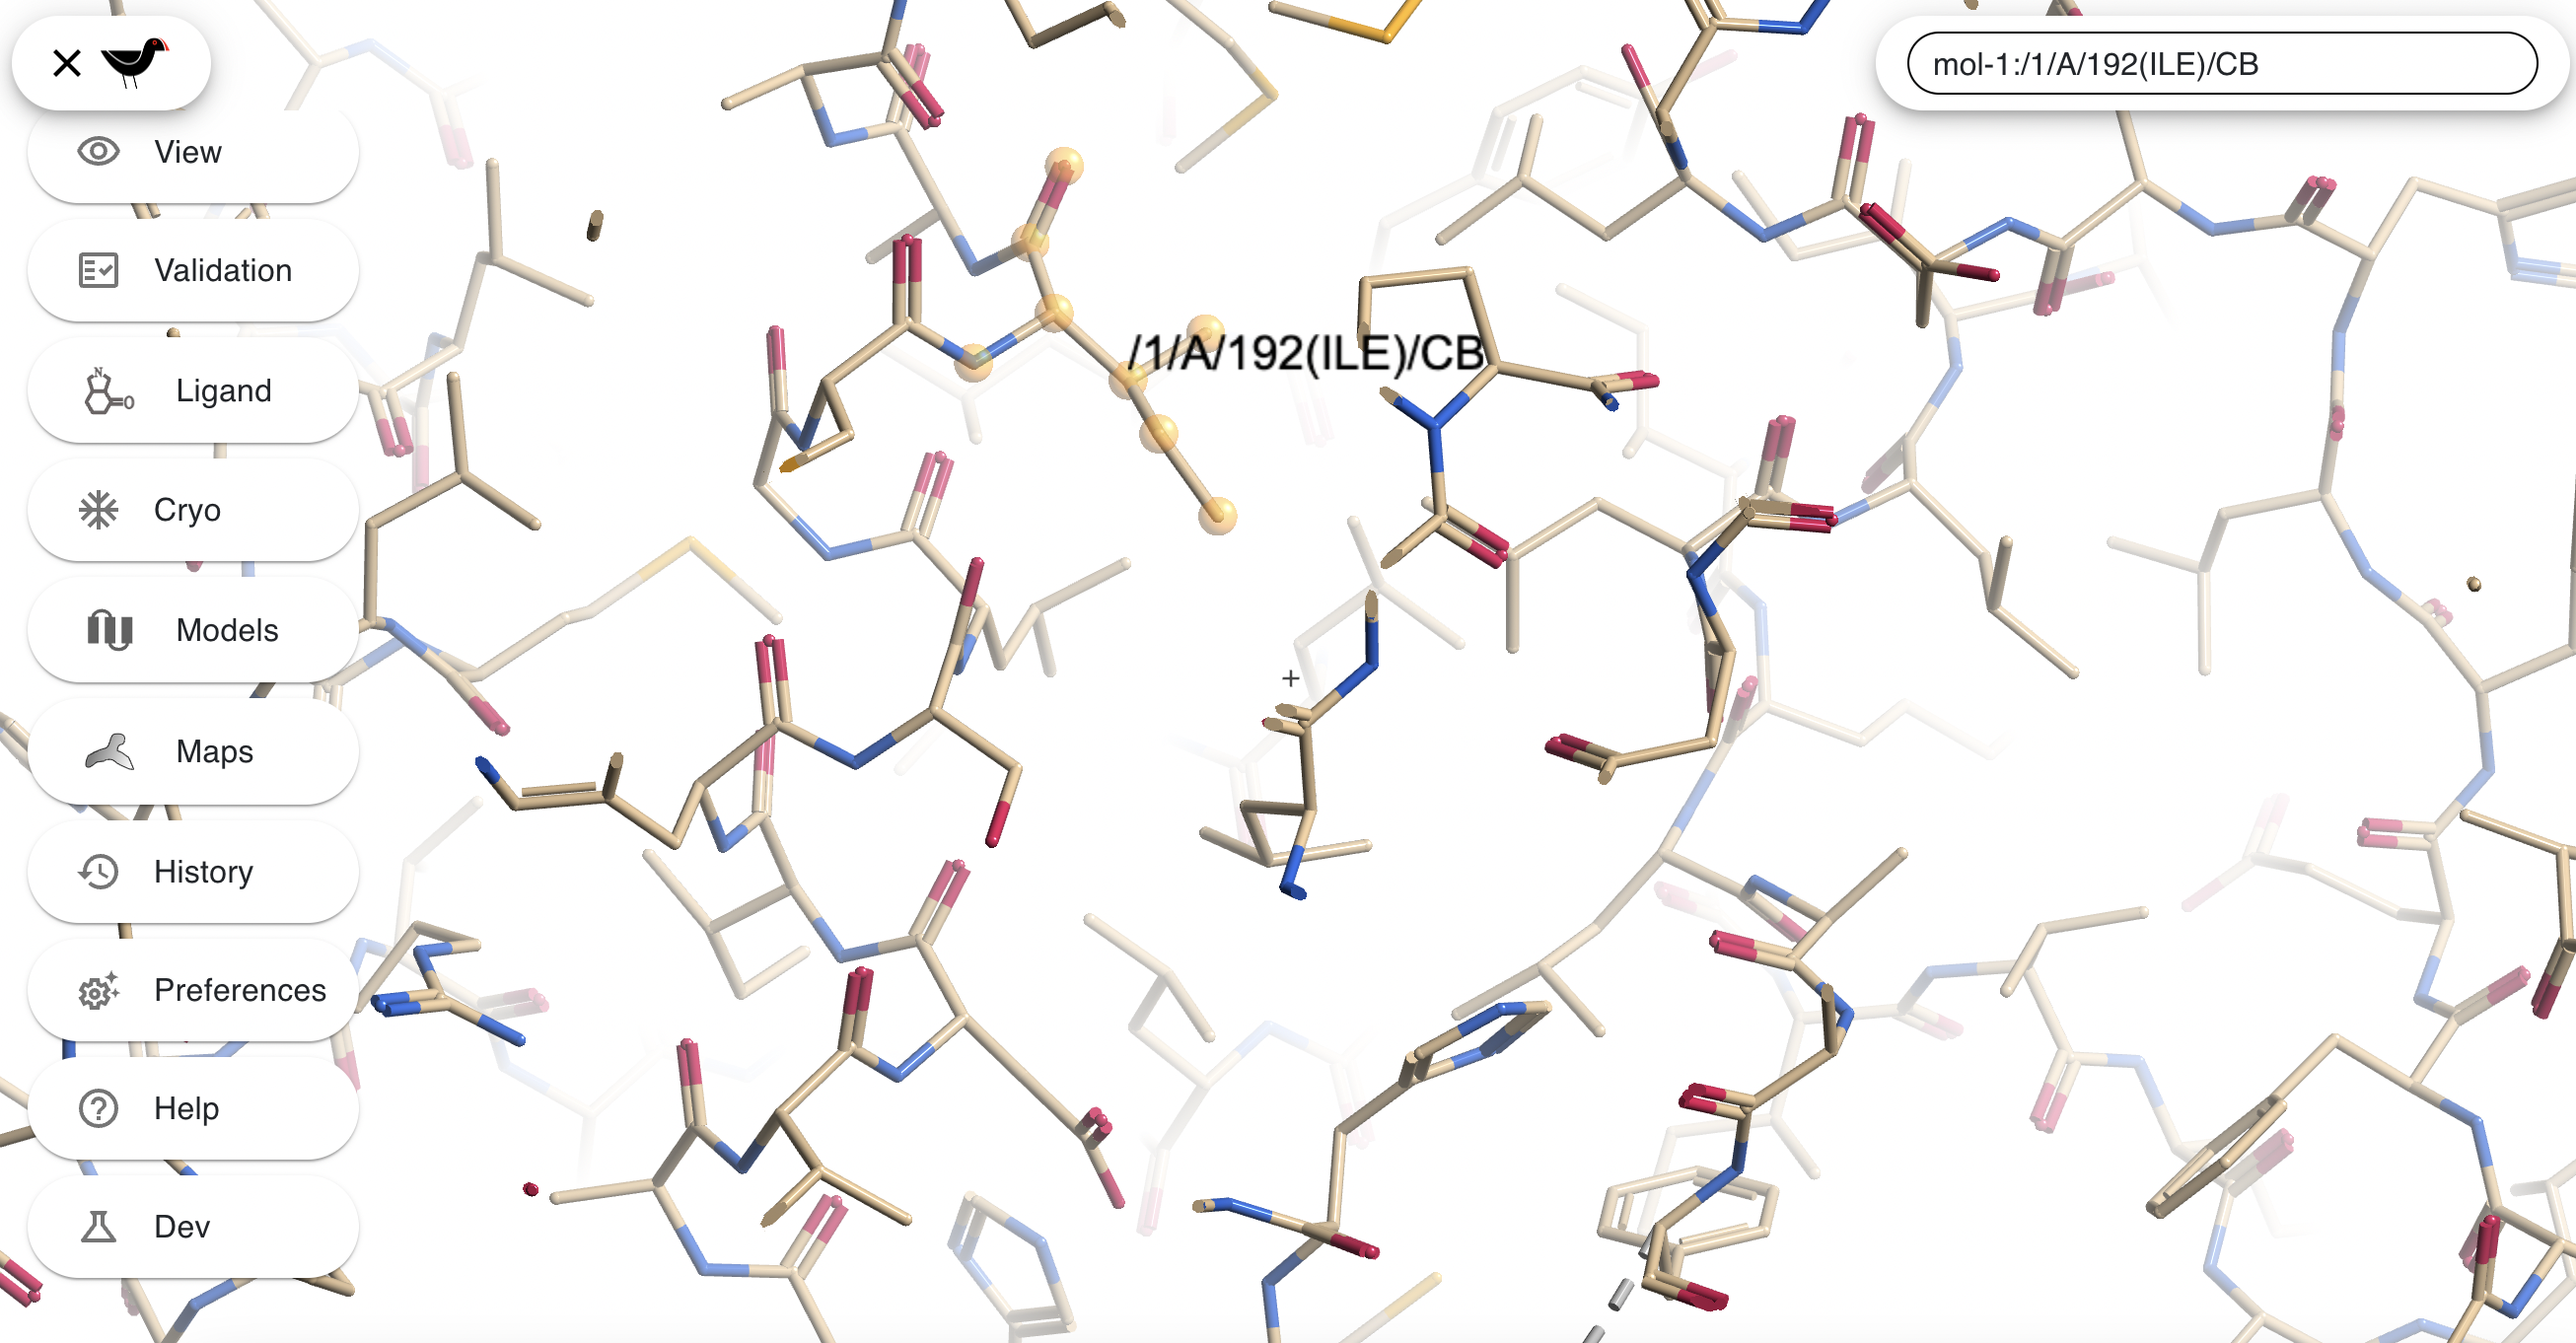
If you hold down the “l” key whilst clicking on an atom the atom will be given a text label:
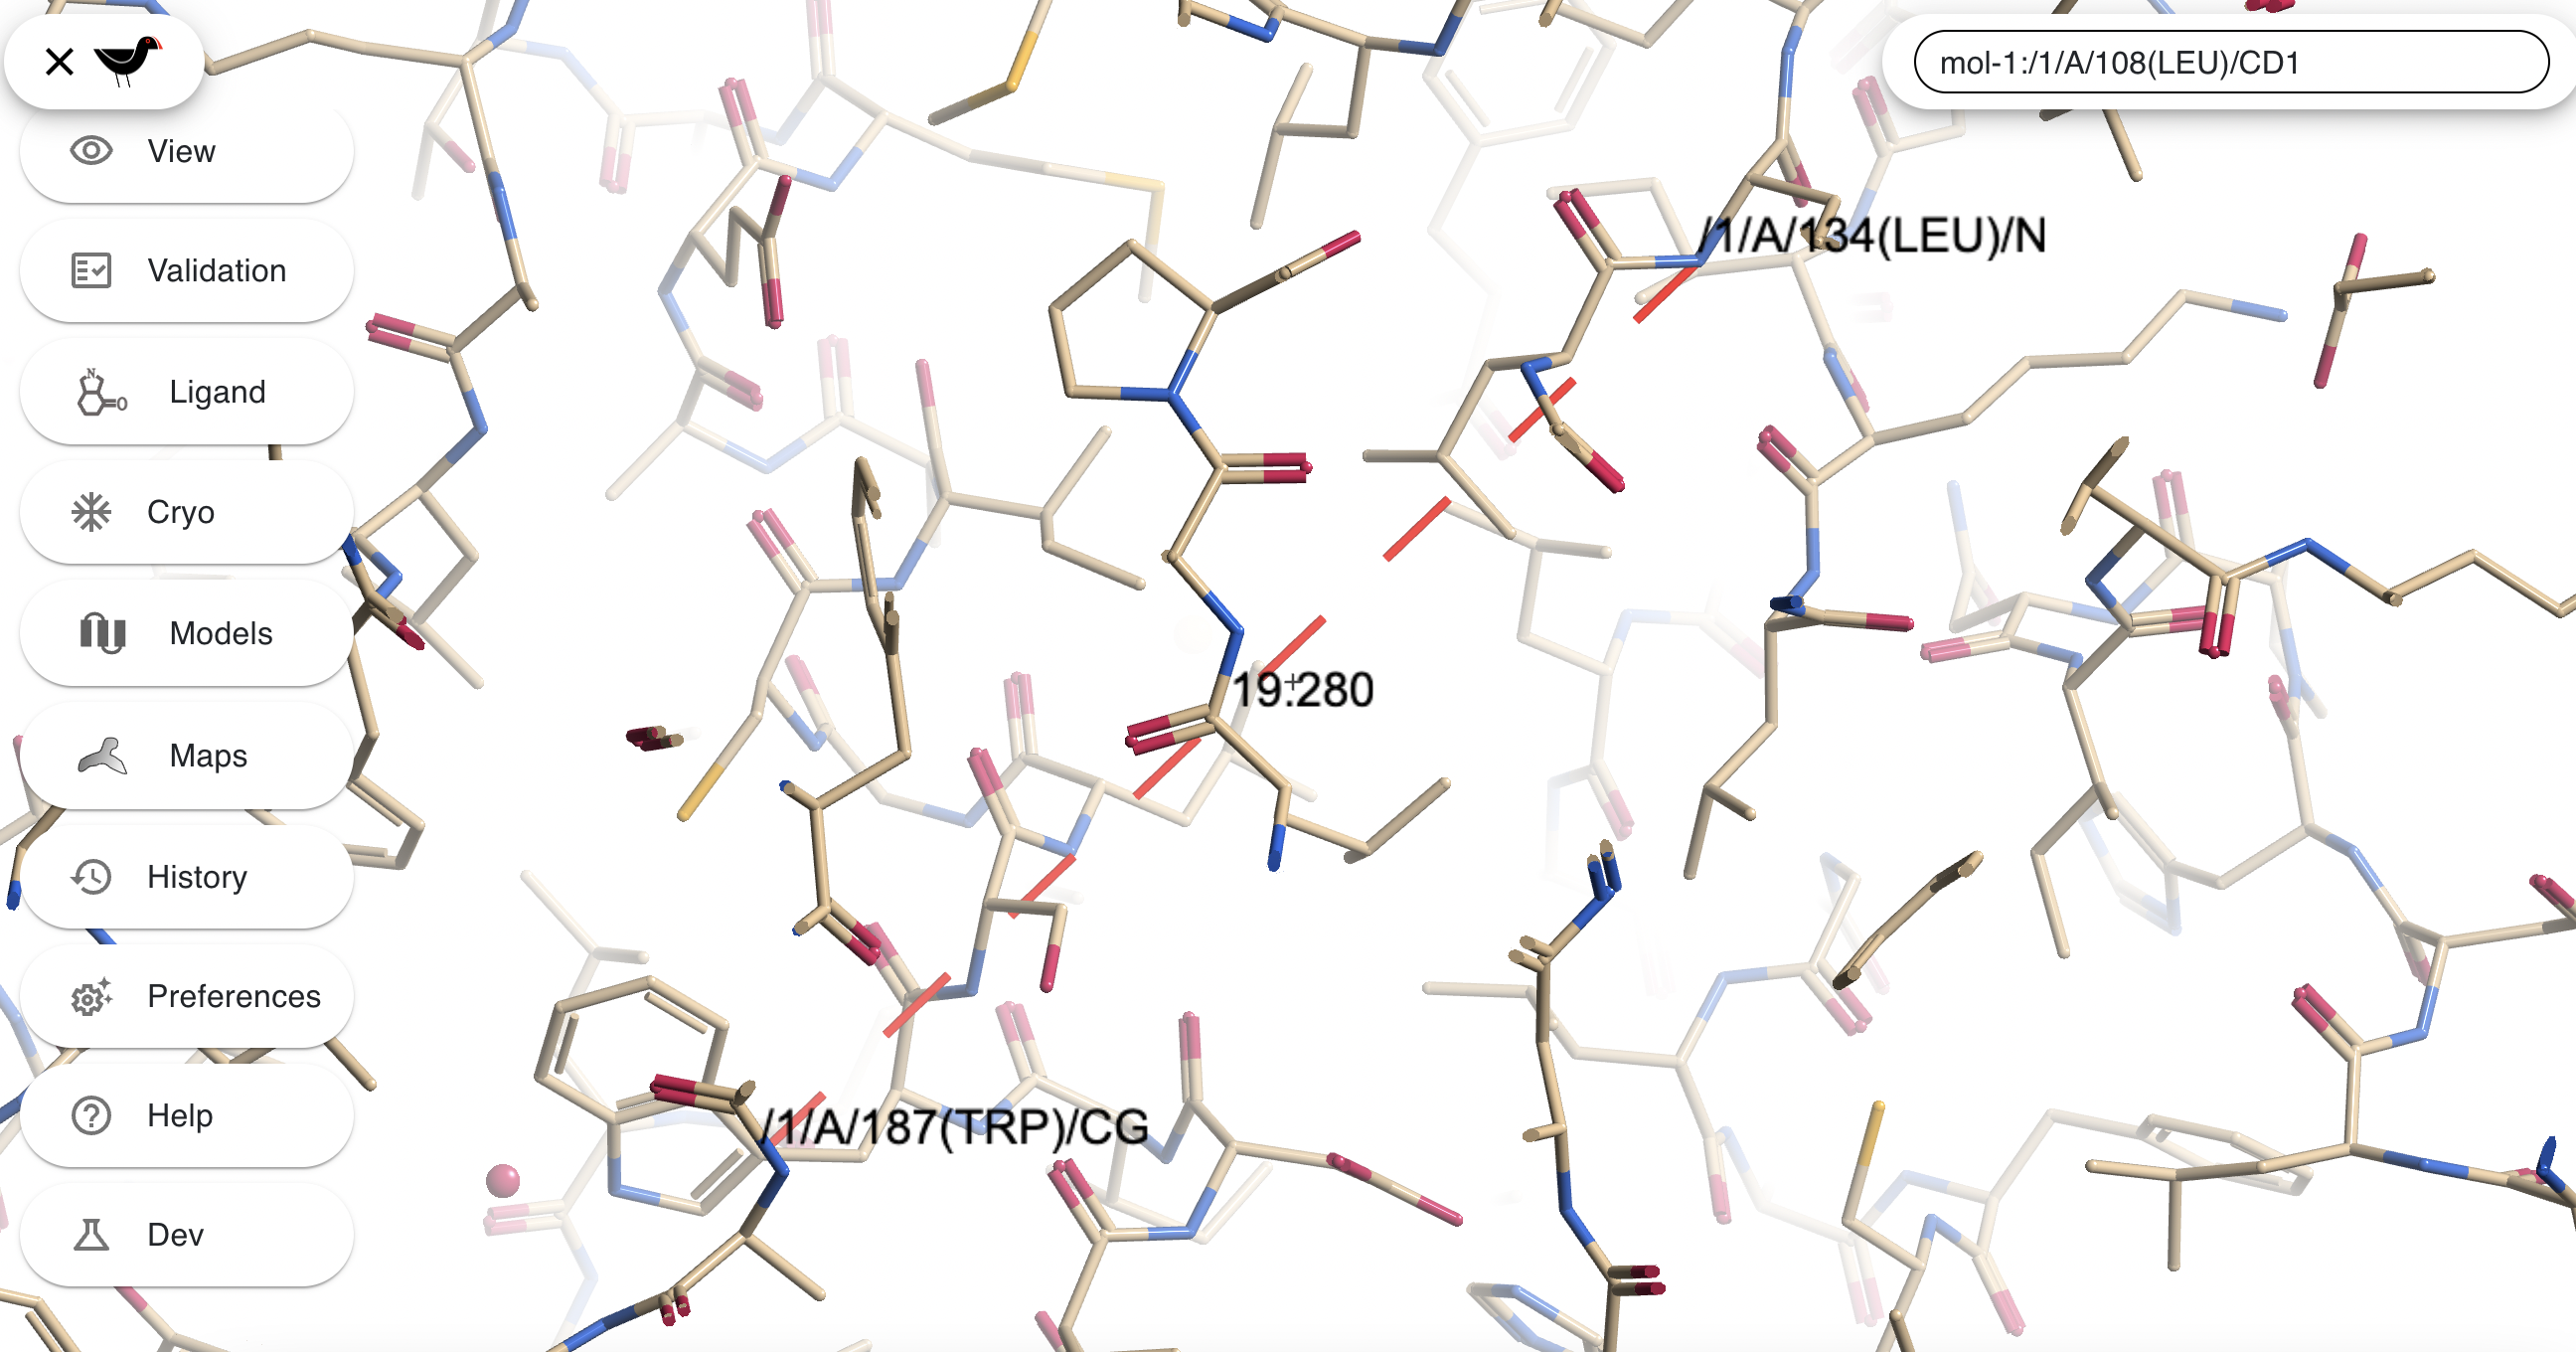
If you hold down the “m” key whilst clicking on one atom and then another then both atoms will be labelled and the distance between them displayed
Pressing “c” will clear all atom and distance labels.
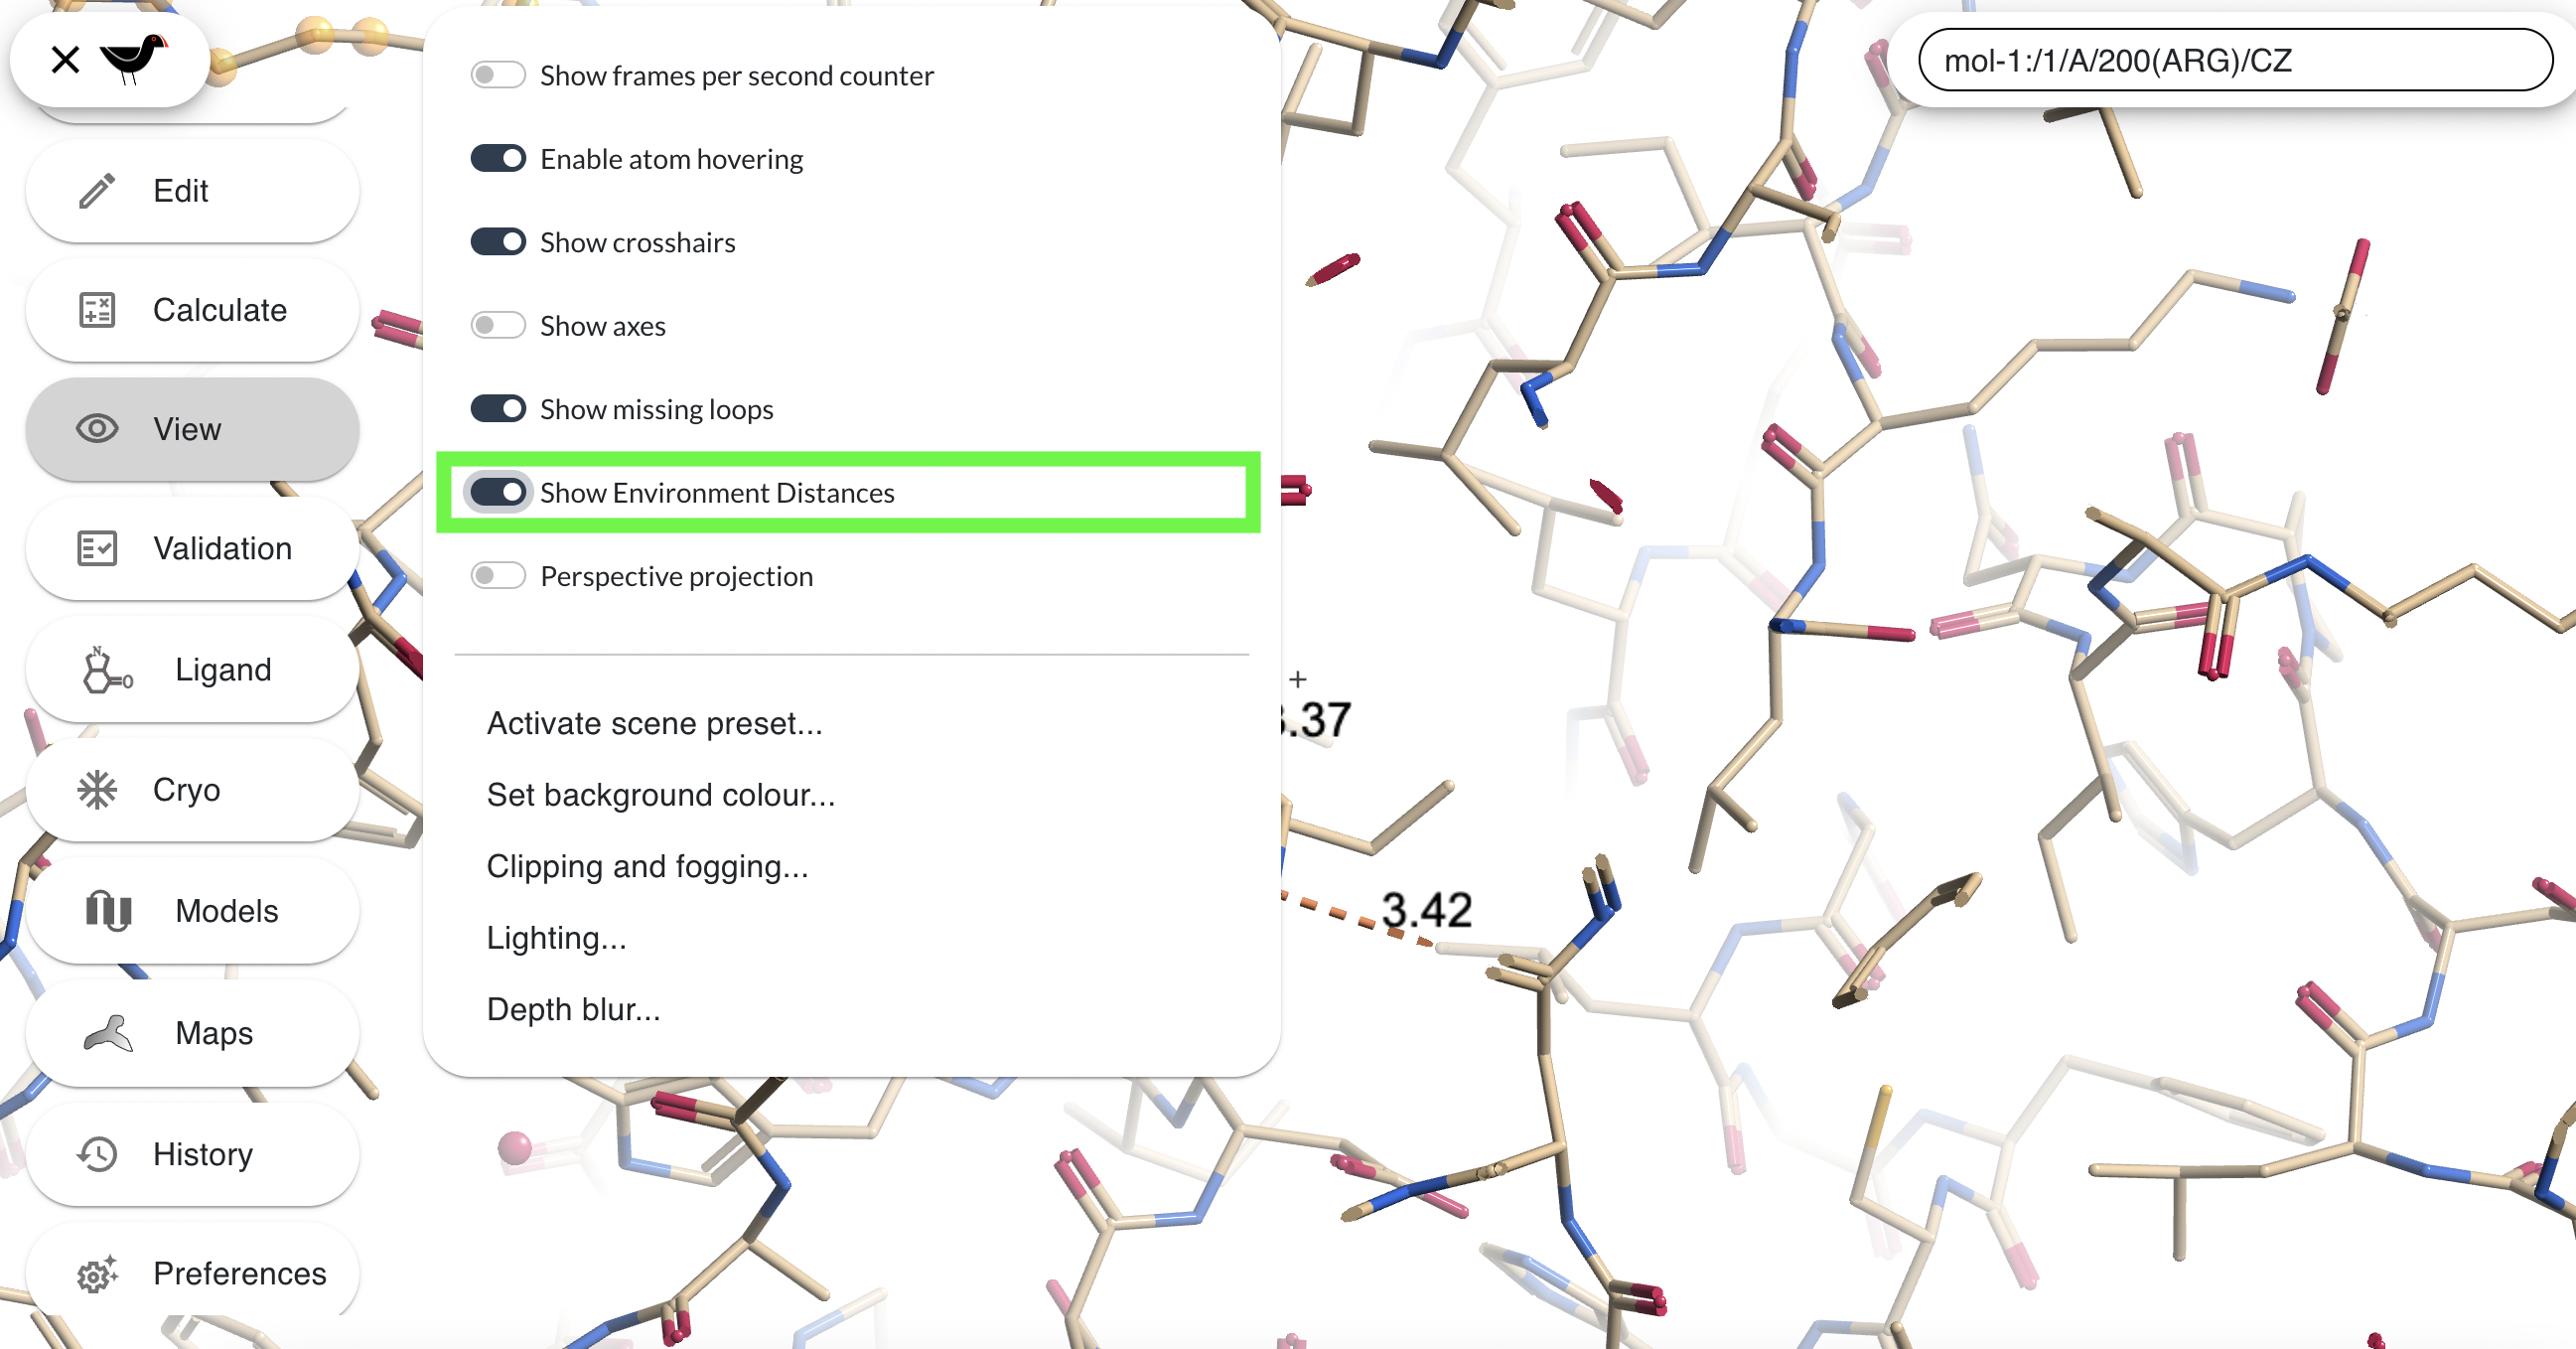
“View”, ““Show Environment Distances” will make Moorhen display hydrogen bonds (purple) and other potentially close contacts (browny-orange) between whatever is at centre of sceen and its immediate environment.
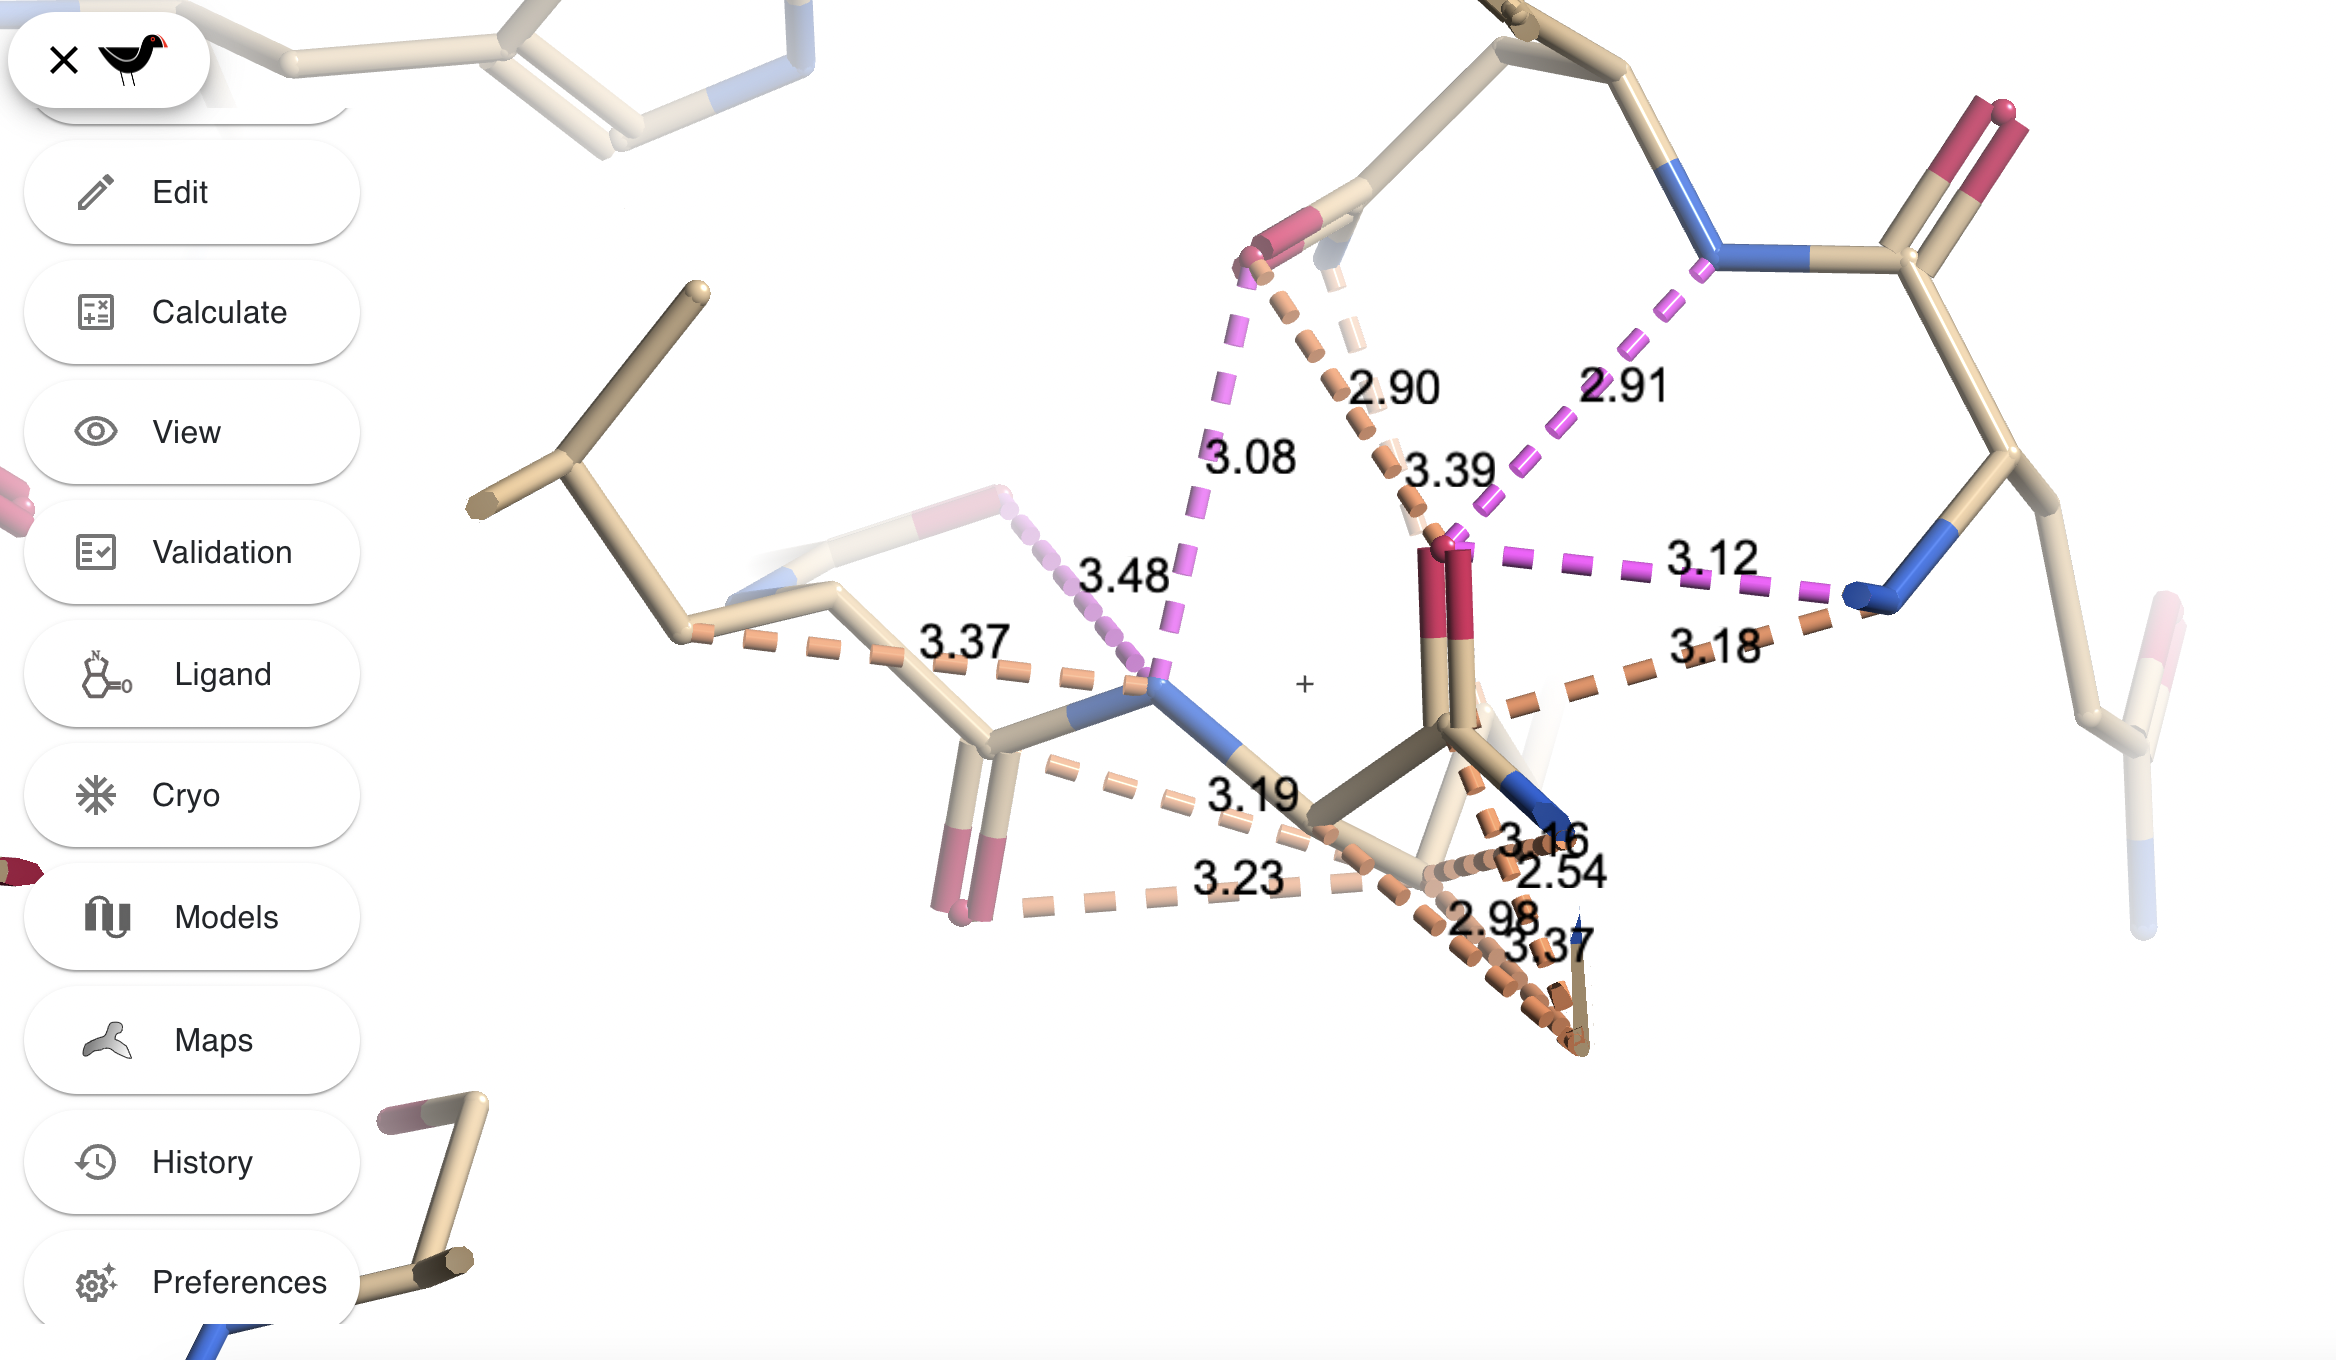
See also “Preferences”, “Fonts…” which will affect all of the above.
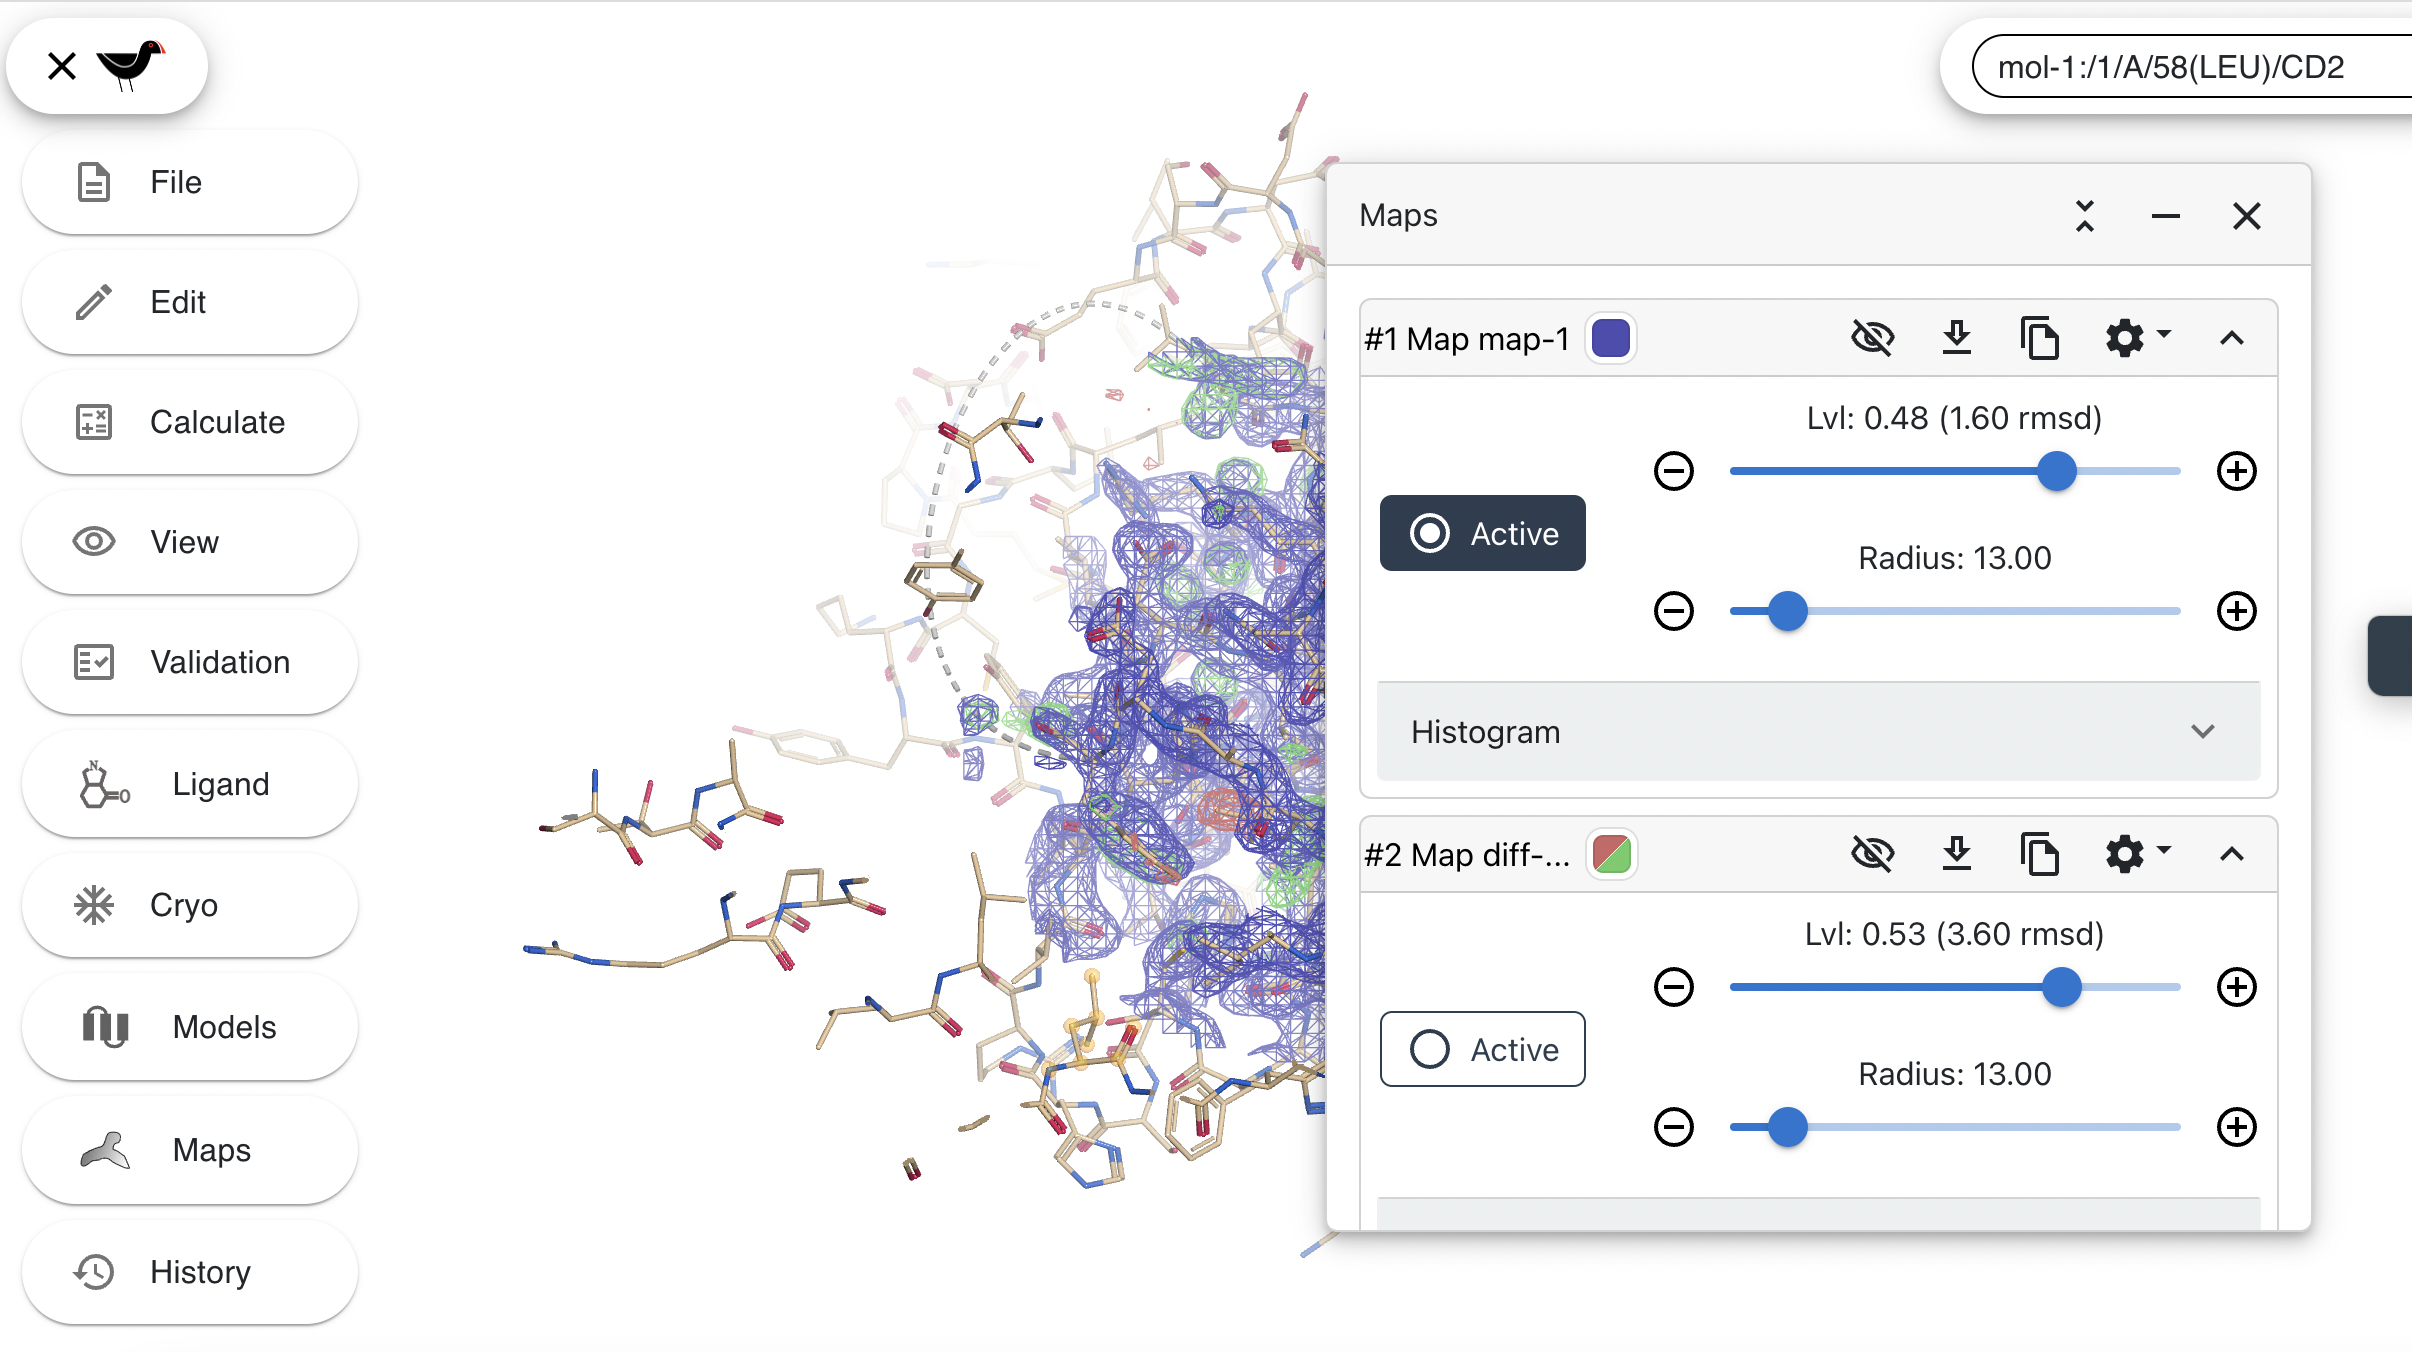
Maps and map masking
The Maps dialog allow you to control the display of the map.
- Click Maps
{Moorhen shows the Maps dialog}
Each map has its own “card”
- Click on the “eye” icon the display or undisplay that particular map.
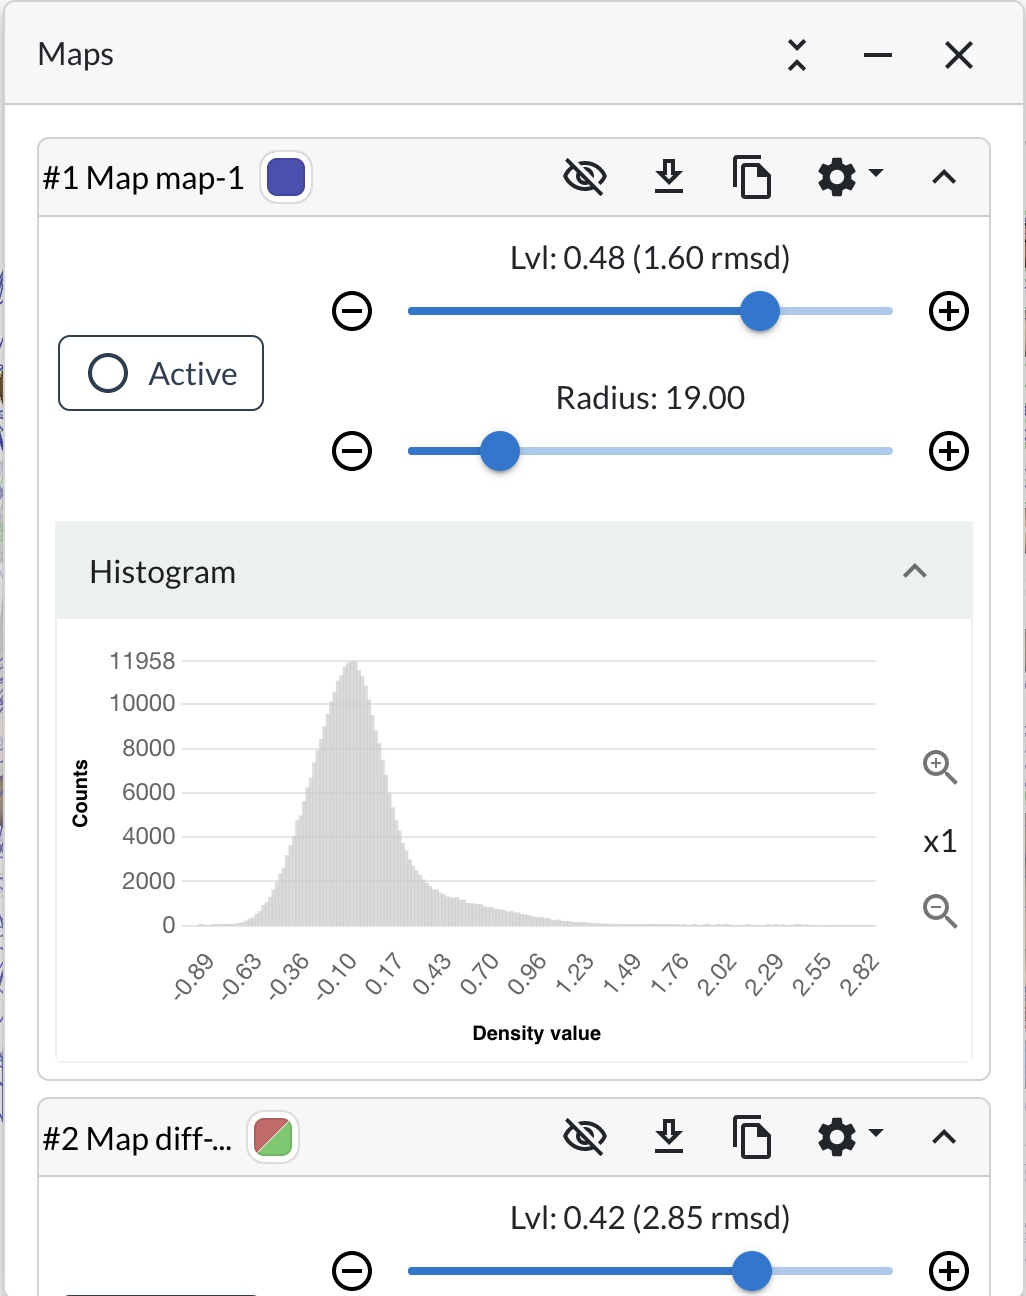
There are sliders for the contour level and the map display radius. You can adjust these, but be aware that it invokes considerable computations when can take some time to updaets/refresh the display (this is particularly true for Cryo-EM reconstructions).
- Click on Histogram button
{Moorhen reveals the density histogram for that map}
Generally speaking, “Fo-Fc” style difference maps are expected to have a normal distribution and “2Fo-Fc” style maps will have a skewed normal distribution (the skew to to the side of higher density values).
Histograms of maps from cryo-EM reconstructions generally don’t look normal.
Ligand-masked Map
We will use the reference structure for Tuturial-1.
- Click File
- in the “Fetch coords from online services” Choose “PDBe” (it’s the default)
- Type “2vtq” in the entry
- Click Fetch
Let’s find the ligand of that reference structure:
- Click on Models {Moorhen shows the “Models” dialog}
- See that the “Bonds” button is activated (if not, click it on now).
To undisplay the tutorial model:
- Click on the eye button in the “Models” card for “mol1”
{Moorhen undisplayed mol-1}
- In the card for the “2vtq” Model, click on the Ligands tab.
{Moorhen reveals the ligands in this molecule (in this case, there is only one)}
- Click on the label “A/1299 (LZA)”
{Moorhen brings the ligand to the centre of the screen}
- Close the “Models” dialog.
- Open the “Maps” dialog
- Click on the Cryo button
- Click Map masking…
There are a number of methods we can use for selection
- Change “By molecule” to “By ligand”
{Moorhen opens another selection tool, we’ll get to it in a second}
- Choose “map-1” for the Map difference map #FIXME
- Choose “2vtq” for the molecule
- Turn on the Invert map switch
- Click OK
{Moorhen creates a masked map over the ligand}
Now let’s change the map sampling (smoother maps are more attractive)
- In Preferences → Set map sampling rate change to “2.1” - The larger the sampling rate, the smoother the map, but also the slower to draw.
Clip, Fog and Lighting Effects
In addition to selecting what is drawn and how it is drawn, you may wish to tweak how your scene is “lit” and also the front and back “clipping” planes (i.e. hiding things too “near” or too “far” to show a particular “slab”). These setting are controlled from the “View” menu:
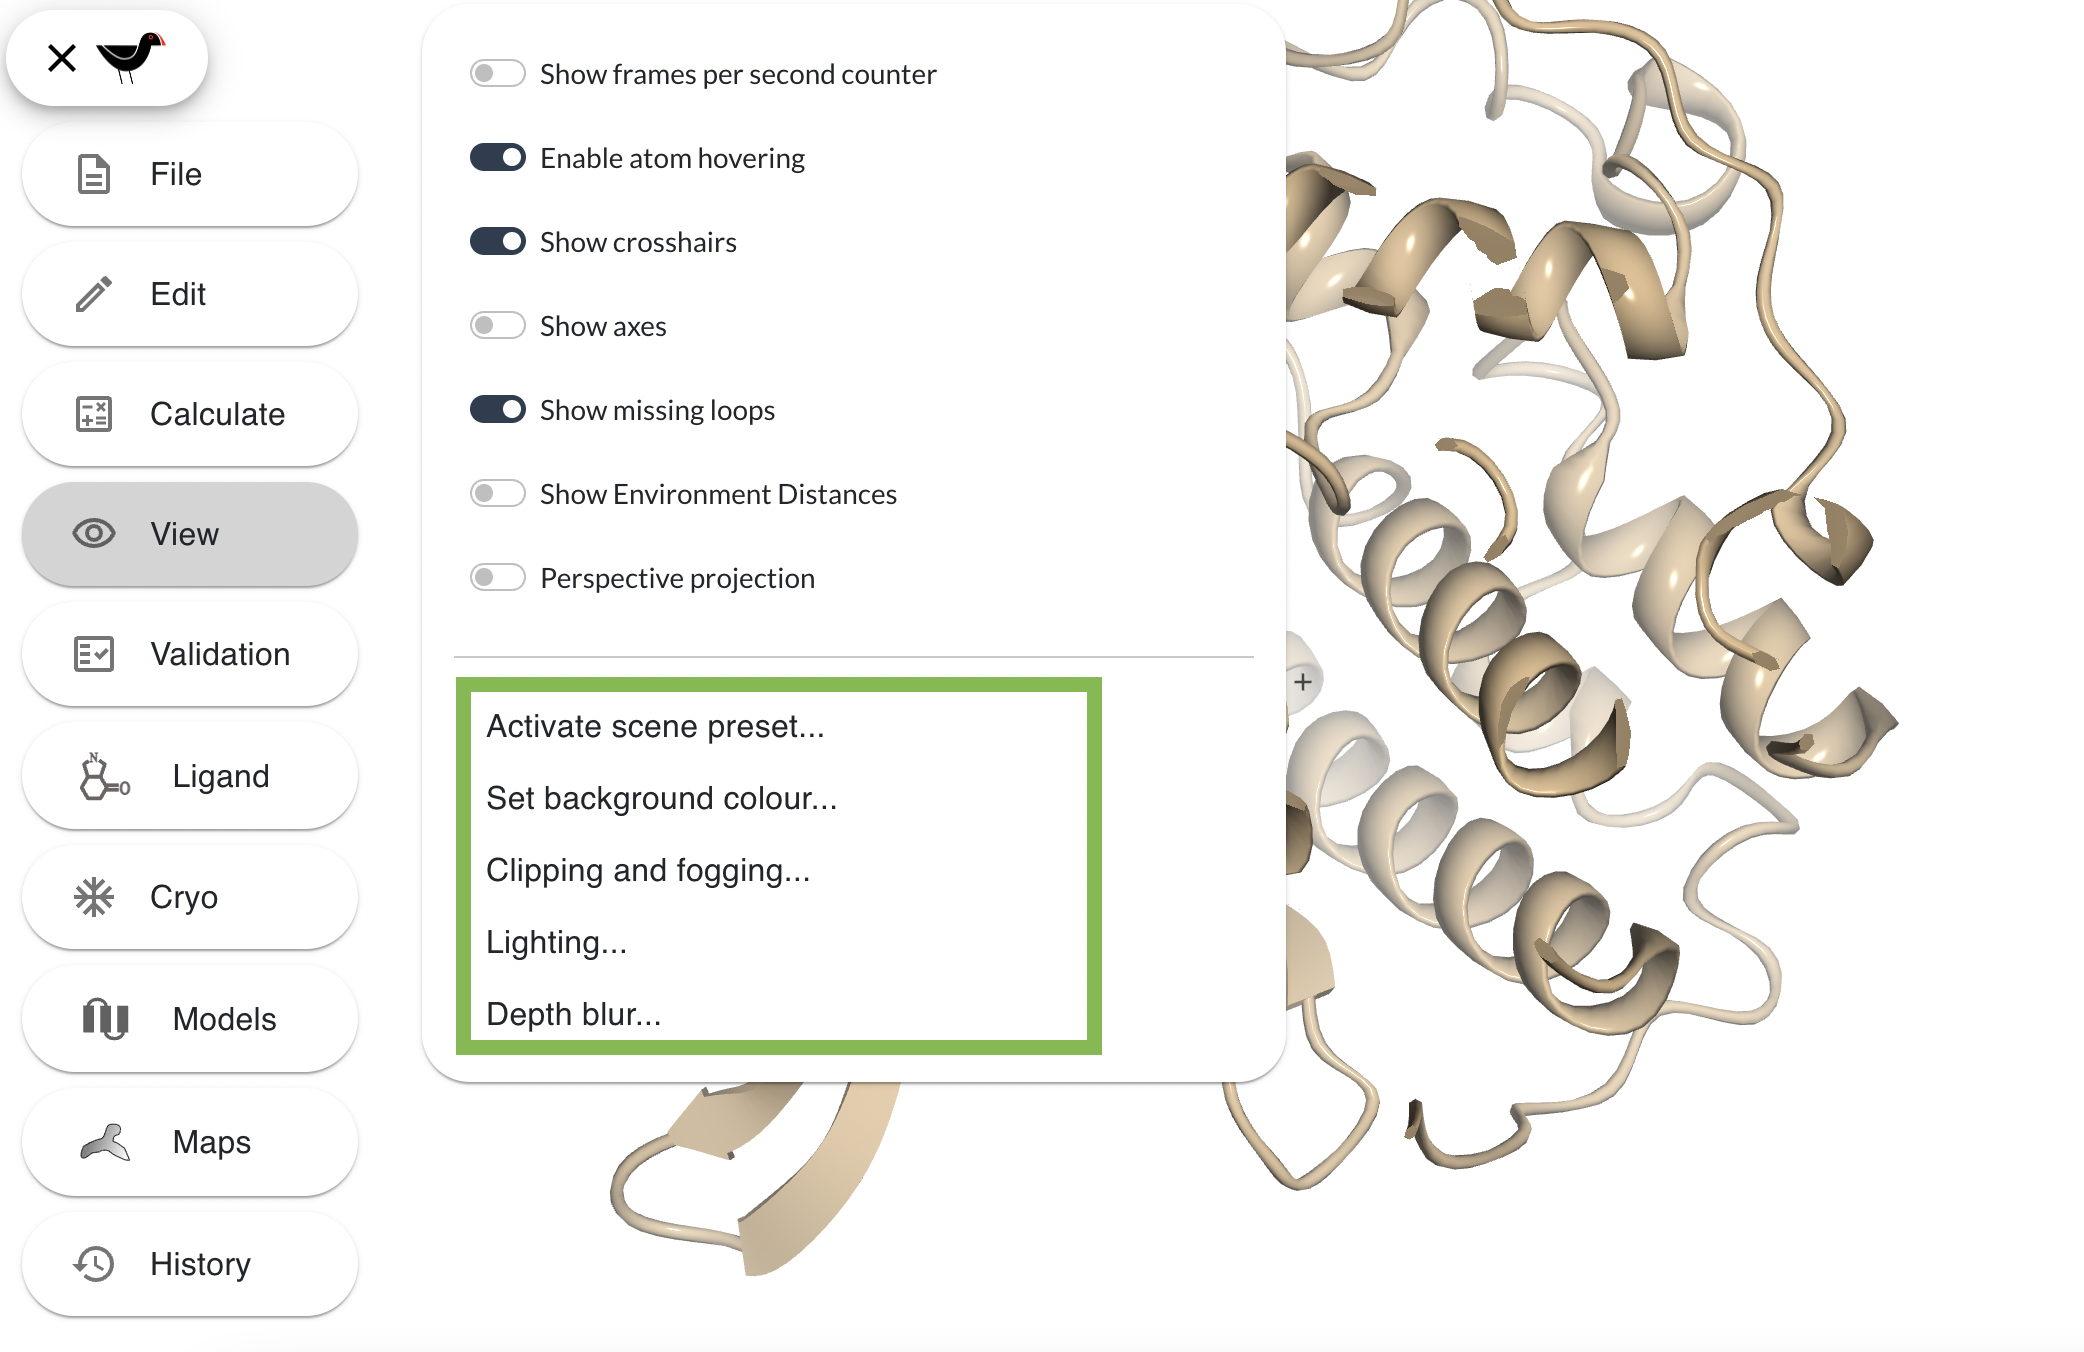
Select “Clipping and fogging…” from the “View” menu. There are 4 sliders, the top 2 alter the front and back clip - move them around to see the model be more/less sliced at front and back. The bottom 2 sliders control the fogging or depth-cueing in the scene. “Front zFog” alters how near/far the fog effect begins and “Back zFog” alters where the fog effect stops - the distance beyond which everything is “fogged out” or completely obscured. Play around with them to produce dense fog such as this:
You may have noticed that after setting the sliders and then zooming in/out the settings change back to previous settings. This is because Moorhen’s default behaviour is to dynamically alter the clip and fog to what is most appropriate for a given zoom level in the context of model building. When creating bespoke views you probably do not want this behaviour and you can prevent it by turning off the “Reset clipping and fogging on zoom” setting in the “Clipping and fogging” options. You can also get this behaviour with “View”, “Activate scene preset”, “FIGURE MAKING”. “‘Clip-cap’ perfect spheres” determines how spheres are drawn when they intersect the front clip plane - you probably don’t want to uncheck this.
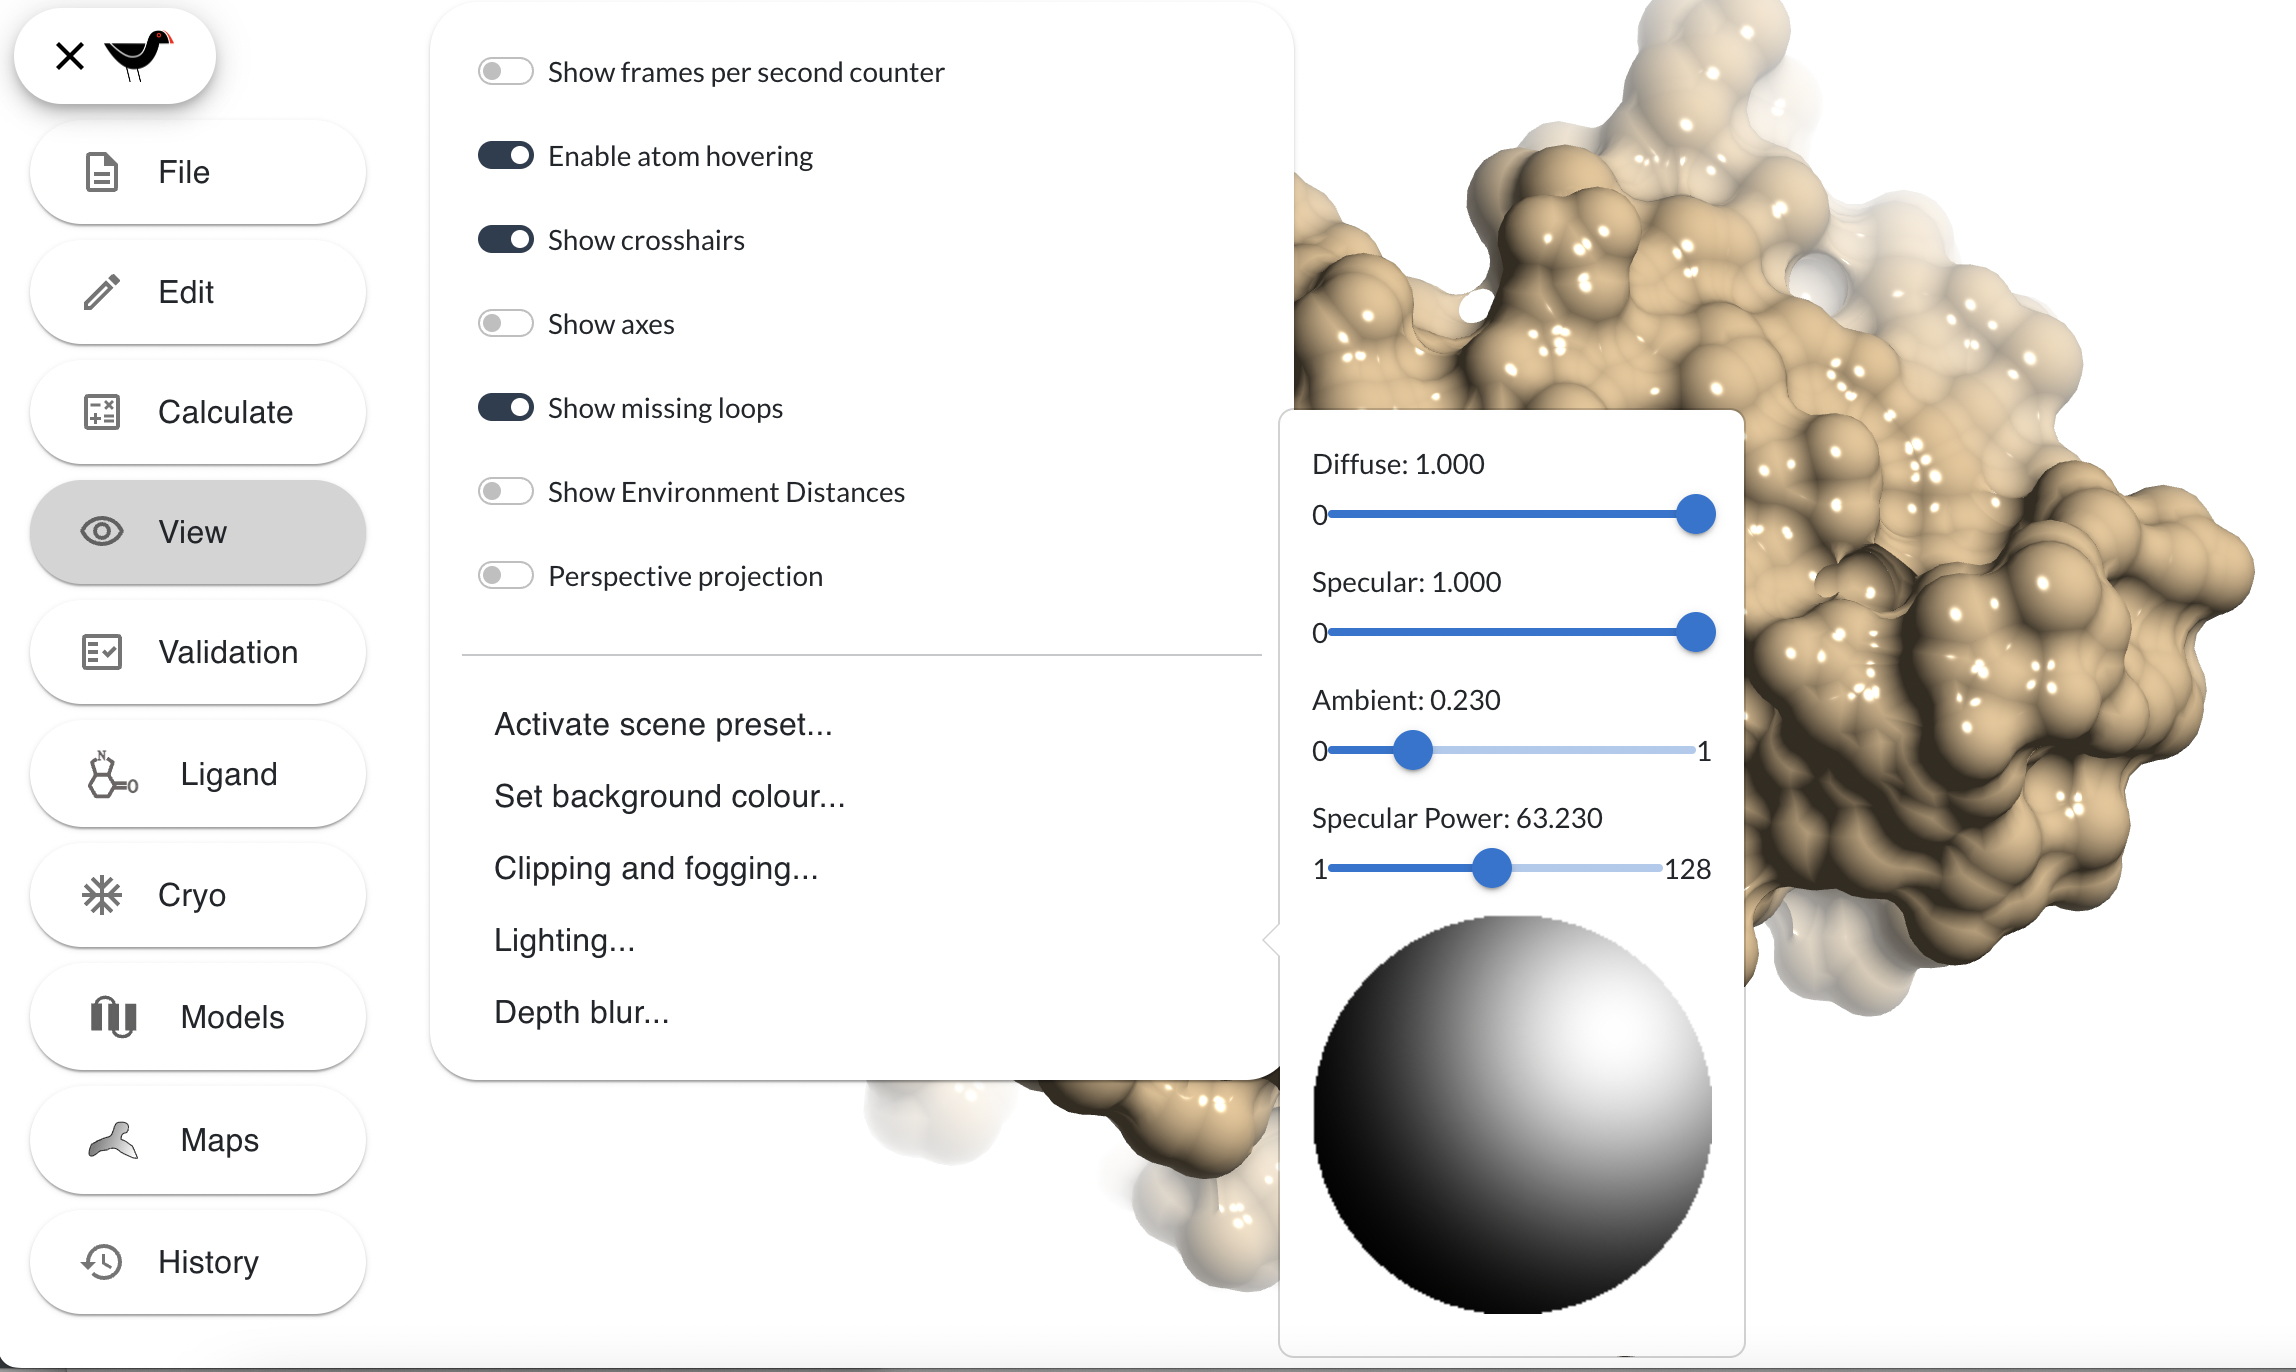
The “Lighting” entry in the “View” menu brings up a dialog with 4 sliders and a drawing of a sphere:
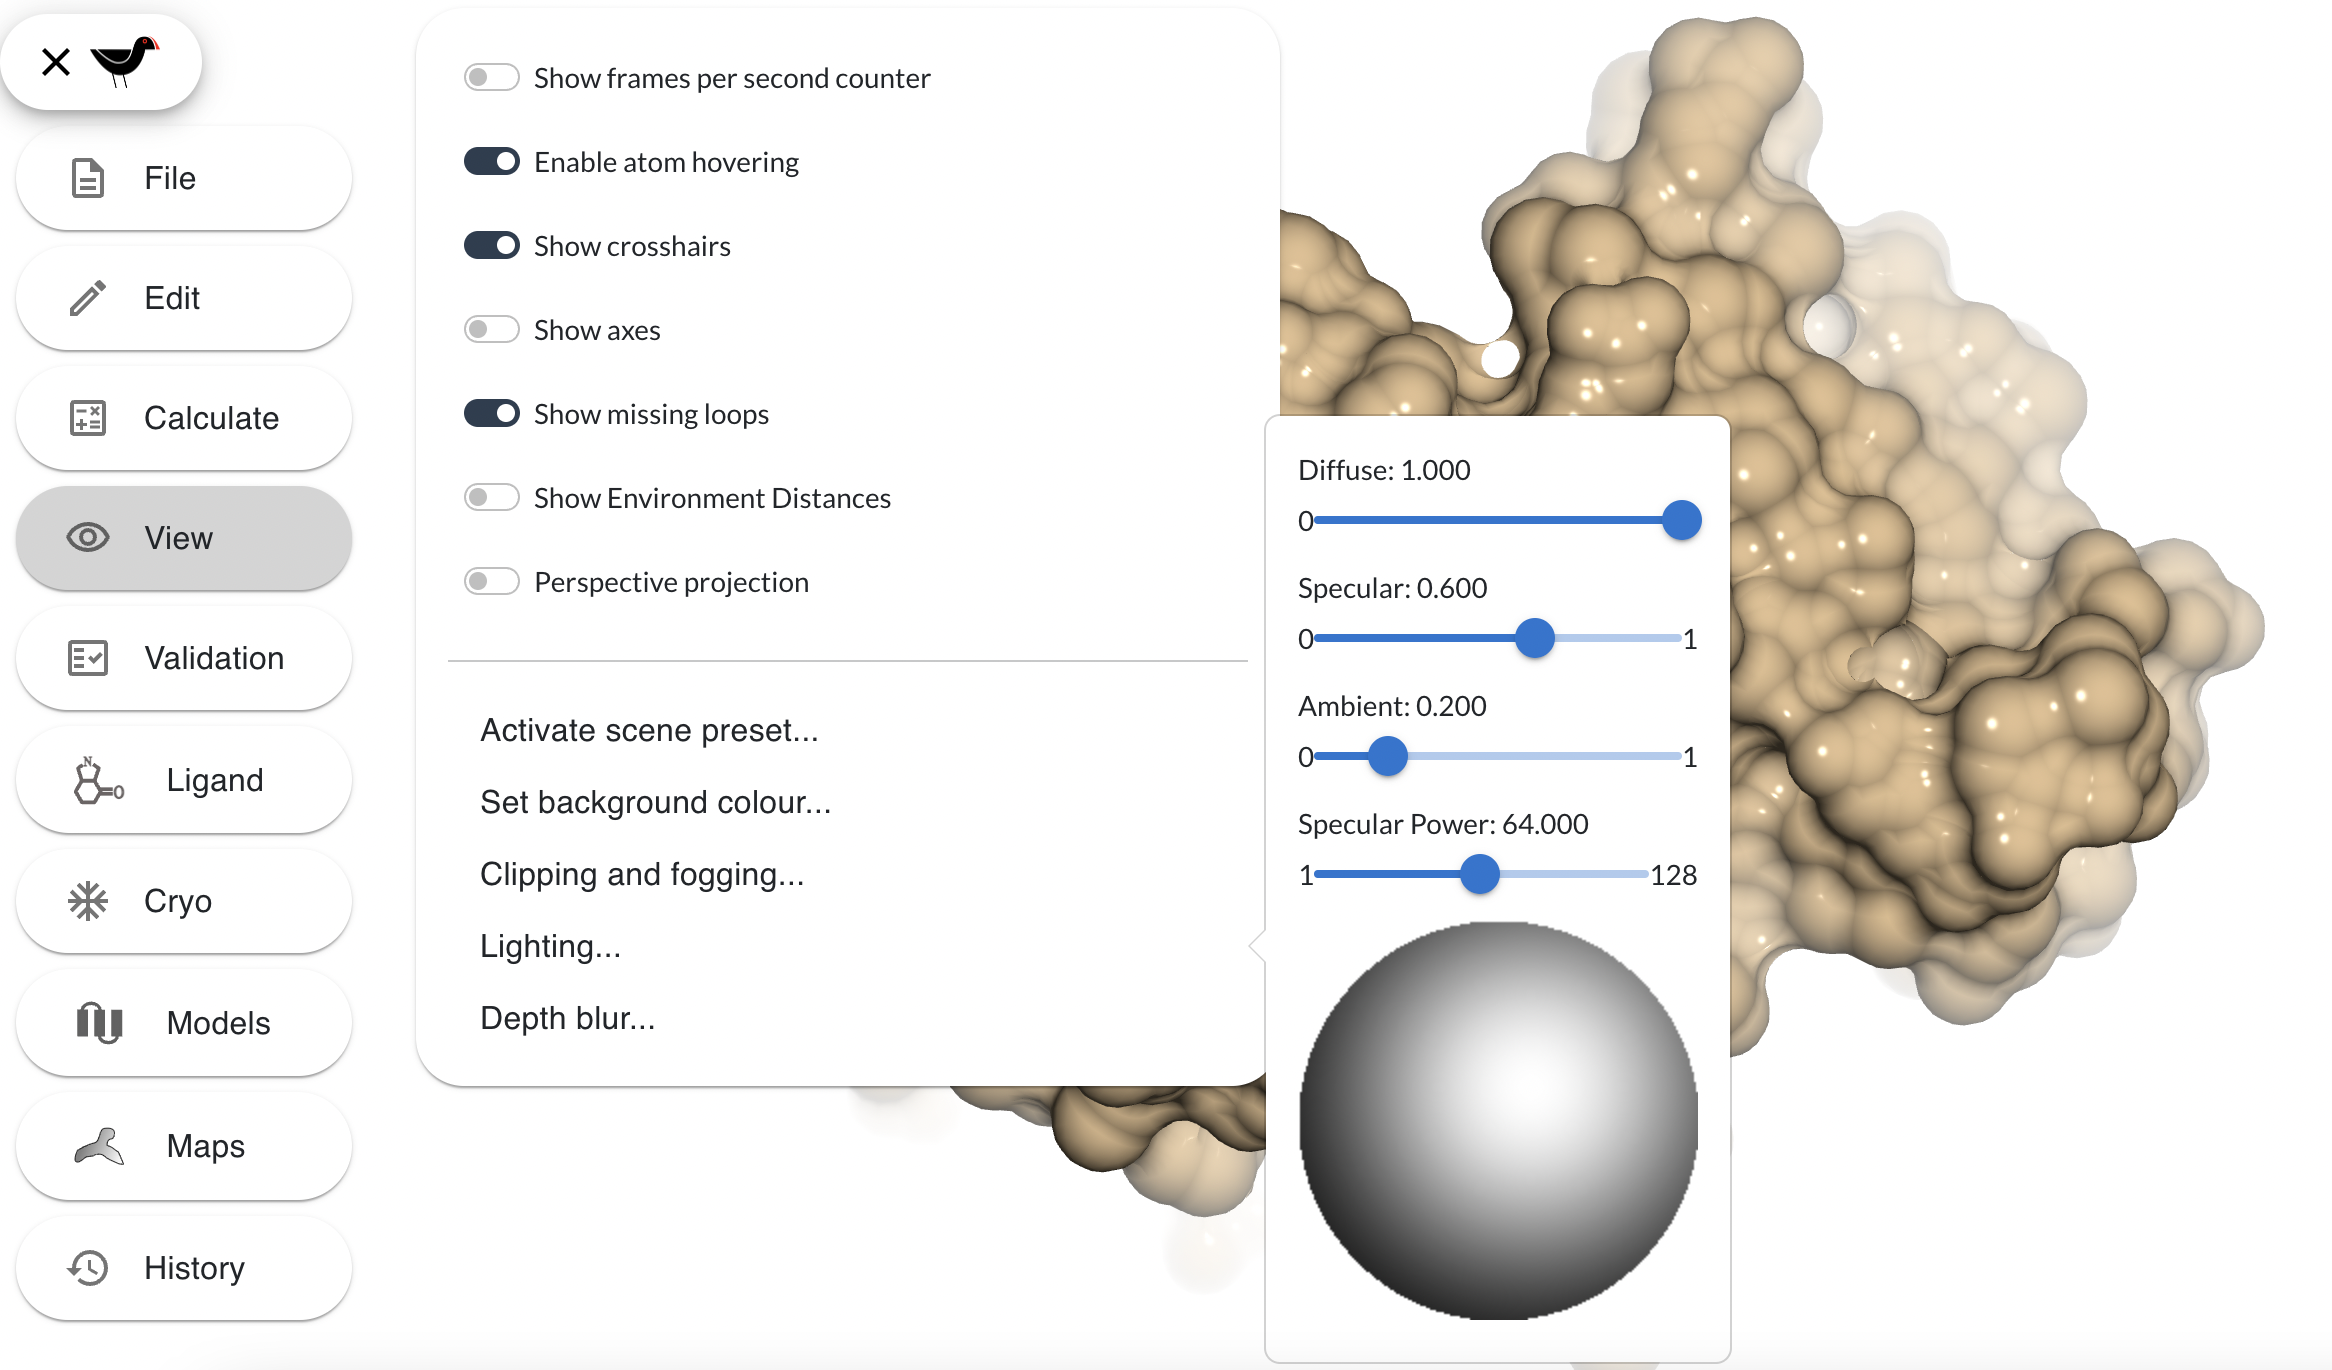
The 4 sliders alter the contribution of various properties of the lighting model:
- Diffuse - this slider alters the amount of diffuse light from 0 (none) to 1 (full). Diffuse lighting is soft, directional, reflective lighting.
- Specular - shiny reflections
- Ambient - non-directional lighting, setting this to 1 floods the scene with light
- Specular power - This affects the size of the specular reflection.
The big sphere at the bottom is a widget that can be used to control what direction the light comes from. You can click and drag around in it to alter the light position:
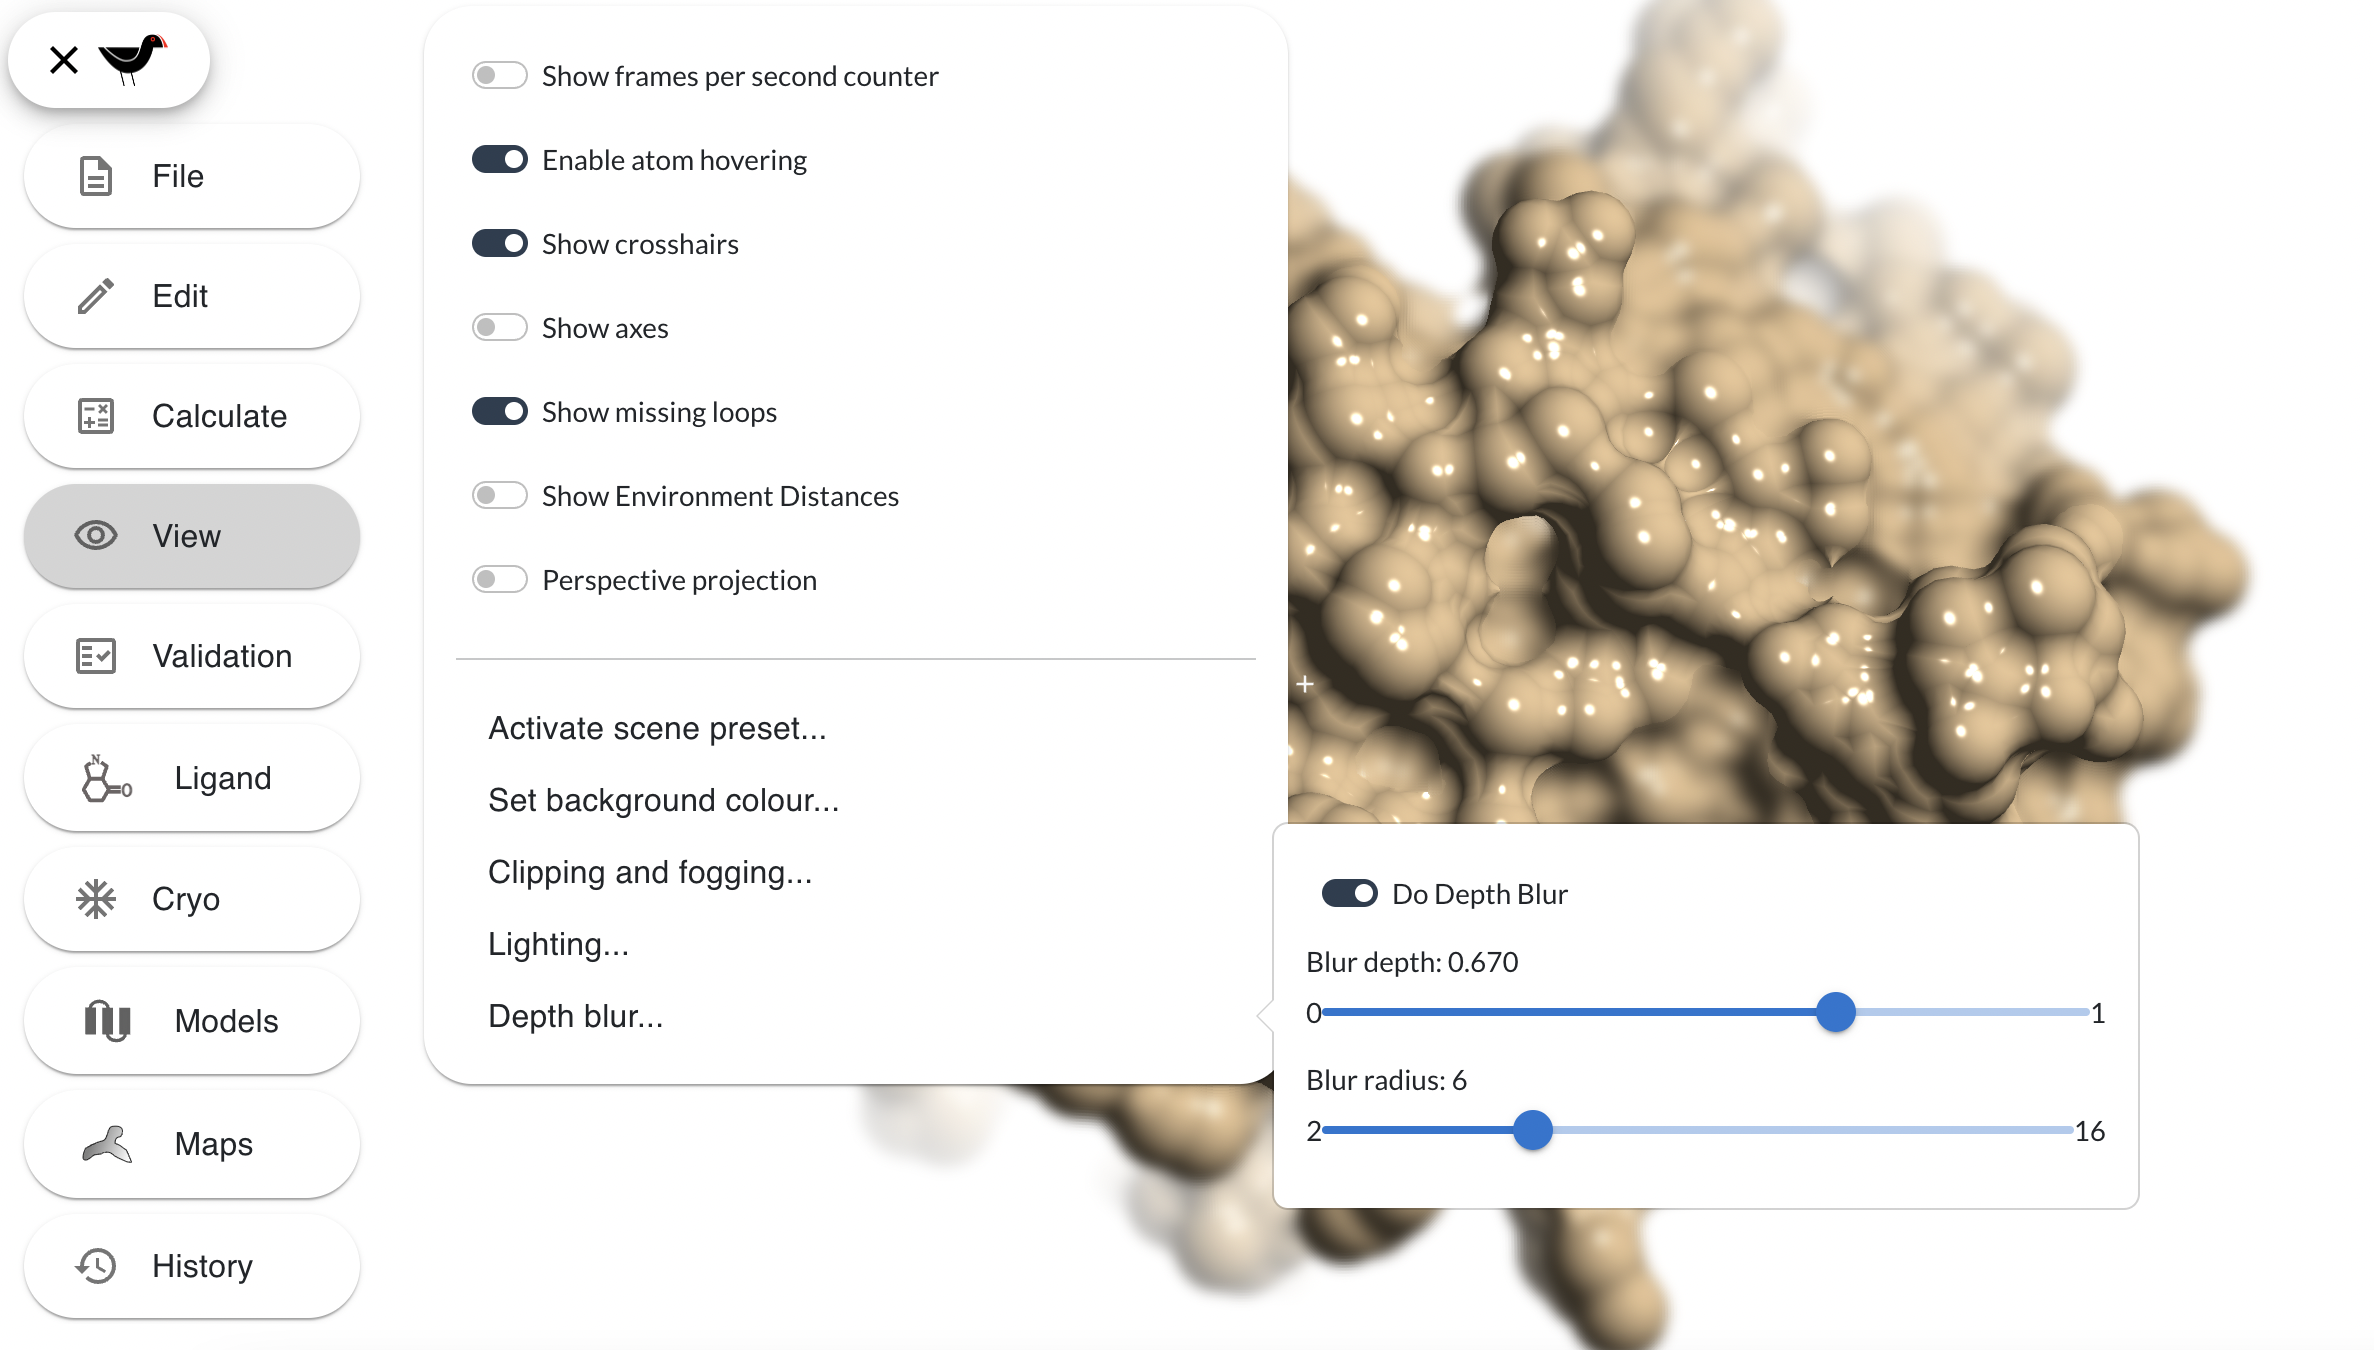
The “Depth blur…” option of the “View” menu brings up dialog with which you can blur the scene beyond a certain depth. Try this:
User defined preferences
Click on the “View” menu under the Moorhen burger button. Notice the switches listed at the begining of this menu? For our convinience, Moorhen will remember these scene settings between sessions. What this means is that we can close Moorhen and open it again at some point in the future and it will remember our prferences. Let’s change some of them:
- Turn on “Show Axes”.
Moorhen displays [X, Y, Z] axes on the top right corner
- Turn on “Perspective projection”
Instead of giving us a flat view, Moorhen now uses perspective projection to provide better perception of depth when moving the model
- Click on “Set background colour…”. Now choose a new background colour using the colour picker. Let’s try a shade of grey.
Moorhen changes the background colour accordingly
Additionally, you can find more settings in the “Preferences” menu under the Moorhen burger button. While the default values provided in Moorhen are OK in most use-cases, you may find that you need to experiment with the values of some of these settings depending your needs. After you are happy with the changes, try to open a new Moorhen session and see how your preferred settings are restored in the new session.
Saving your image
When you are happy with your picture there are a few ways of creating your final image: you can simply take screenshot using tools provided by your operating system - Print Screen key on Windows, Shift+Cmd+4 on macOS, etc.; hit the “S” key in Moorhen; “File”, “Screenshot”.
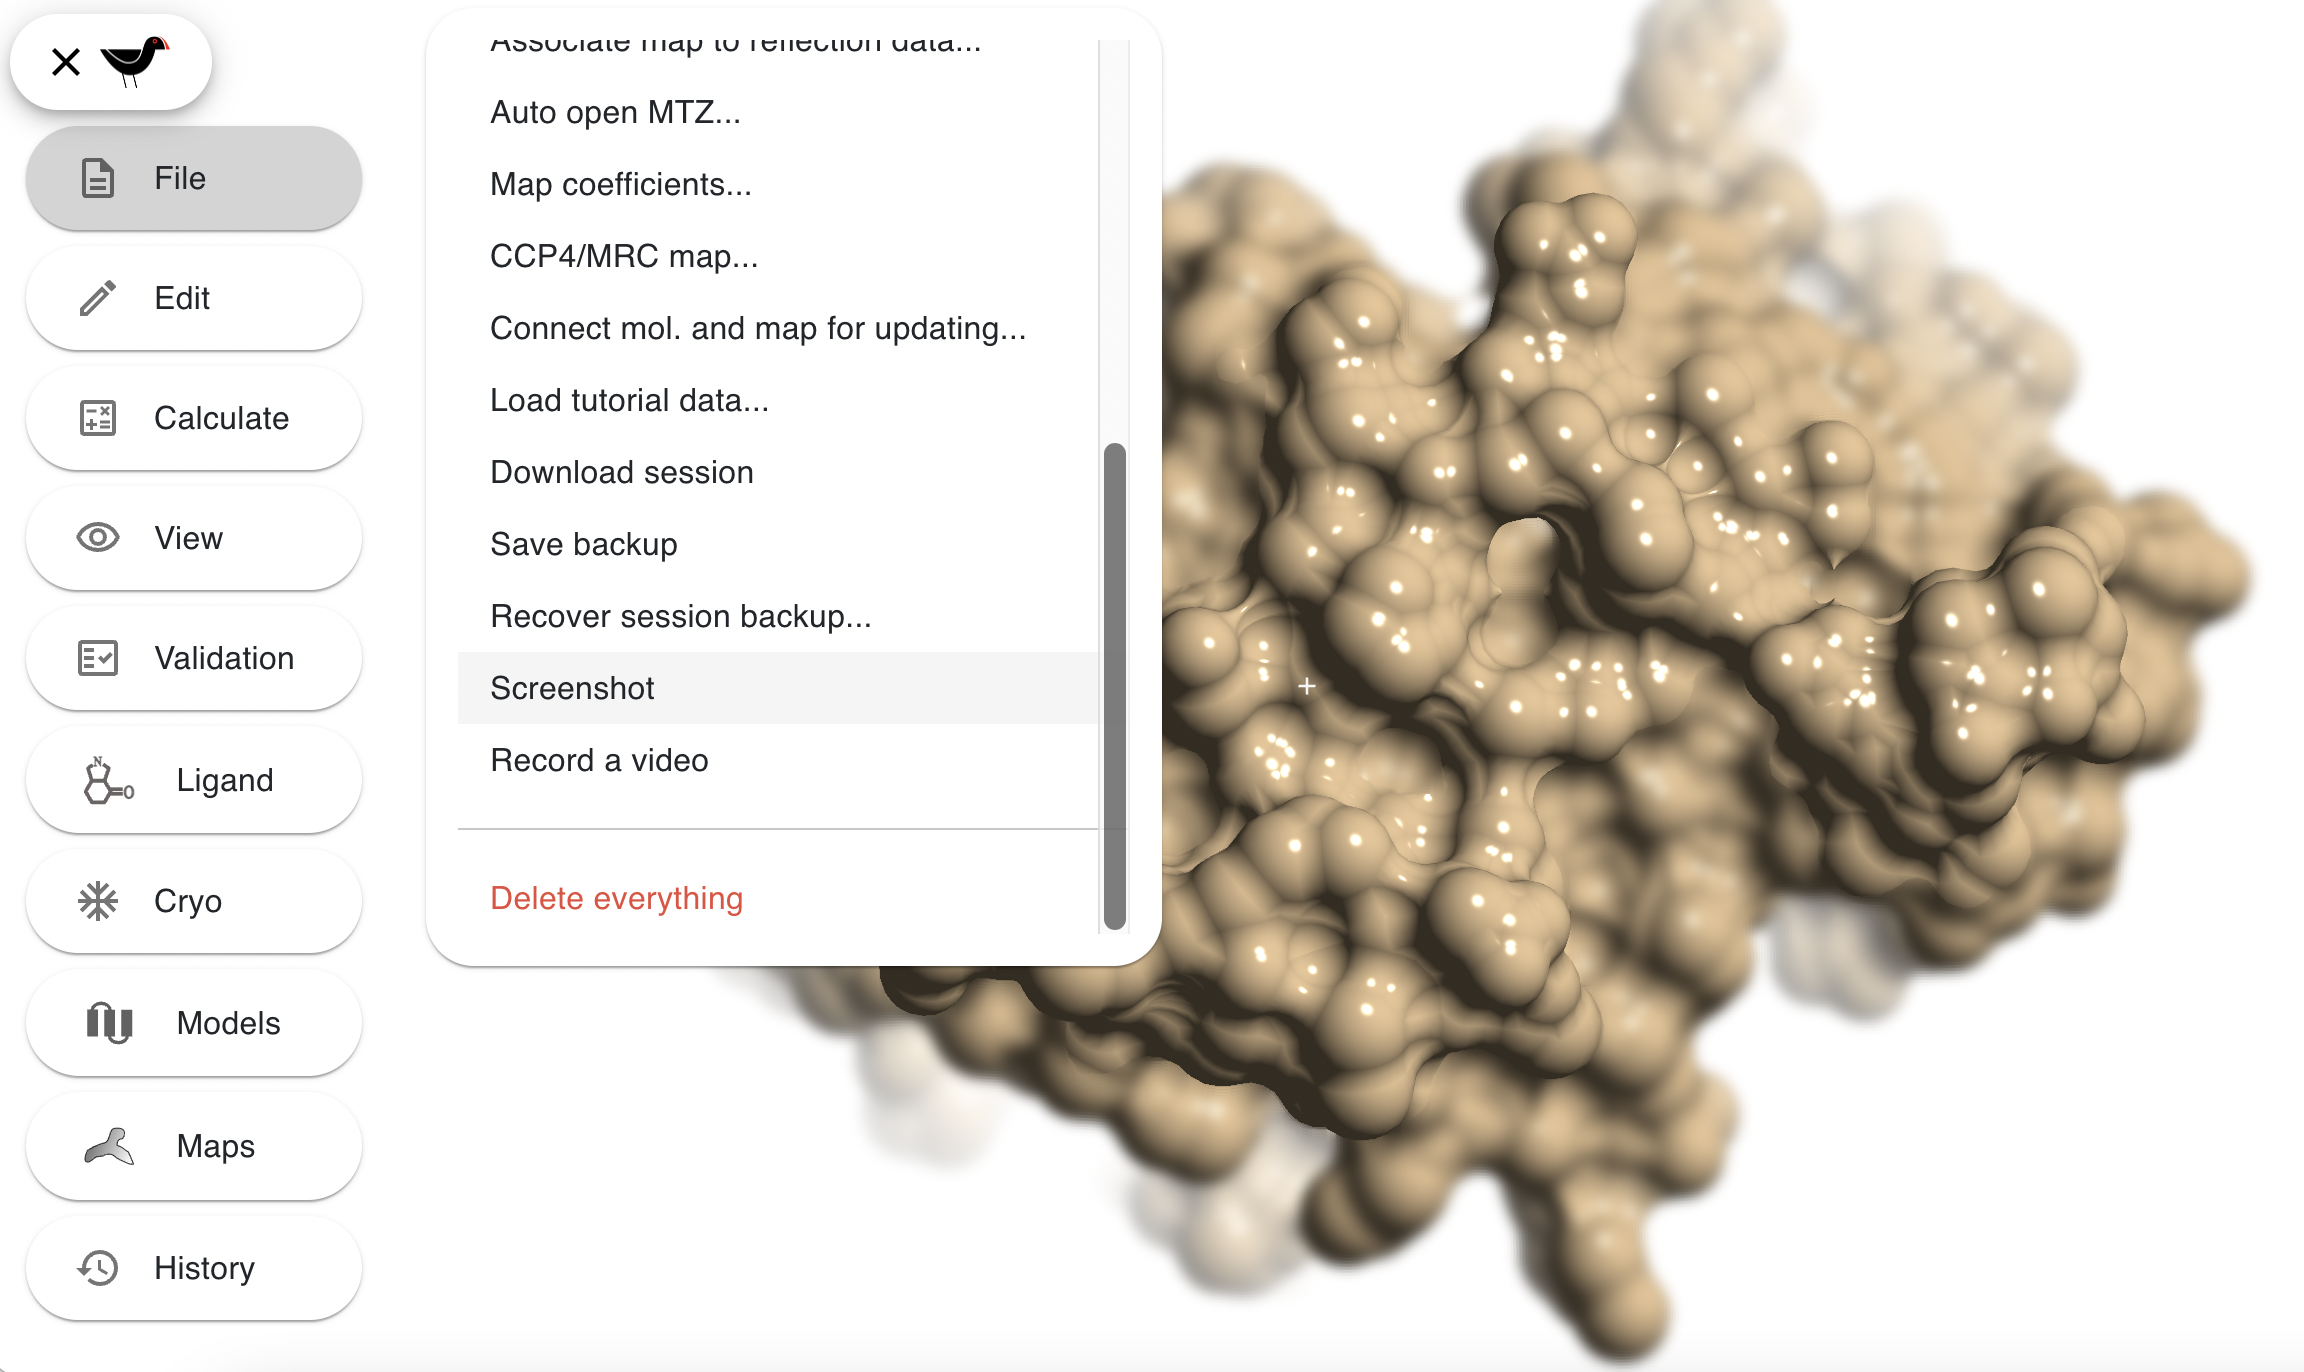
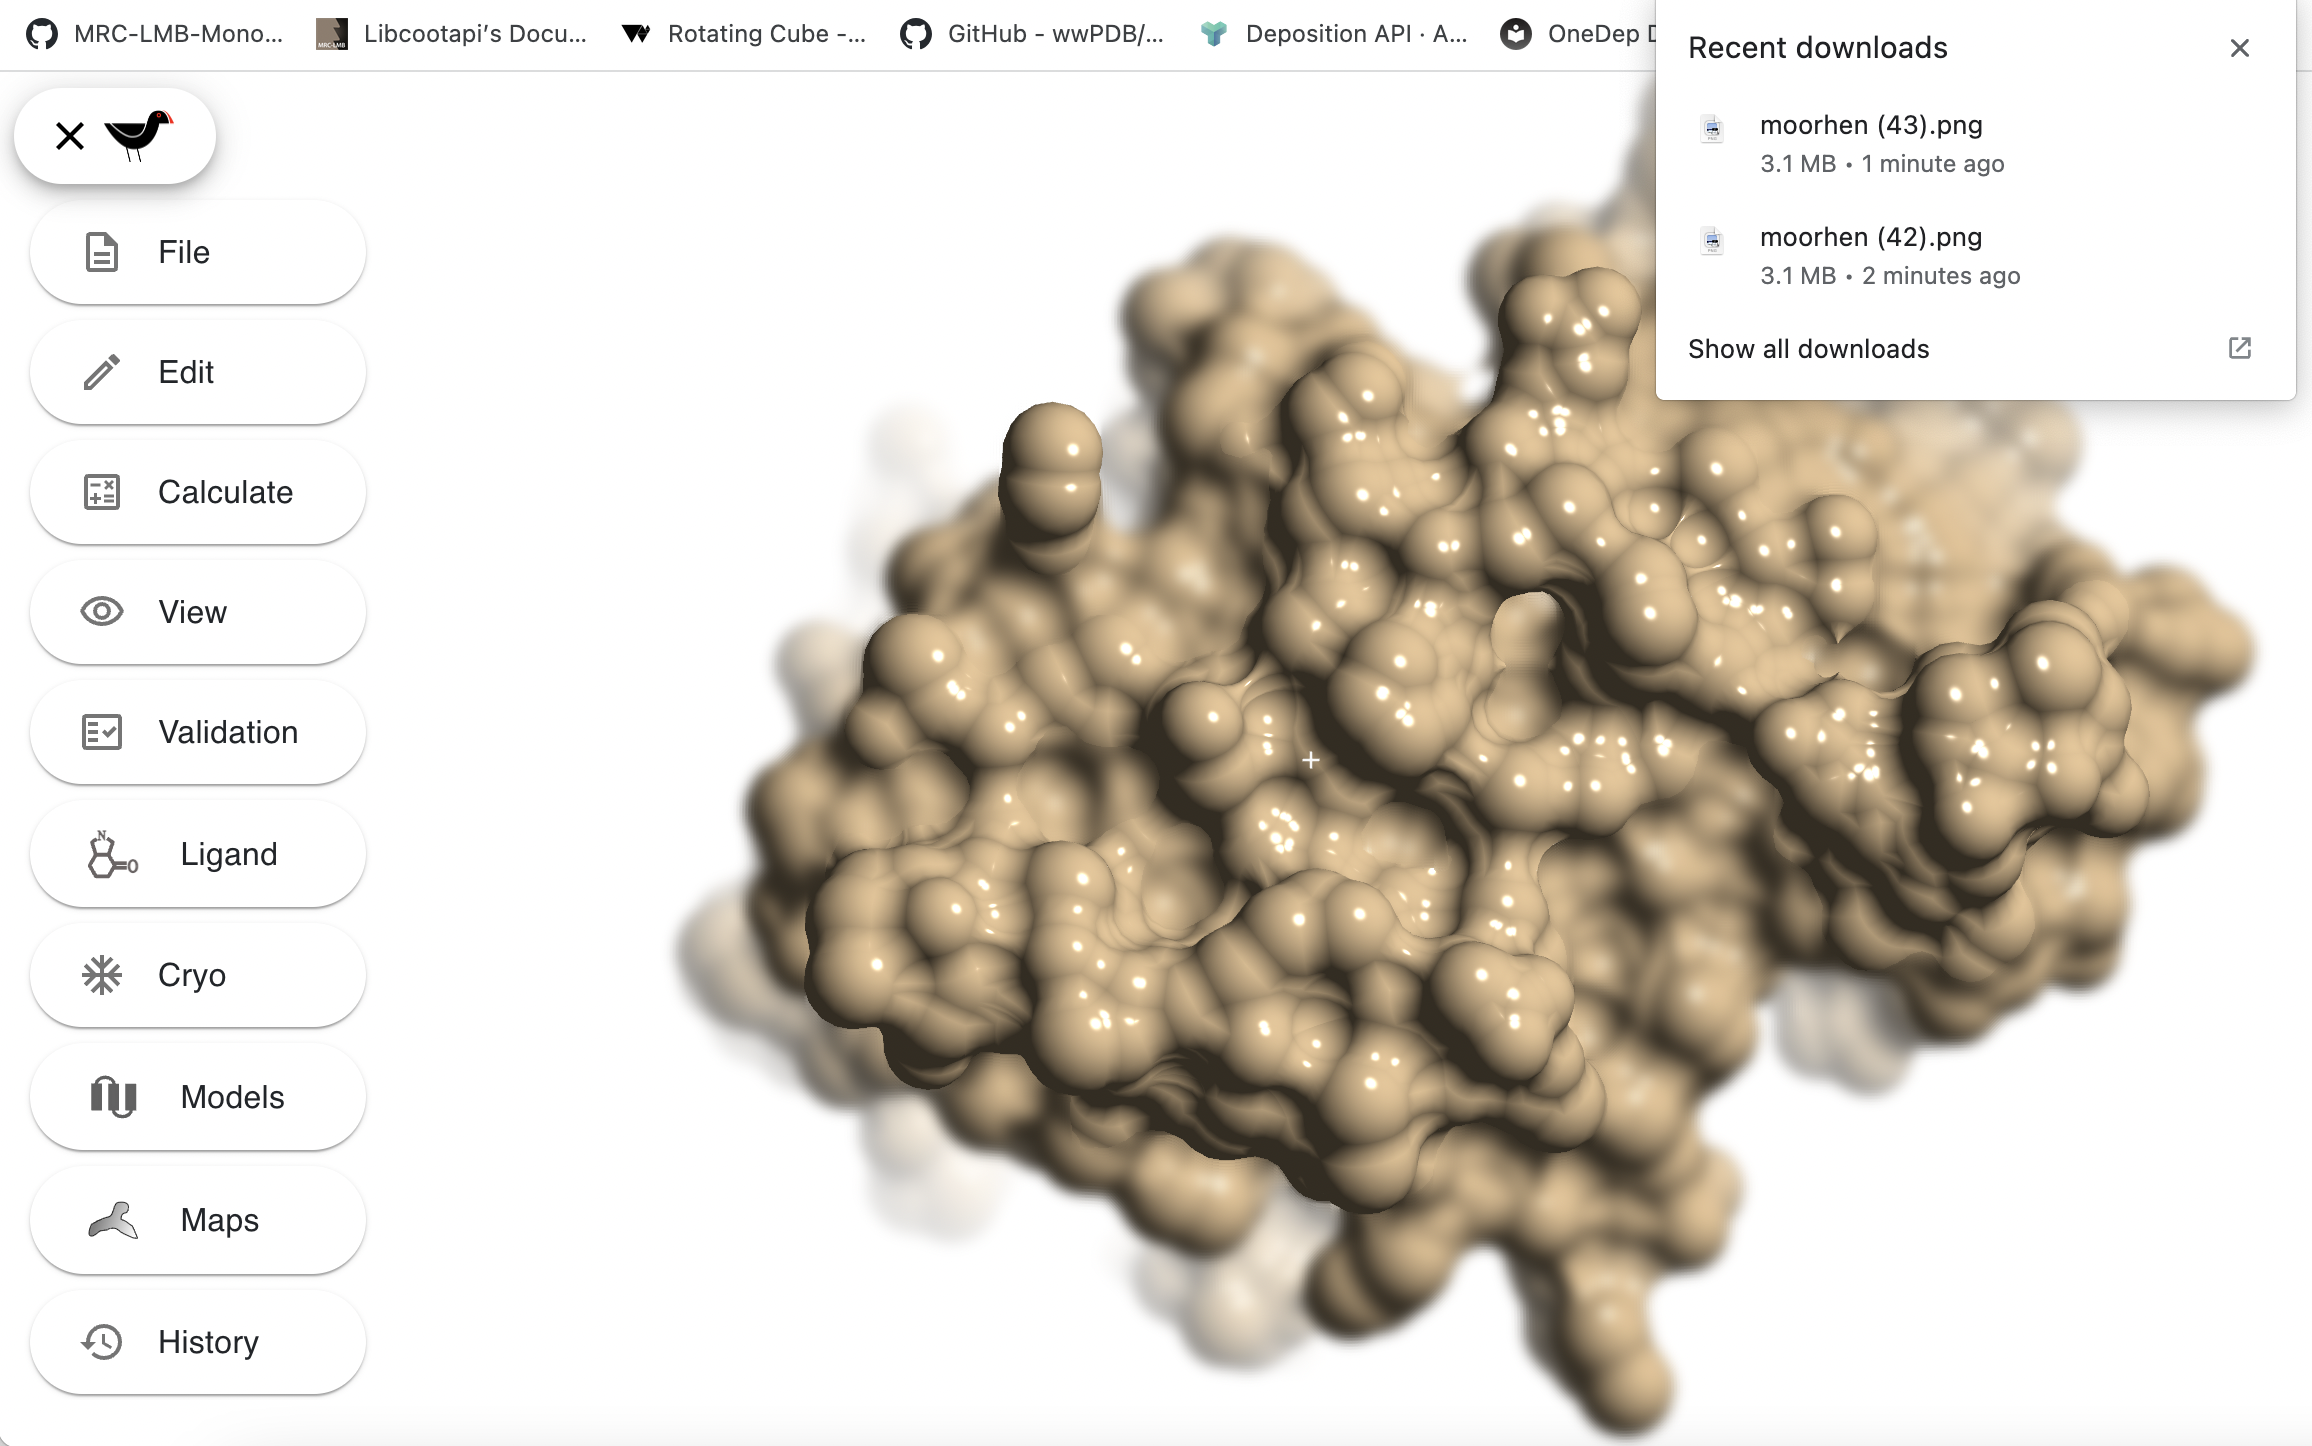
The last 2 options do the same thing, they instruct Moorhen to create a high resolution image. The high resolution image will be either 4096 pixels wide or 4096 pixels high d, with the other dimension scaled to match the shape of your Moorhen window. The file will automatically downloaded by your browser to your normal download location and named something like “moorhen.png”. Subsequently saved images will be named similarly with a number inserted into the name - the way this is done depends on your browser. e.g. this shows the recently saved images by a user who has saved 44 images with Moorhen:
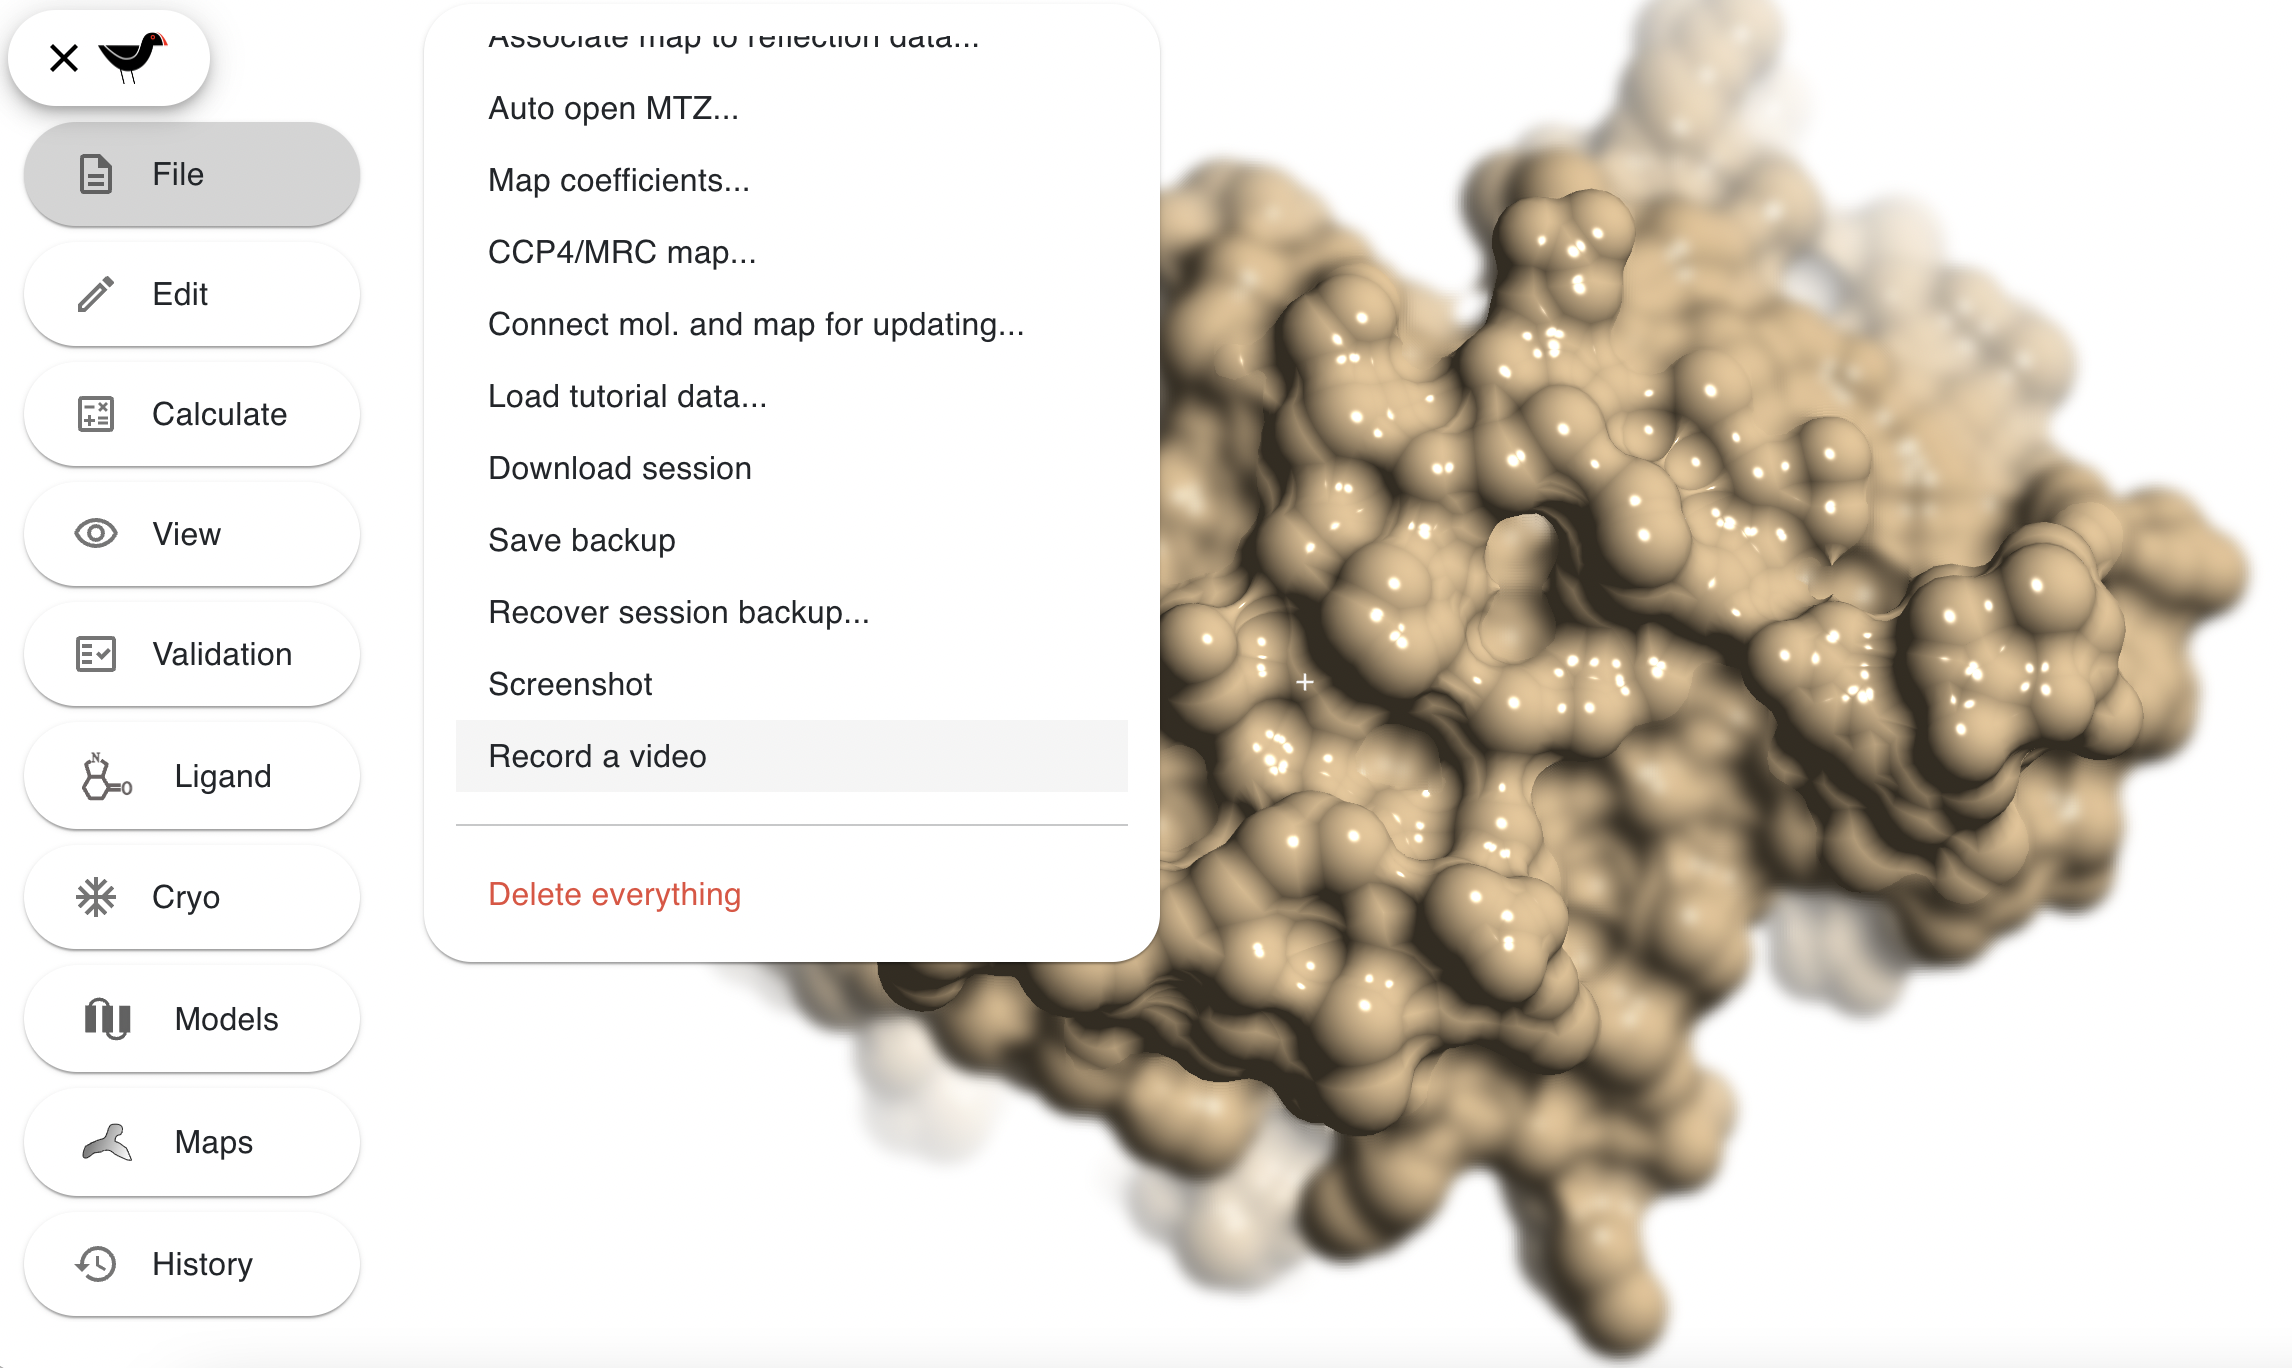
Video Recording
“File”, “Record a video” will put Moorhen into a recording mode where it will record eveything that you do into a video - just the molecular graphics, not the menus or dialogs:
When recording a box with a flashing red “light” appears at the top of the screen:
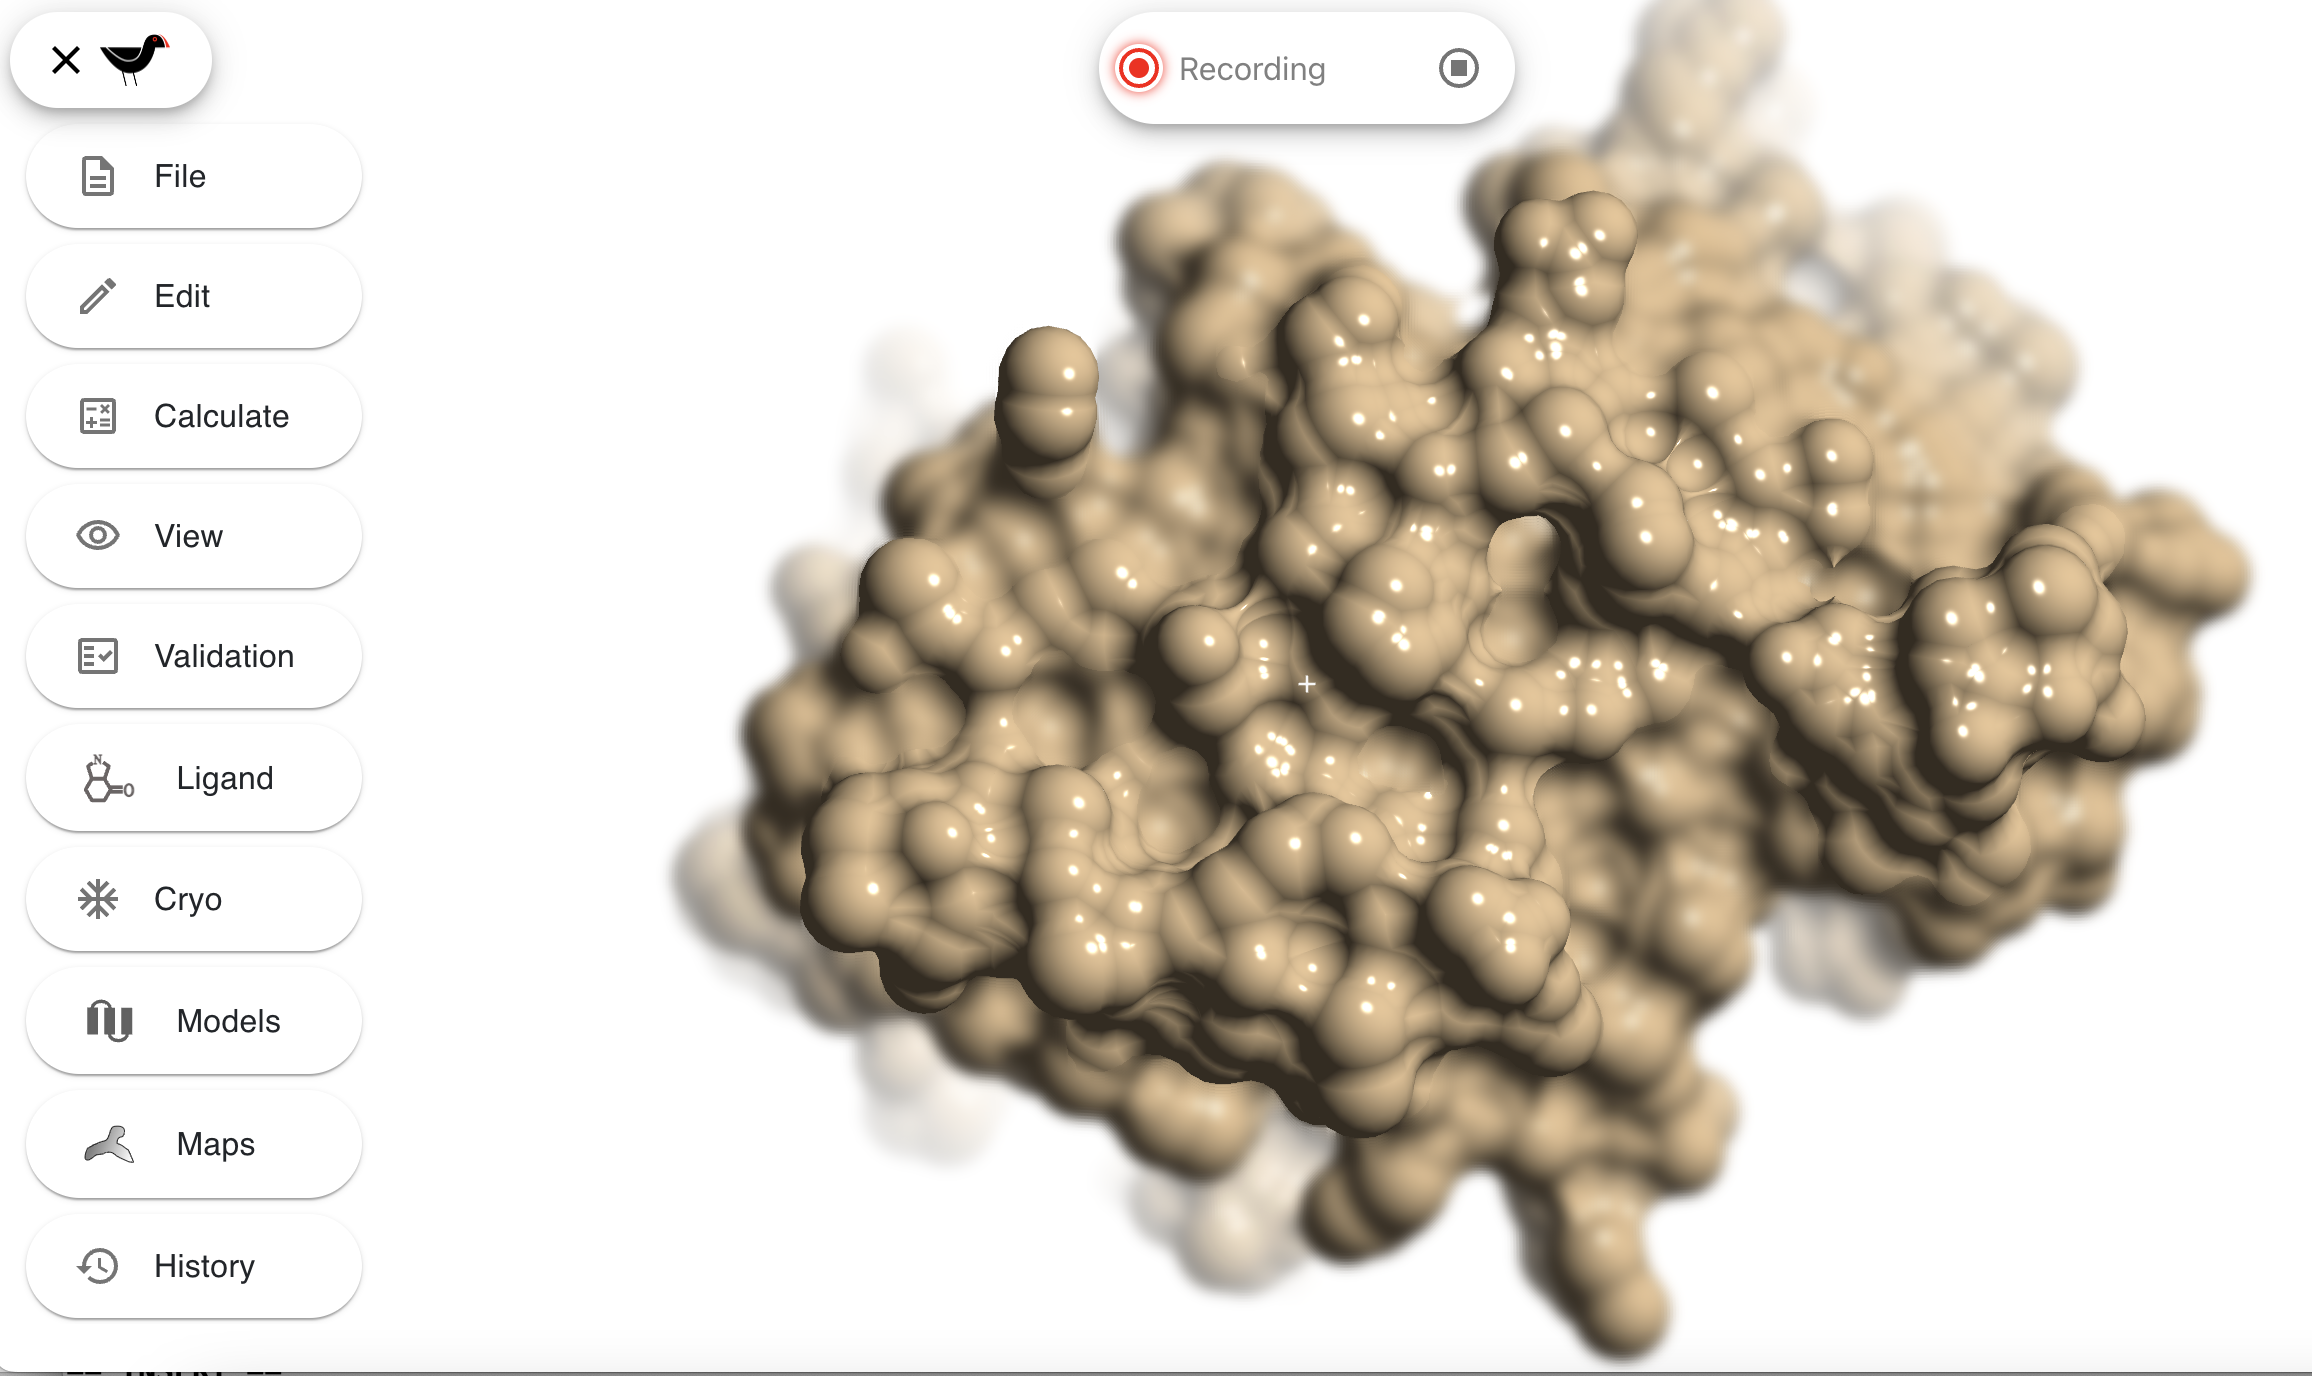
When you wish to stop recording, hit the square stop button  at the right hand side of the recording box. A file name “moorhen.webm” (with
numbers ascending in the same ways as screenshot naming) will be download to your downloads location.
This file can be viewed in most browsers and converted to other formats with a variety of tools.
at the right hand side of the recording box. A file name “moorhen.webm” (with
numbers ascending in the same ways as screenshot naming) will be download to your downloads location.
This file can be viewed in most browsers and converted to other formats with a variety of tools.
Saving and Restoring Work
If you close your browser, or tab, or navigate away from Moorhen you may lose all your work. You can save your progress in two ways:
- “File”, “Save backup”
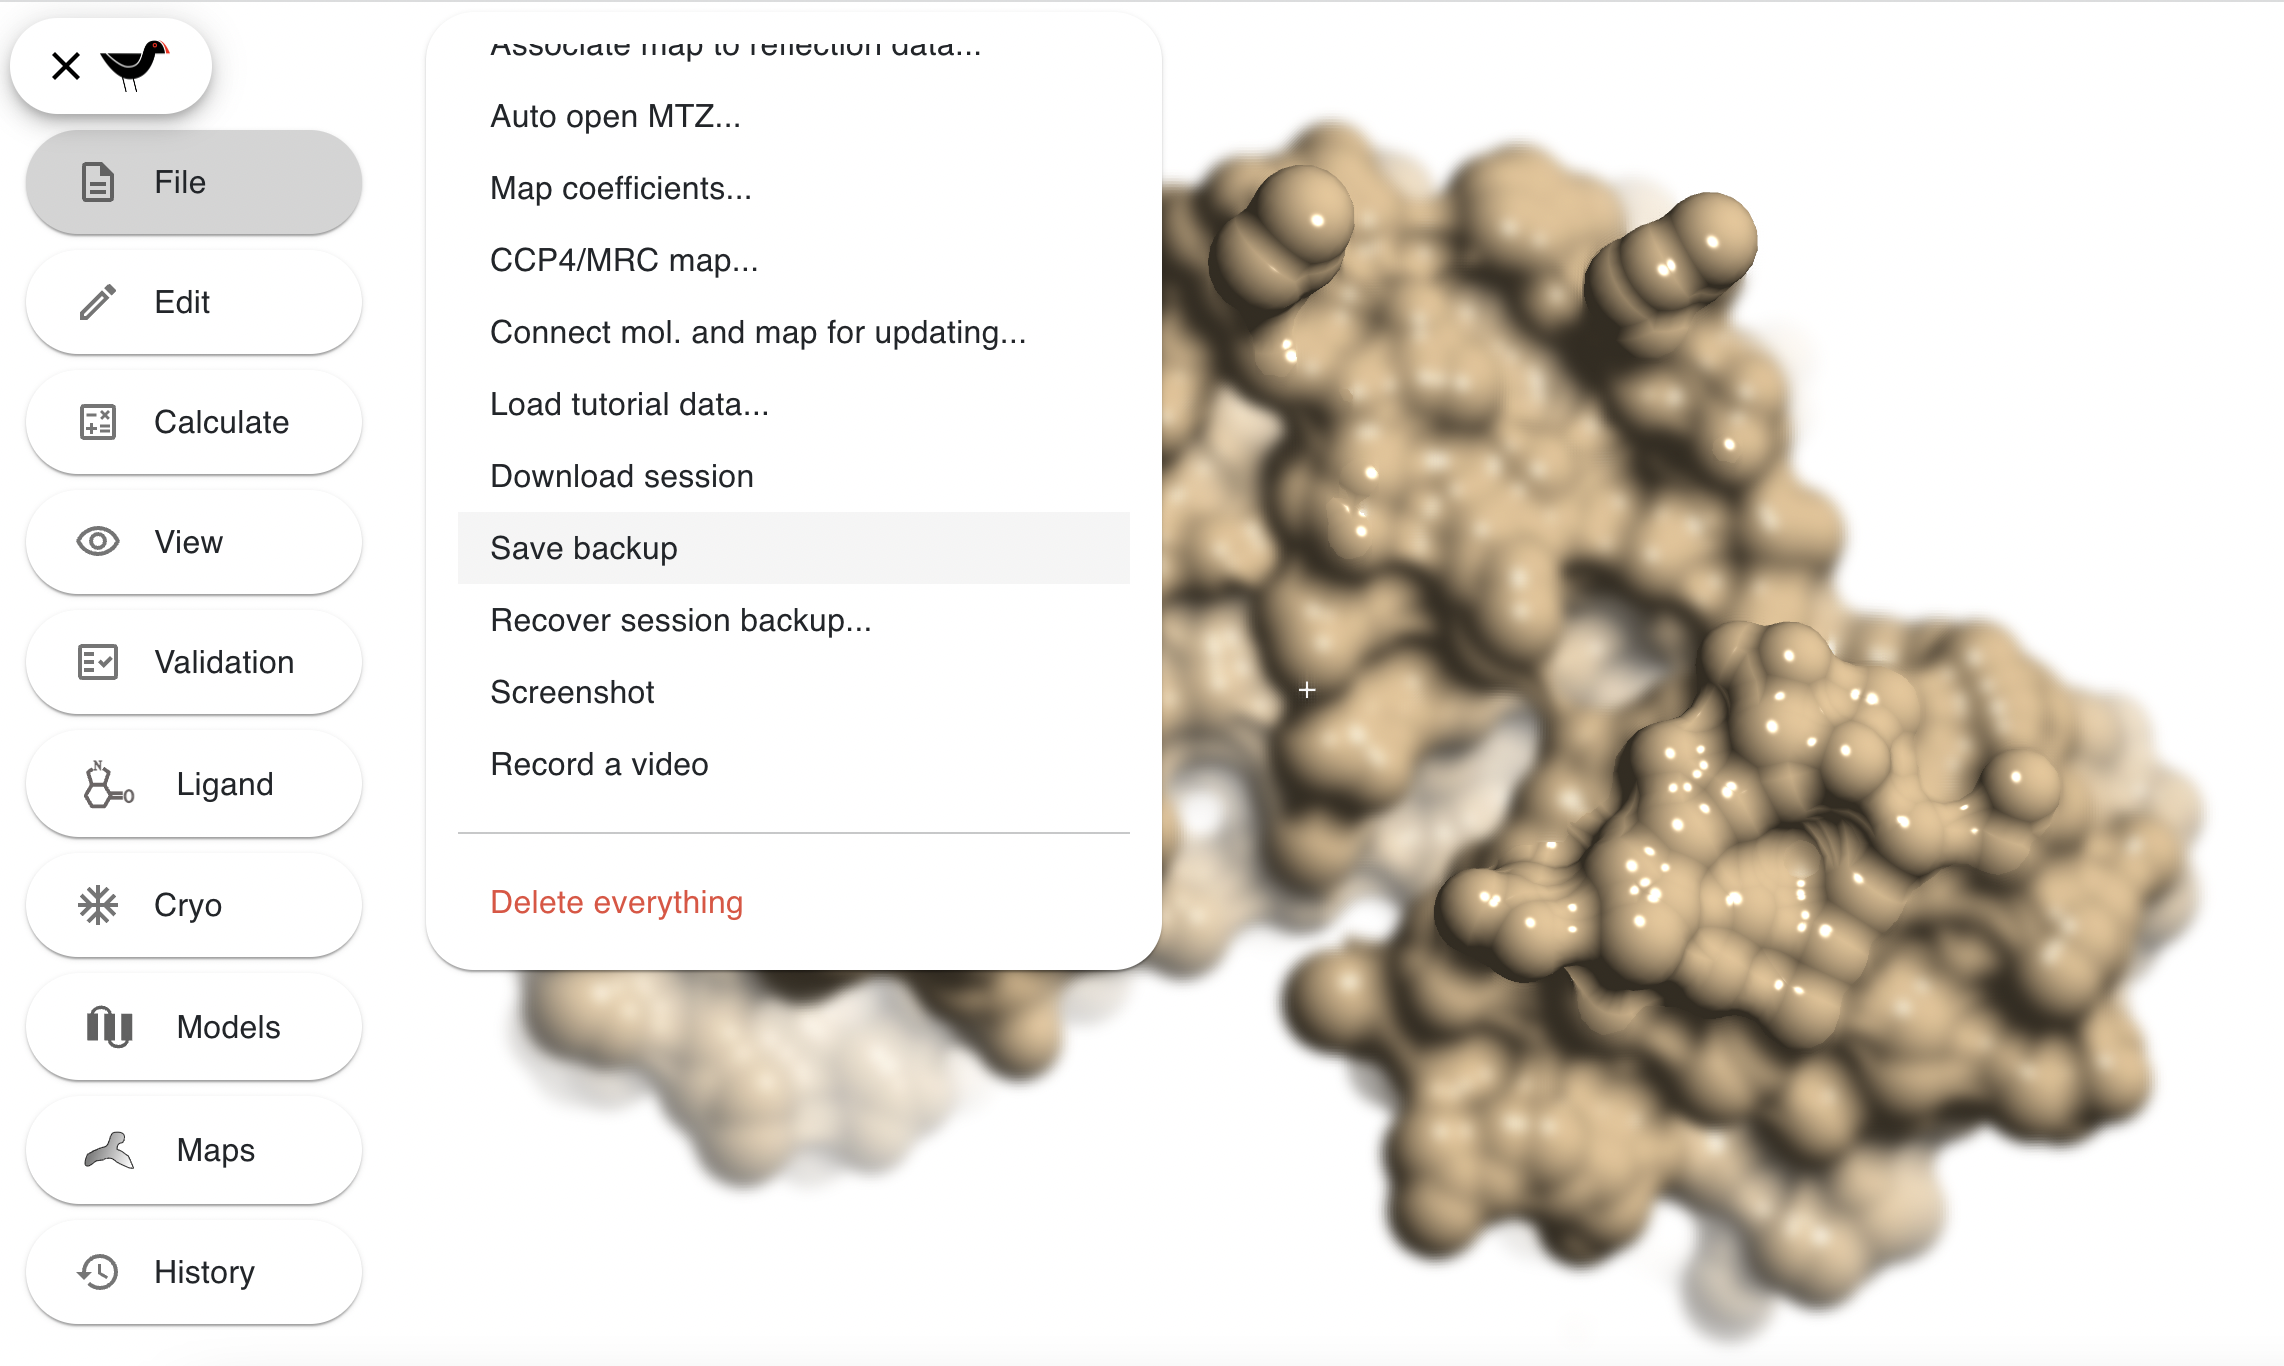
This will save backup in the web browsers storage. The backup can be recovered with “File”, “Recover session backup…”:
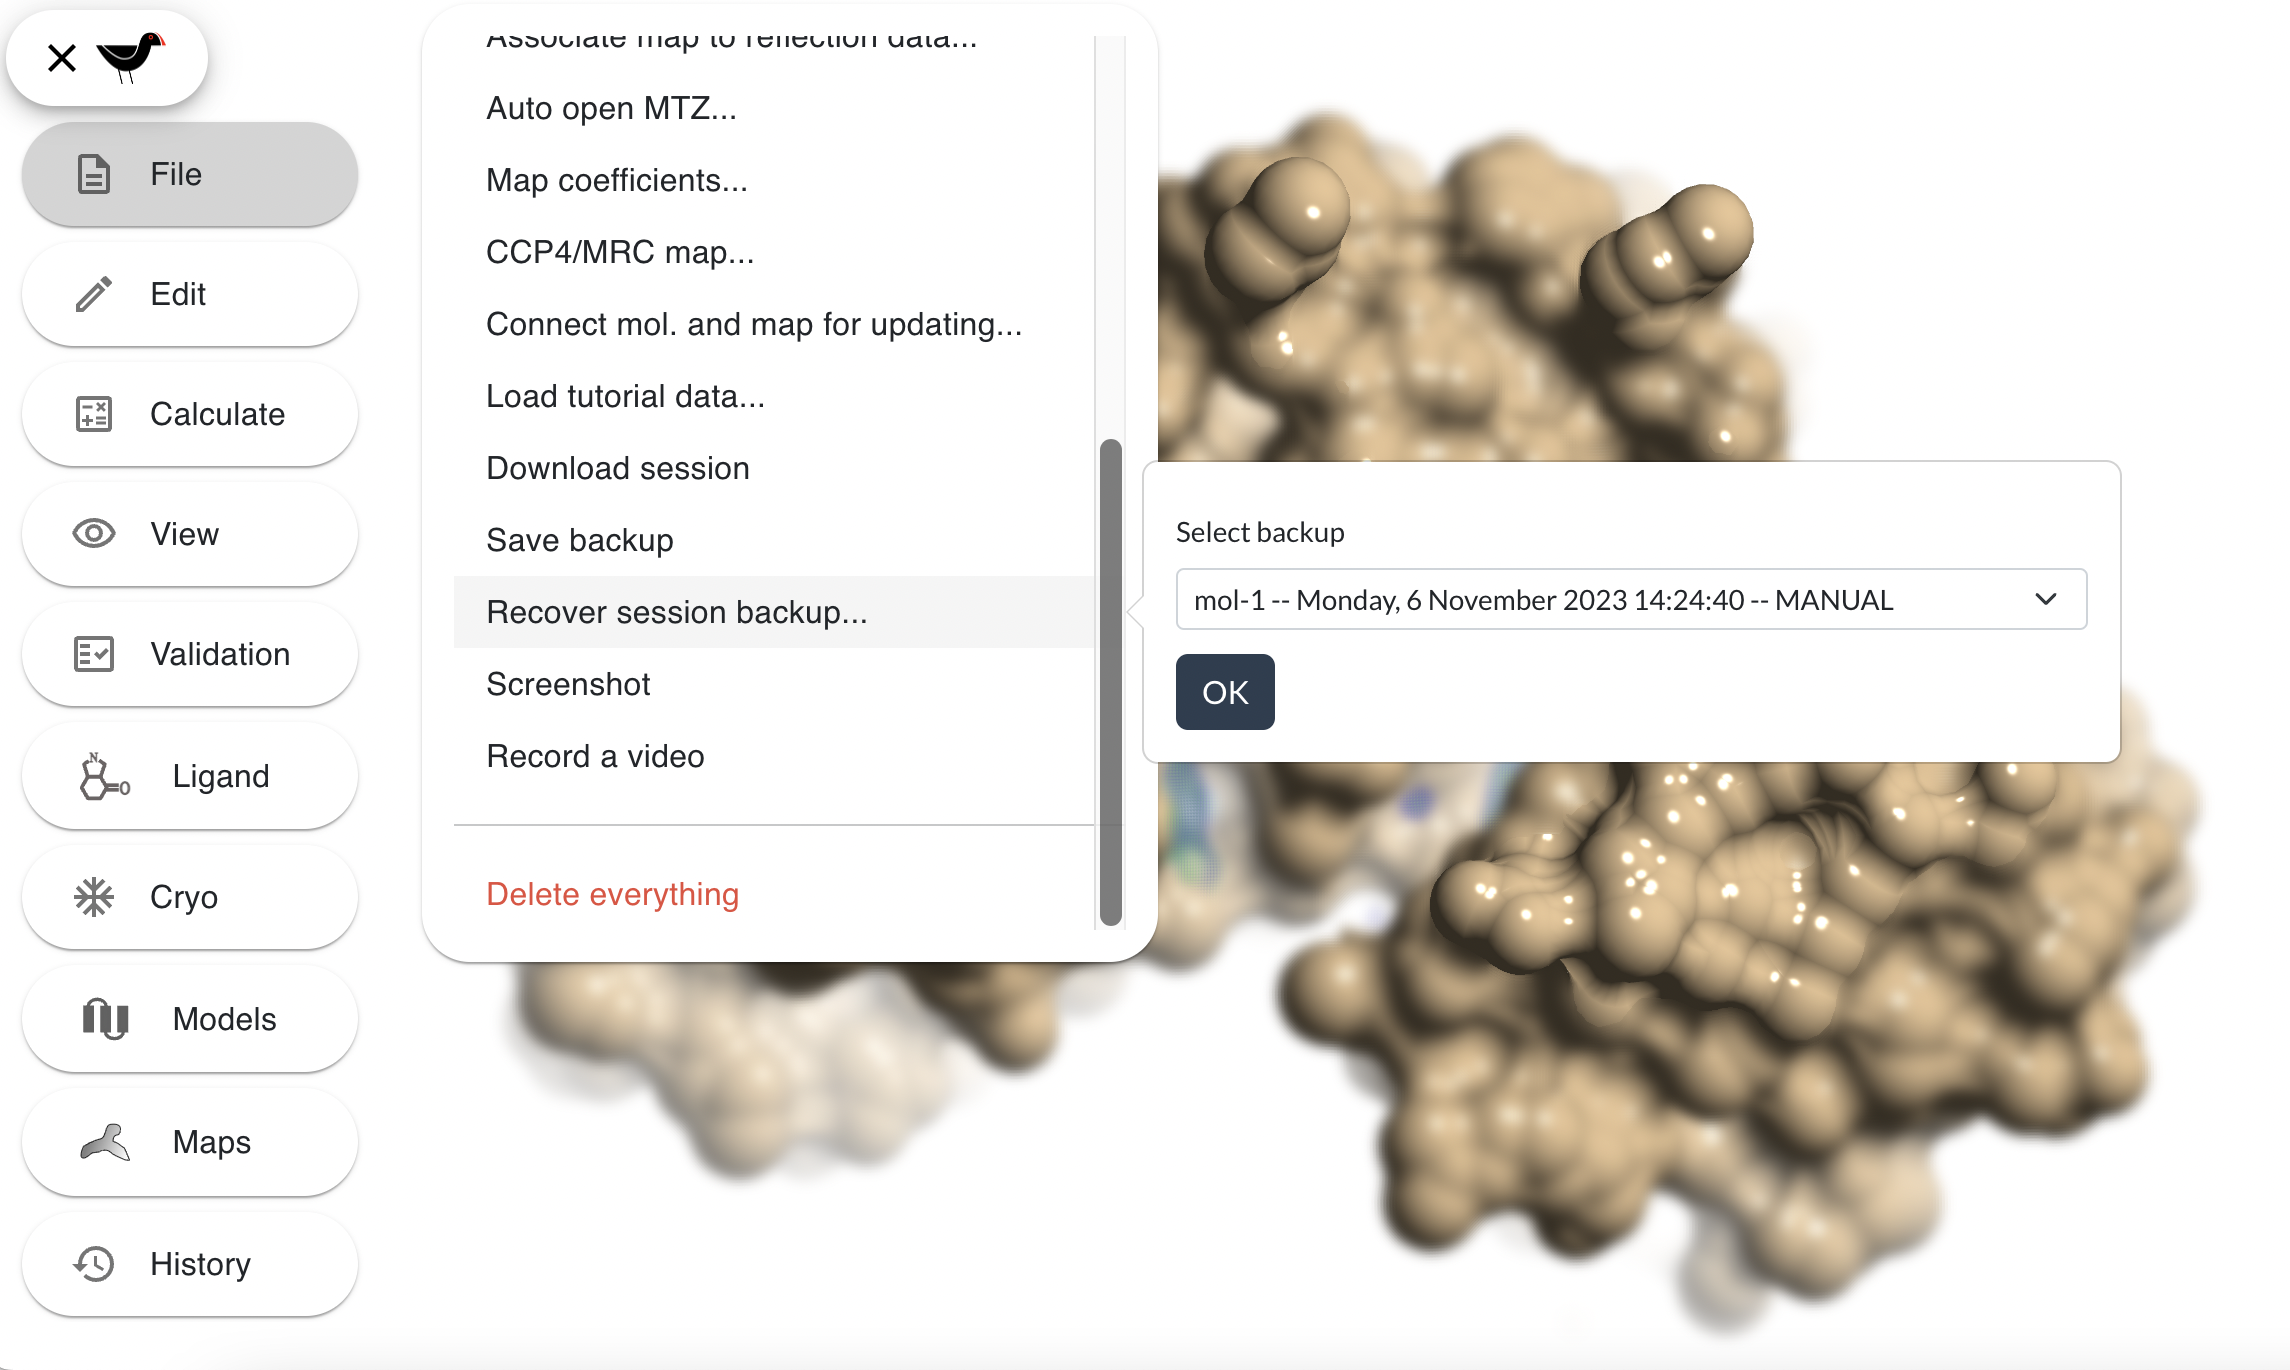
Select a backup from the list and then click “OK” to load. This only works on the computer/browser you saved on and may be deleted if you clear the browsers cache.
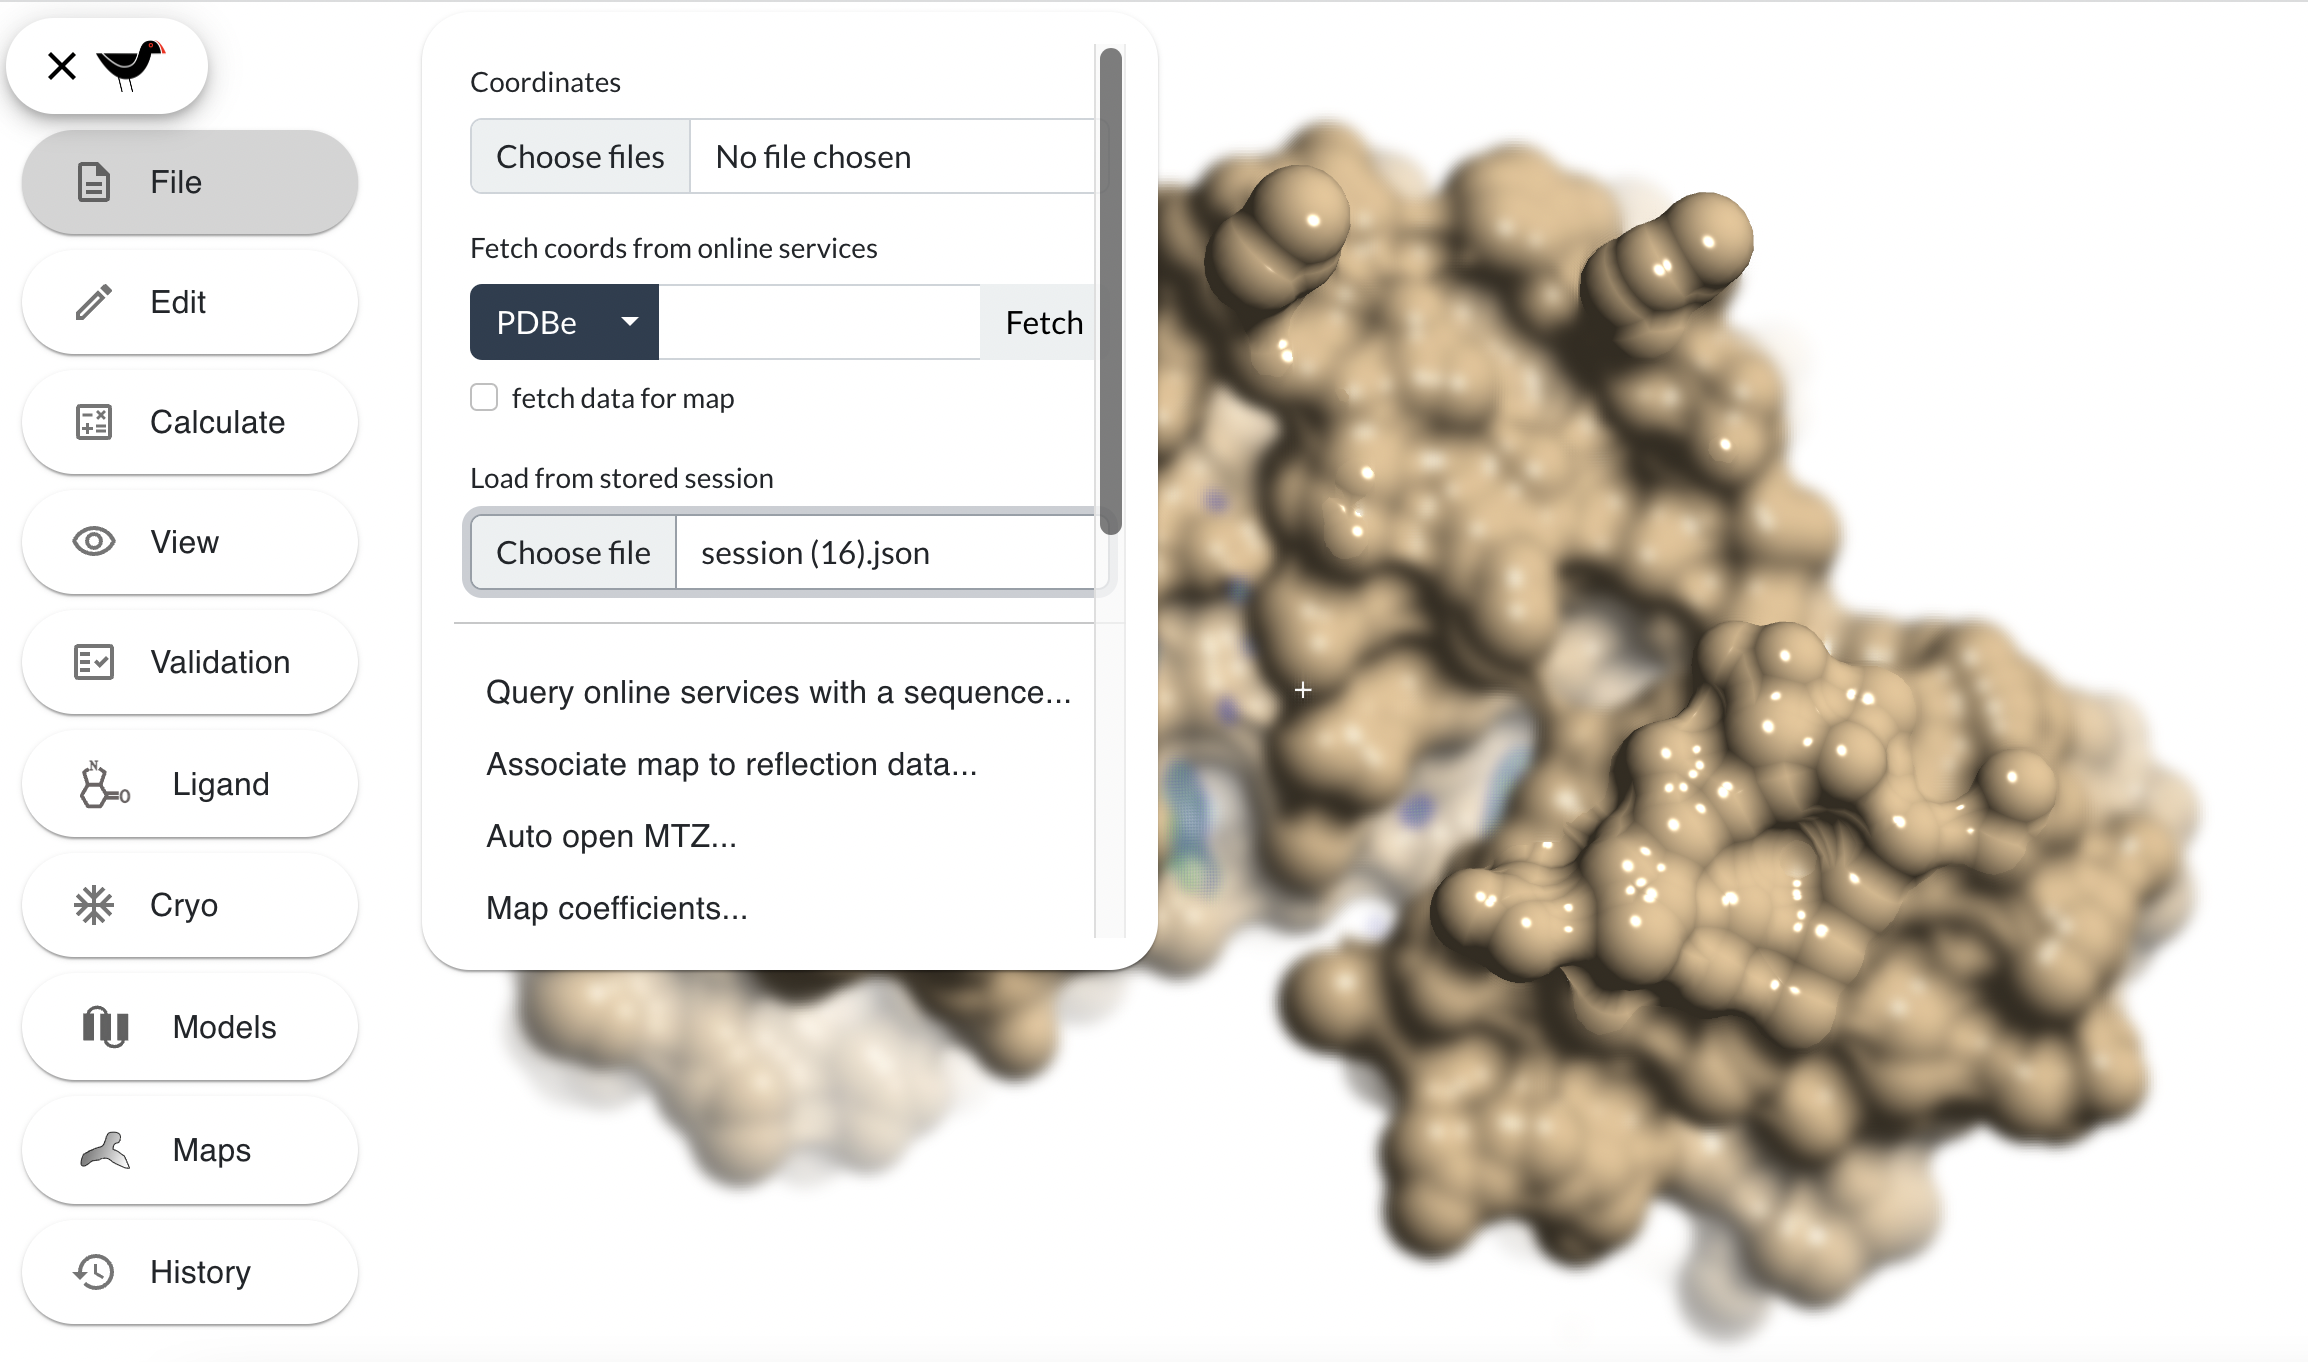
- “File”, “Download session”
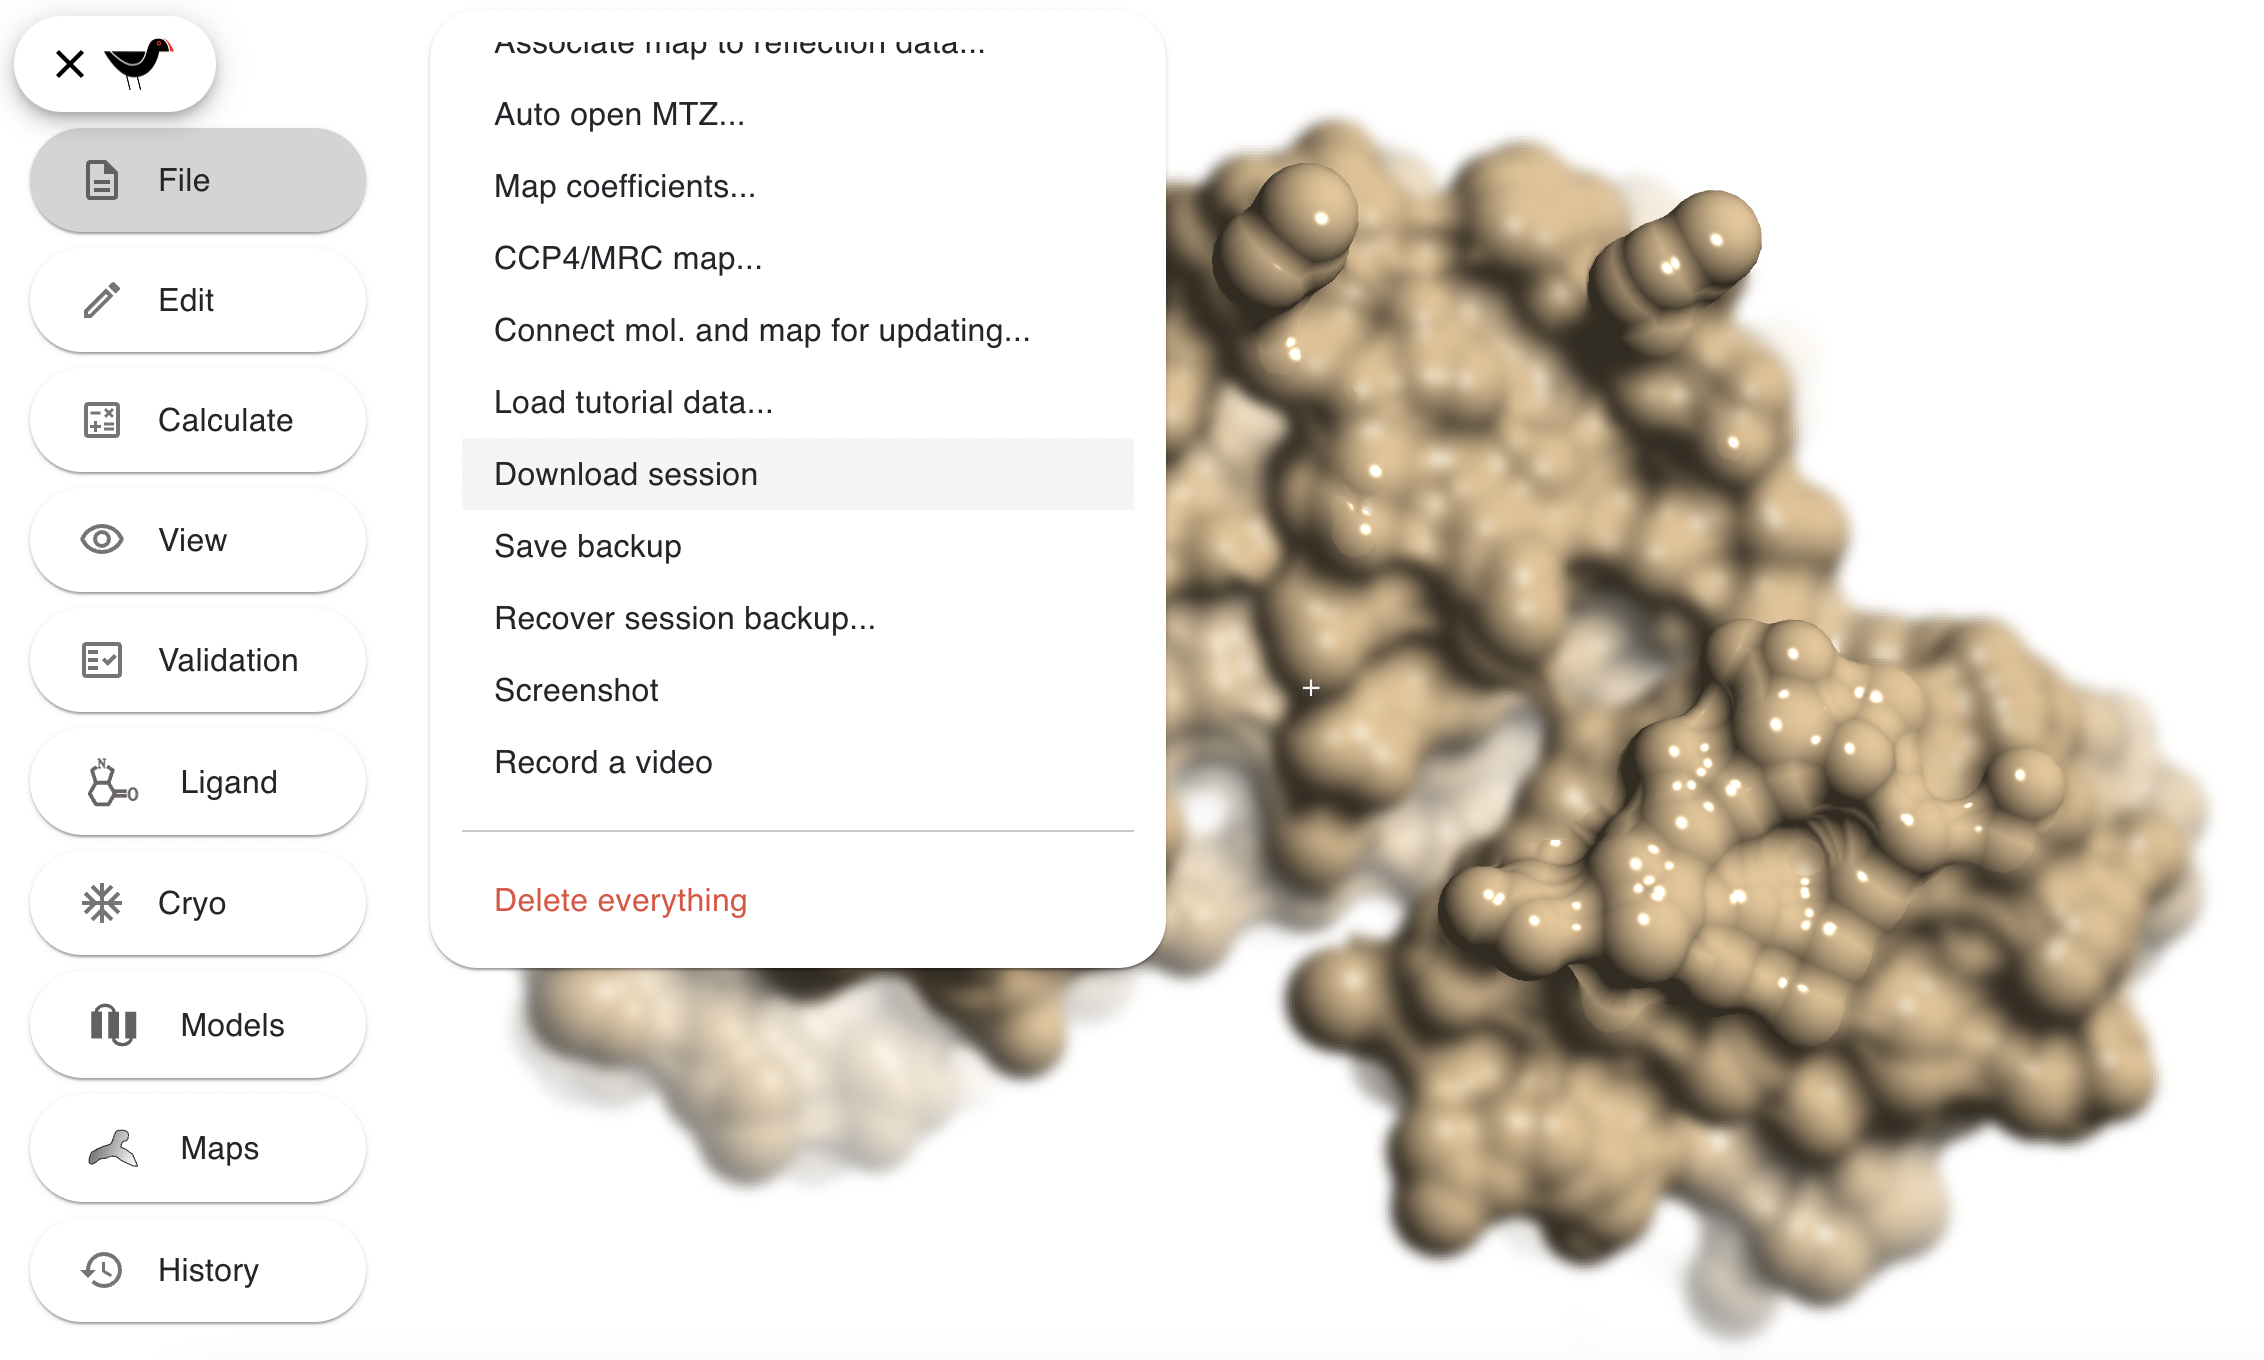
This will download a dile named “session.json” (again with numbers like screenshots and videos). This file can be moved to other computers, etc. and reloaded anywhere with “File”, “Load from stored session”: